Visitor screening
In this article
Visitor screening asks the host to approve or reject a visitor after they sign in. The visit is marked “Pending” until somebody answers, and the answer is kept with the visitor’s details. Screening is set per visit type, so you can screen contractors while ordinary visitors sign in as usual.
What screening does, and what it does not do
Screening is a notification with two buttons on the end of it, not an access control system. Knowing where the edge is saves a lot of time:
It does:
- ask the host to approve or reject, through the link in the notification they already receive by email or text message;
- record the answer on the visit, as “Pending”, “Approved” or “Rejected”;
- email the result to one address of your choosing, and optionally to the visitor;
- let an administrator set the answer in the backoffice while it is still “Pending”;
- hand the answer to your own systems through the webhook, which carries the approval status.
It does not:
- Block a visitor who is not approved. The visitor signs in normally, the badge prints and the host is notified. “Approval” is a status on the visit, nothing more. There is no state in which the tablet, the contactless sign in or a self-registration link refuses somebody because nobody has approved them yet, and so there is no receptionist override either.
- Route the approval somewhere other than the host. The approve and reject link goes into the host’s own notification. “E-mail notification for screening” receives the outcome afterwards; it cannot answer. To have a security officer decide, either make that person the host of the visit, or add their mailbox under “Email address CC” in the same “Notifications to your hosts” block: the copy carries the same link, and whoever clicks first sets the answer.
- Ask for a reason when a visitor is rejected. The page has an “Approve” and a “Reject” button and nothing else. There is no justification field, mandatory or otherwise, and no reason is stored. A note can be added to the visit afterwards in the backoffice, see Add visitor notes.
- Run several approvals in sequence. One visit has one answer. The first person to click decides, and once the visit is no longer “Pending” the answer is fixed. There is no second approver, no escalation and no timeout.
- Issue a QR code or a pass on approval. Approval changes a status; it does not hand the visitor anything to show at a door. The QR codes Vizito issues are the ones in Sign-in links and QR codes.
If you need an approval that actually holds somebody at the door, that belongs with your access control system: keep the doors closed to visitors and let the webhook or the API tell it who was approved. See also Access control. Tell us what you need through the chat in the backoffice or at info@vizito.eu and it is logged as a feature request; the public roadmap shows what is already planned.
Turn on visitor screening
- Go to the Vizito backoffice and select “Account settings” > “Visit types” in the left menu.
- Click “Edit” next to the visit type you want to screen.
- Open the “Notifications” tab.
- Switch on “Visitor screening” in the “Notifications to your hosts” block.
- Enter an address in “E-mail notification for screening”. This field only appears once the toggle is on. The result of the screening is mailed to this address once the visitor has been approved or rejected, which makes it a good place for a reception mailbox.
- Click “Save”.
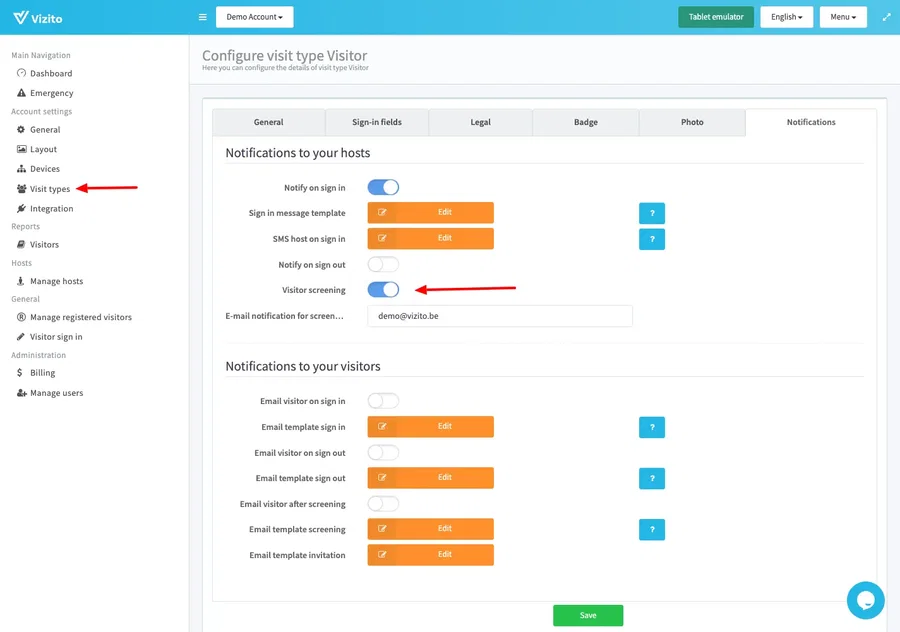
The same tab also has “Email visitor after screening” and “Email template screening”, under “Notifications to your visitors”. Use those if the visitor should get an email of their own about the outcome. The notifications above go to the host and to the screening address, not to the visitor.
What happens when a screened visitor signs in
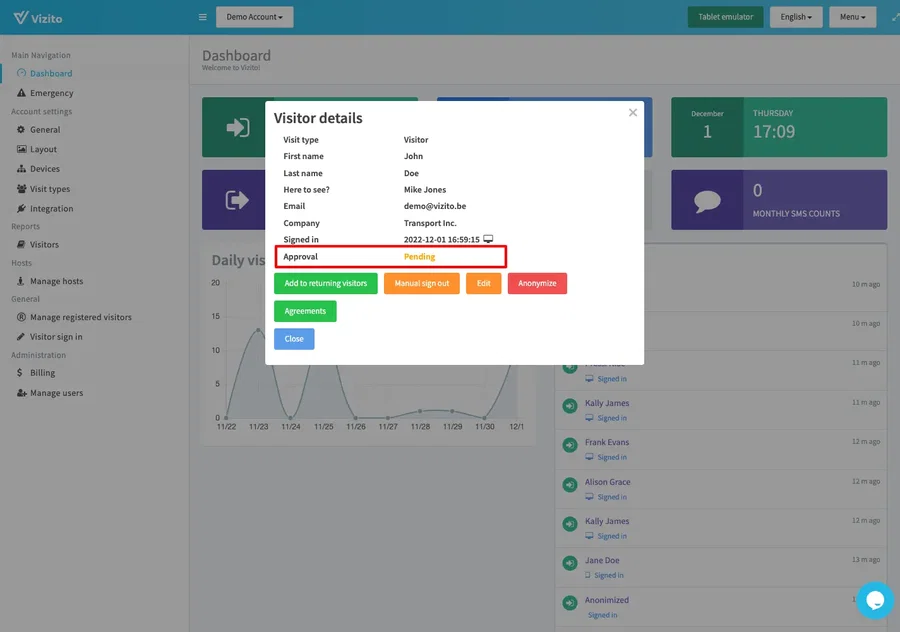
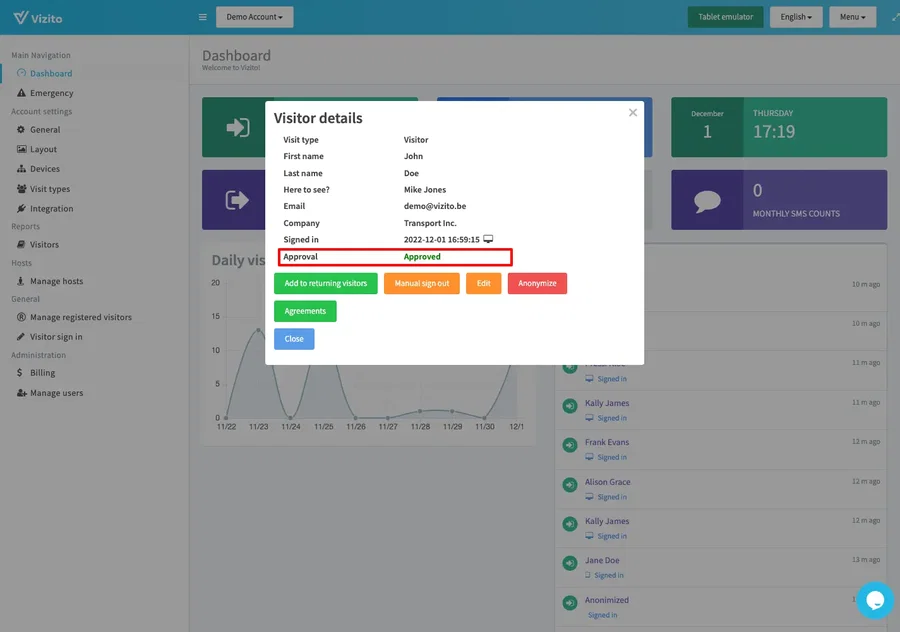
The visit is created with the “Approval” field set to “Pending”. To see it, go to “Visitors” under “Reports” in the left menu and click any cell of the visitor’s row to open “Visitor details”.
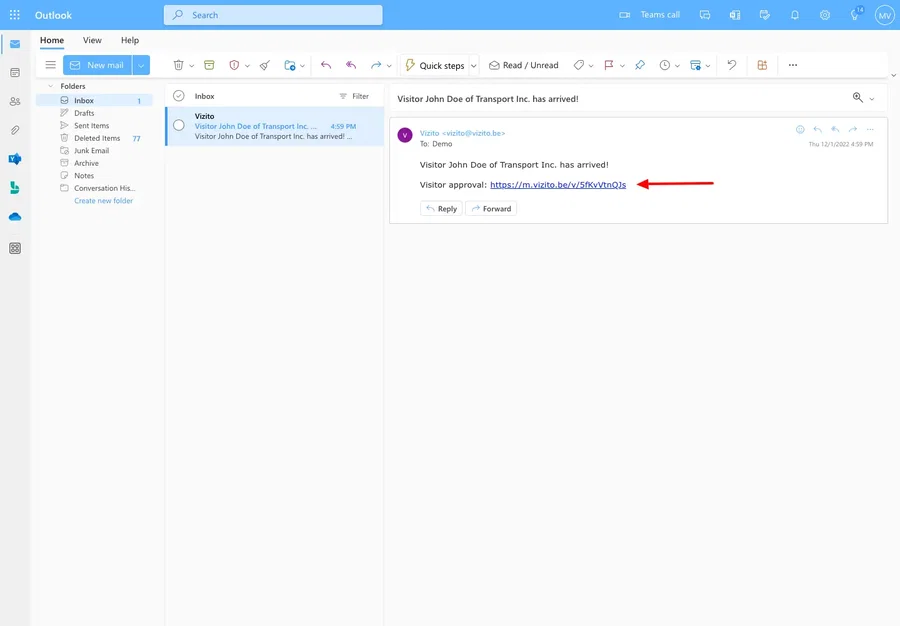
The host receives an email with a link to approve or reject the visitor. The
link rides on the notification the host already gets, so it also reaches
anything you set under “Email address CC” or “Email address BCC” for that visit
type. You do not have to put a placeholder in the template: when the template
does not contain %approval_link%, Vizito appends “Visitor approval:” and the
link at the end of the message. Adding the placeholder yourself puts the link
where you want it, in the email and in the text message. See
Messages / placeholders.
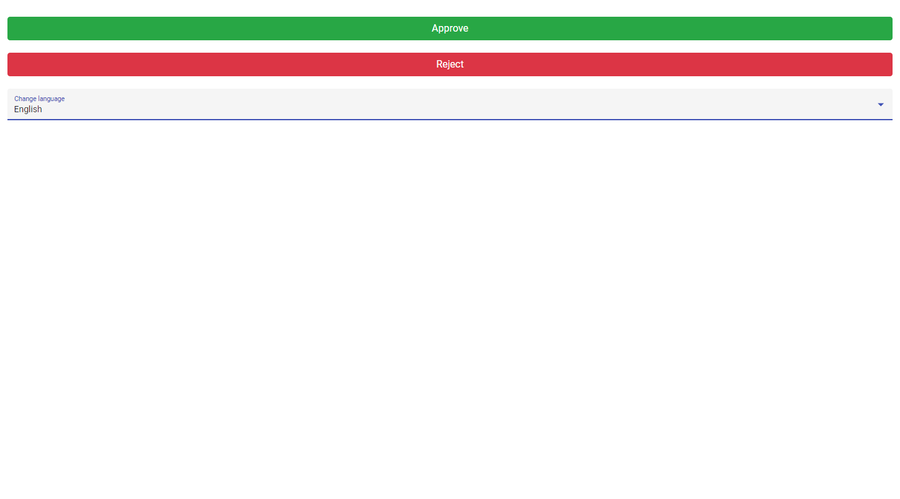
The link opens a page with an “Approve” and a “Reject” button.
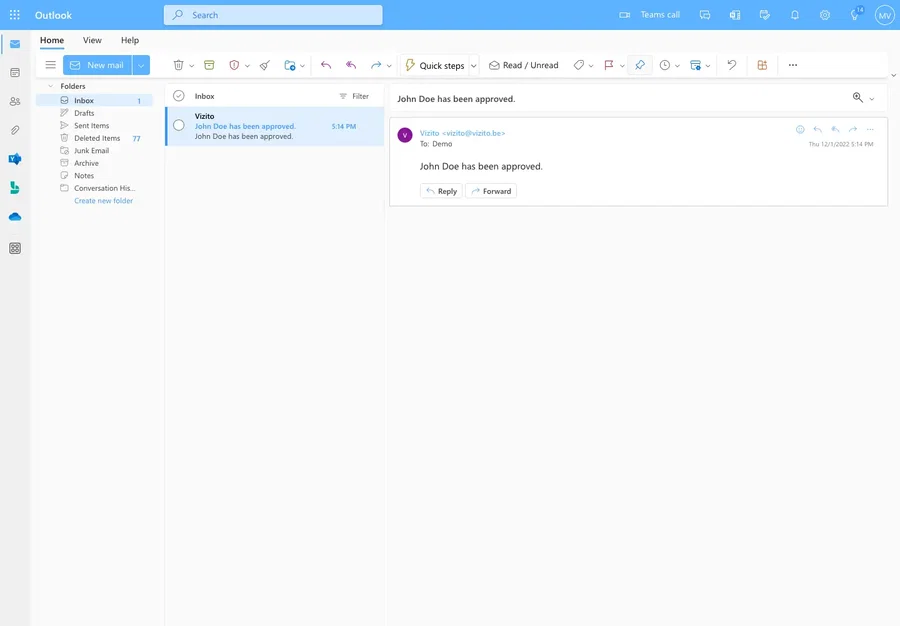
An email is then sent to the address you entered under “E-mail notification for screening”, stating that the visitor has been approved or rejected.
“Visitor details” in the backoffice shows the same answer.
Approve or reject a visitor yourself
You can set the answer in the backoffice instead of waiting for the host, as long as the visit is still “Pending”.
- Go to “Visitors” under “Reports” in the left menu.
- Click any cell of the visitor’s row to open “Visitor details”.
- Click “Edit”.
- Set “Approval” to “Approved” or “Rejected”.
- Click “Save”.
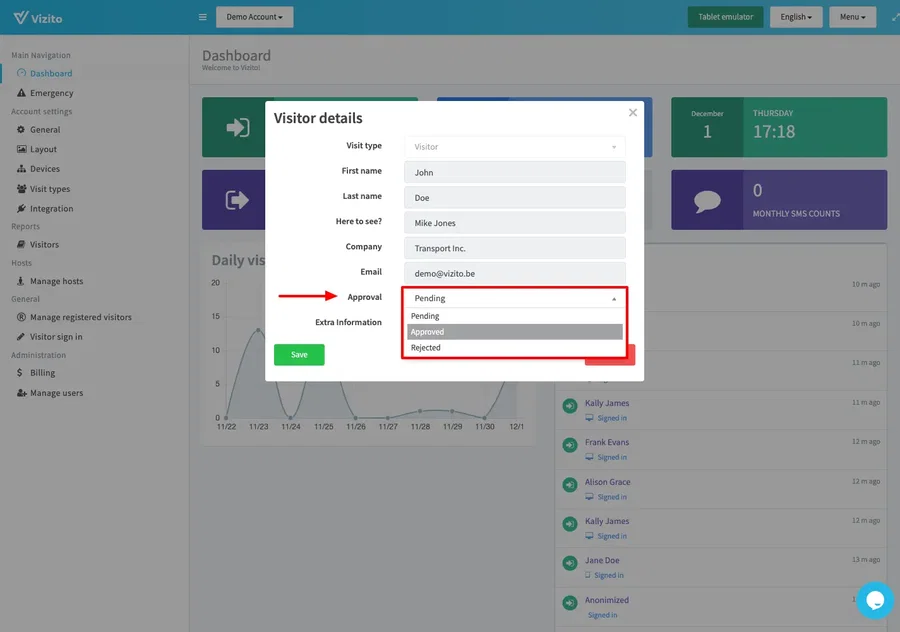
The dropdown offers “Pending”, “Approved” and “Rejected”, and it can only be changed while the visit is still “Pending”. Once a visitor has been approved or rejected, the answer is fixed.