Single Sign-On via SAML
In this article
Setting up SAML SSO in Vizito
Vizito supports SAML-based Single Sign-On (SSO) to enhance security and streamline access management. Follow the steps below to configure SAML 2.0 authentication.
1. Access SAML Settings
- Log in to the Vizito Backoffice.
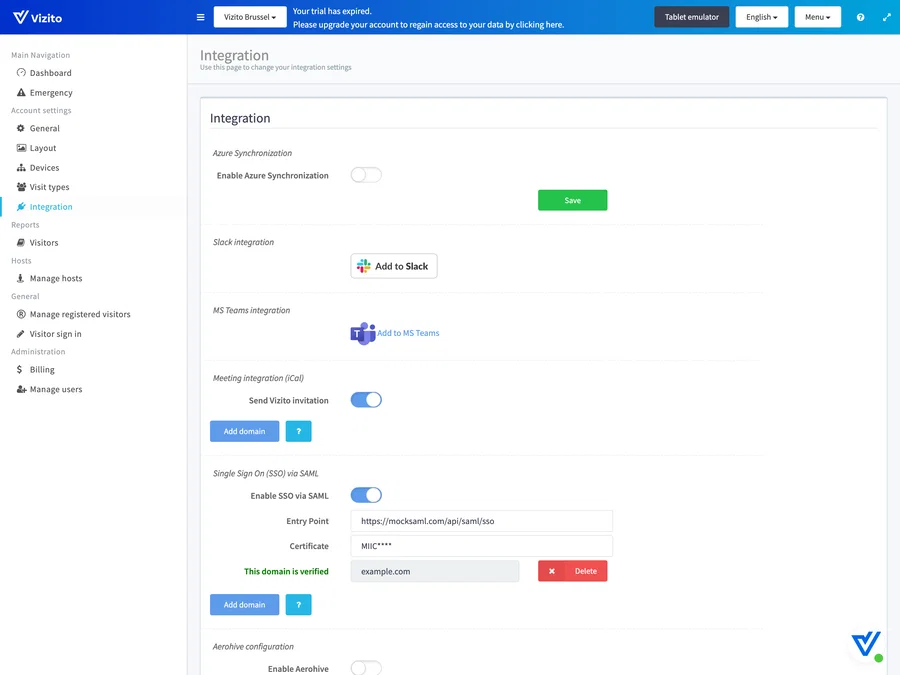
- Go to “Account settings” > “Integration” in the left menu and scroll down to the “Single Sign On (SSO) via SAML” section.
2. Enable SSO via SAML
Toggle the switch “Enable SSO via SAML” to activate SAML authentication.
3. Configure SAML Settings
You need to provide the following details from your Identity Provider (IdP):
-
Entry Point: The login URL provided by your IdP for authentication.
-
Certificate: The public certificate issued by your IdP for verifying authentication requests.
4. Add Your Domain
Before users can log in via SAML, you must add at least one domain that matches your organization’s email addresses.
How to add a domain:
- Click the “Add domain” button.
- Enter your company domain (e.g., yourcompany.com).
- Click Save to apply the domain restriction.
📌 Note:
- Users must have an email address matching the added domain to use SAML authentication.
- Users must also exist in Vizito, add them through the user management page.
- If you add multiple domains, users from any of these domains can authenticate using SAML.
5. Save & Test the Configuration
- Ensure all details are correct and click Save.
- Test the authentication flow by attempting to log in with a user belonging to the specified domain.
Example: Microsoft Entra ID (Azure AD)
These steps produce the Entry Point and Certificate that Vizito asks for. Do them in Azure first, then complete the Vizito steps above.
1. Register Vizito as an enterprise application
- Log in to the Azure portal.
- Go to Microsoft Entra ID > Enterprise applications.
- Click New application > Create your own application.
- Name it (for example “Vizito SAML”), select “Integrate any other application you don’t find in the gallery” and finish the wizard.
2. Configure SAML-based sign-on
- Open your Vizito SAML application and select Single sign-on > SAML.
- Under Basic SAML Configuration, enter:
- Identifier (Entity ID):
vizito-saml - Reply URL (Assertion Consumer Service URL):
https://backoffice.vizito.be/api/auth/saml/callback
- Identifier (Entity ID):
3. Add the email claim
Vizito matches the SAML login to an existing user by email address, so Azure must send one.
- Go to Attributes & Claims and click Add new claim.
- Name:
email - Source attribute:
user.userprincipalname(useuser.mailif your email addresses differ from the user principal name). - Click Save.
We also recommend setting the Unique User Identifier (NameID) claim to the same source attribute.
| Claim | Source attribute |
|---|---|
| user.userprincipalname | |
| NameID | user.userprincipalname |
4. Assign users
Under Users and groups > Add user/group, assign the users or groups that should be able to sign in to Vizito.
5. Copy the settings to Vizito
In the “Set up Vizito SAML” section of the Single sign-on page:
- Copy the Login URL into the Entry Point field in Vizito.
- Download the Certificate (Base64) and paste its contents into the Certificate field in Vizito.
Then save and test the login as described in step 5 above.
Troubleshooting
“Username does not exist: [undefined]”
Azure is not sending an email address. Check that the email claim exists and is mapped to user.userprincipalname or another attribute that holds the user’s email address.
More on claim mapping: Microsoft’s guide to customizing SAML token claims.