Vizito has recently introduced a new feature that allows you to synchronize your Azure employees right from our cloud systems without you having to install any piece of software.
Learn more about the Azure Entra ID synchronization.
The benefits are that it is easier to set up. If you prioritize privacy over ease of use, you can still use our Azure Entra ID client synchronization, which does not duplicate all employee information to our servers.
If you need any help configuring the following steps, be sure to get in touch: info@vizito.be or via chat.
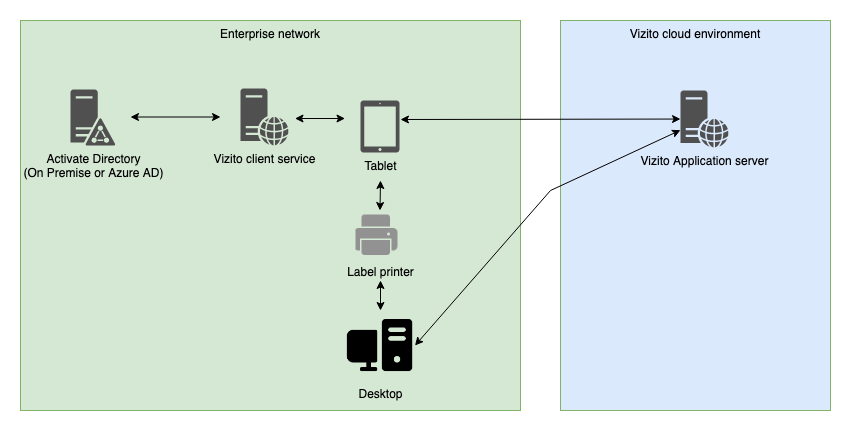
The Azure Entra ID integration is configured by using the Vizito Azure Entra ID client which needs to be installed on a device/server which the tablet can connect to. So the tablet needs to be able to communicate to this device/server via its network.
Please find a schematic representation below:
Step 1: NodeJS
Use your favorite package manager to install NodeJS
Step 2: Vizito Azure Entra ID client
Download and extract our Azure Entra ID client to a directory of your choice
Steps 3 and 4 need to be executed by your Azure Entra ID administrator
Step 3: Add an App Registration to your Azure Entra ID
Go to the Azure portal and log in. Select the domain / tenant you would like to integrate with Vizito.
Now, follow these steps:
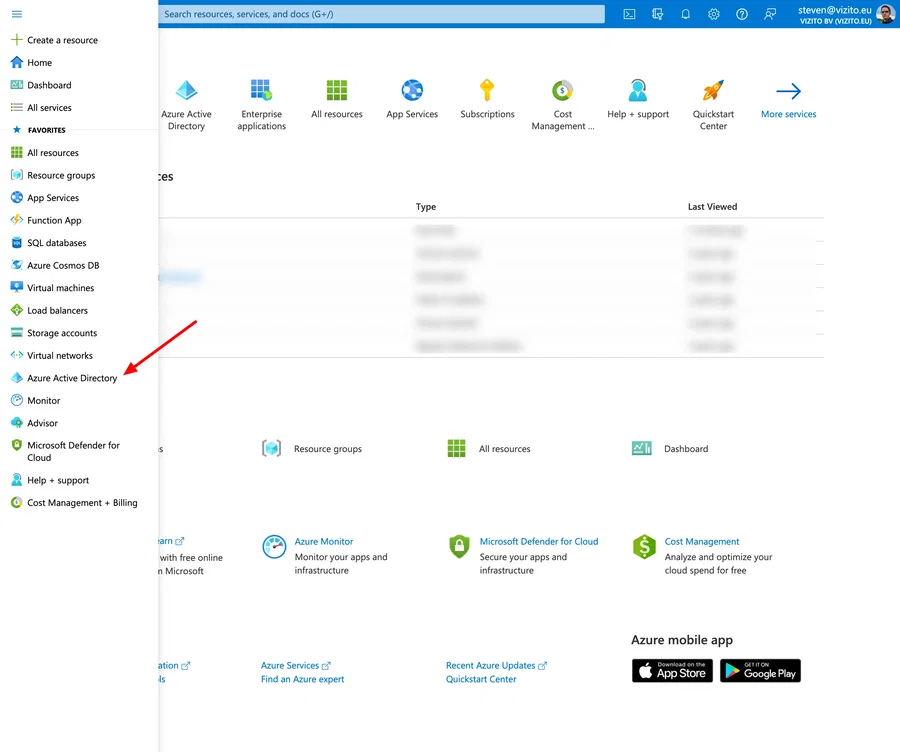
Navigate to Azure Active Directory:
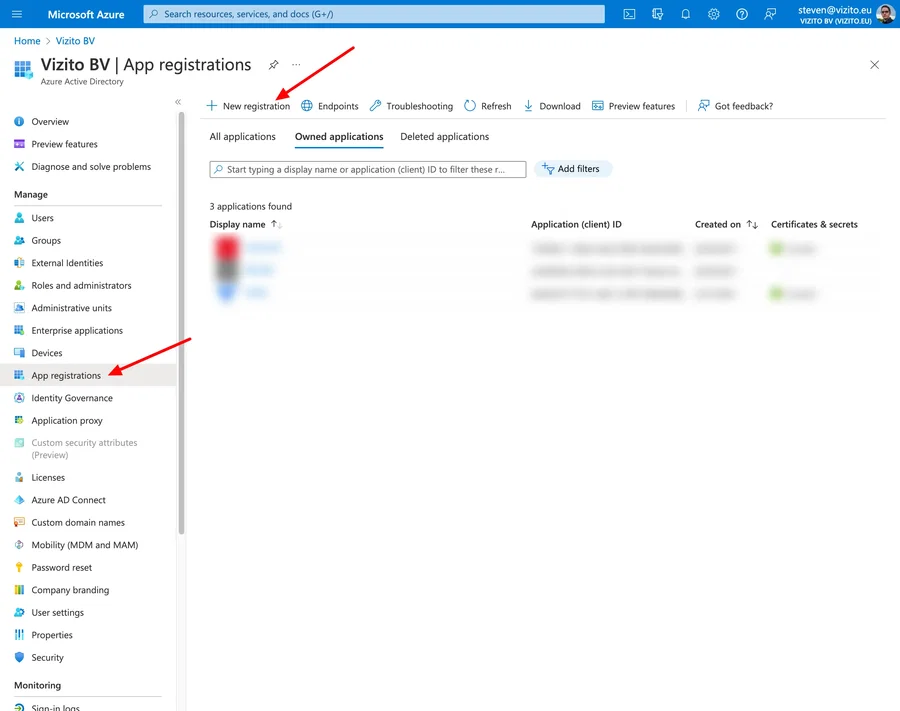
Click on App Registrations and then on New registration:
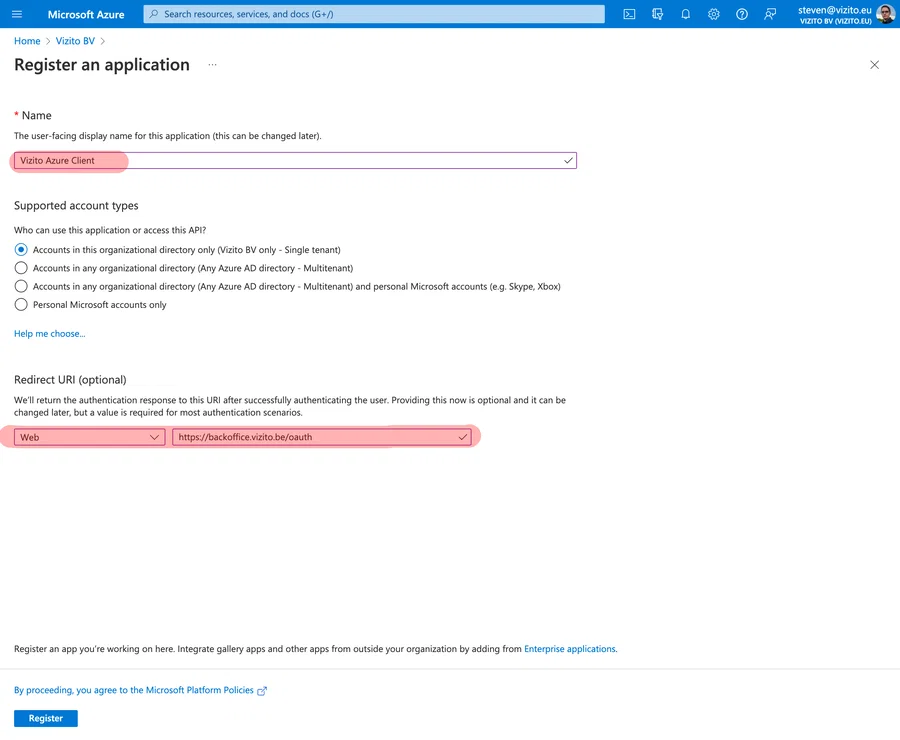
Fill in the required fields.
Choose a name: Vizito Azure Client
Select who can access this API, first option for a single tenant.
Under Redirect URI (optional) select application type Web and sign-on URL: https://backoffice.vizito.be/oauth.
Click on Register.
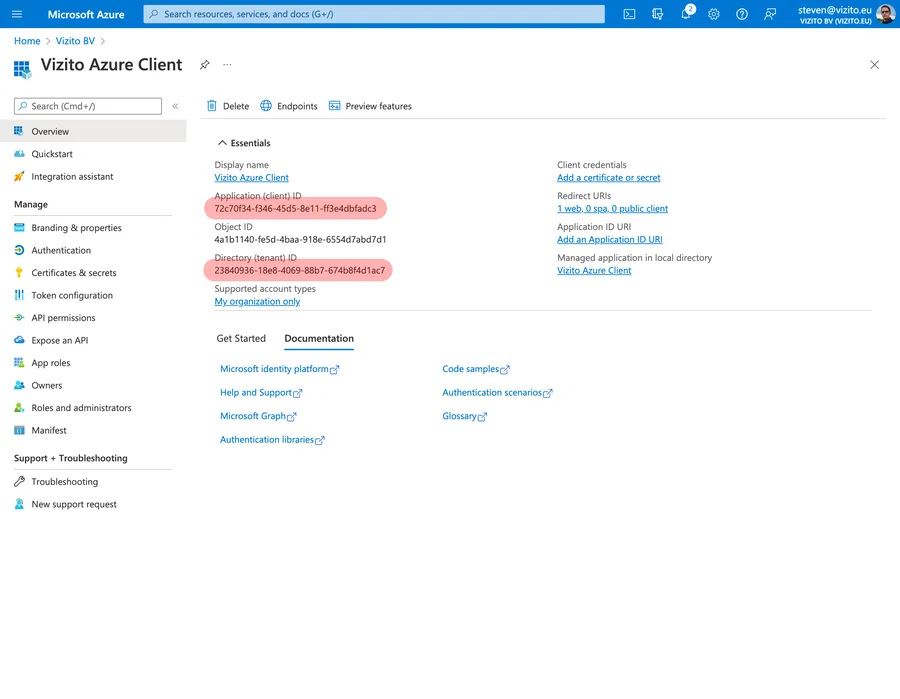
Copy the Application (client) ID and use this value for the configuration item client_id in the config.json file.
Copy the Directory (tenant) ID and use this value for the configuration item tenant_id in the config.json file.
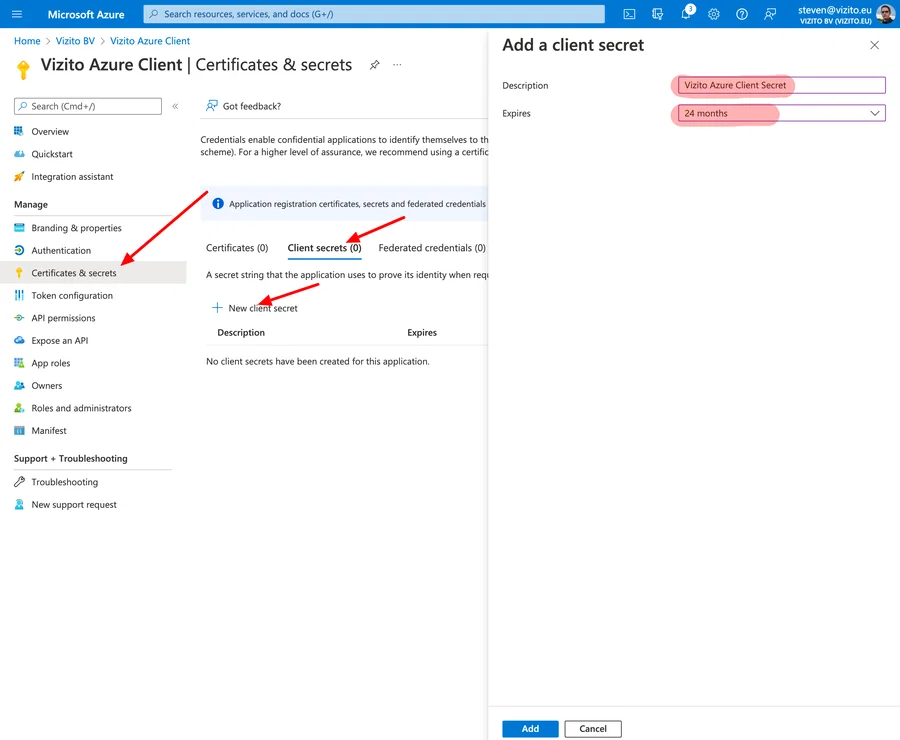
Click on Certificates & secrets > Client secrets > New Client secret
Choose a description Vizito Azure client secret and set an Expiry option (24 months)
Click on Add
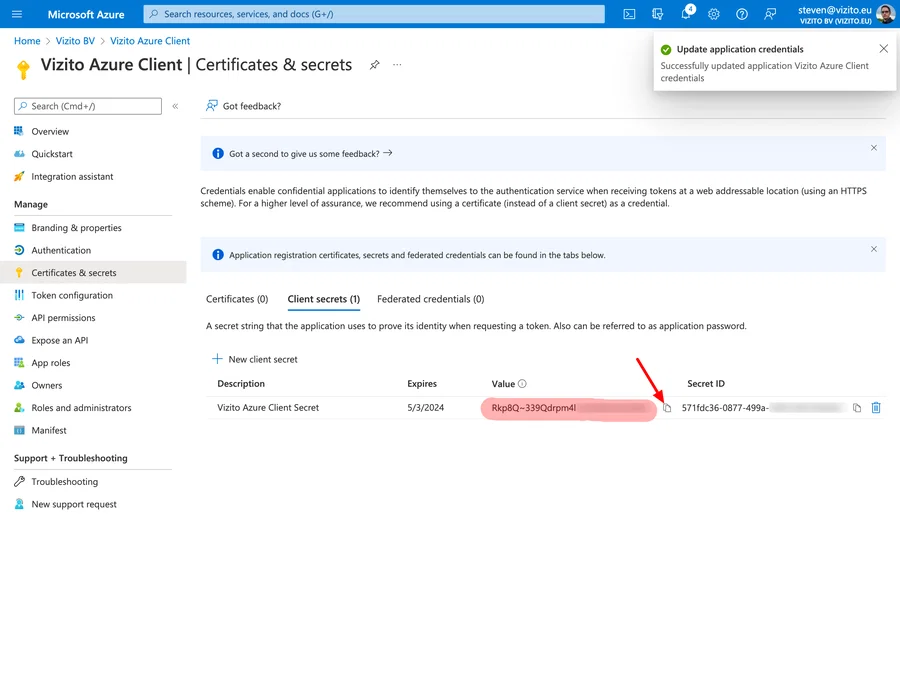
Copy the value and use this for the configuration item client_secret in the config.json file.
Important: you can only copy this value now, it will not be exposed at a later time when you return to your client secrets as a safety measure.
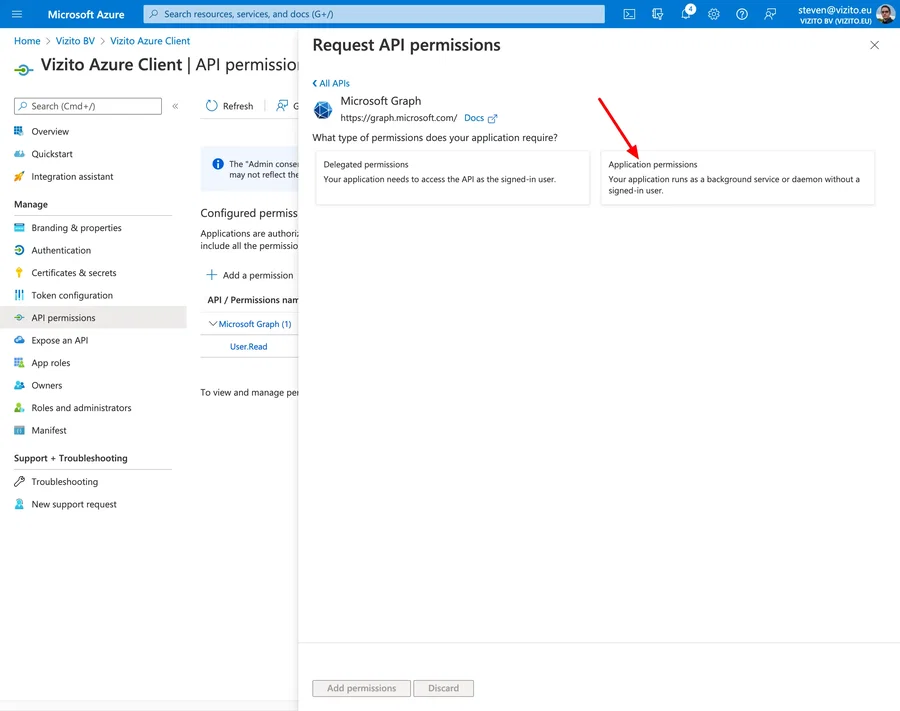
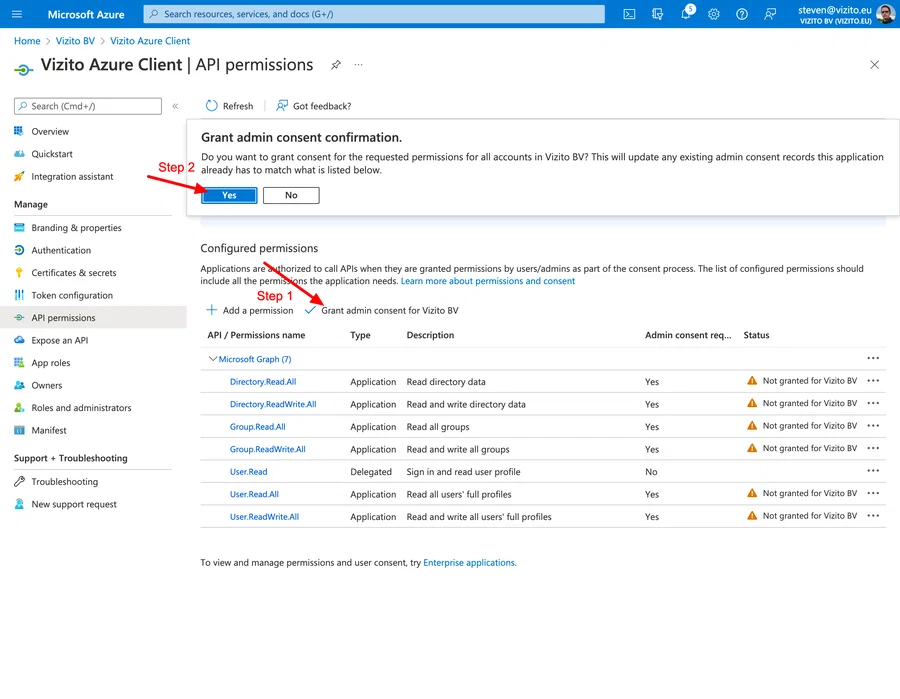
Click on API permissions > Microsoft APIs > Microsoft Graph
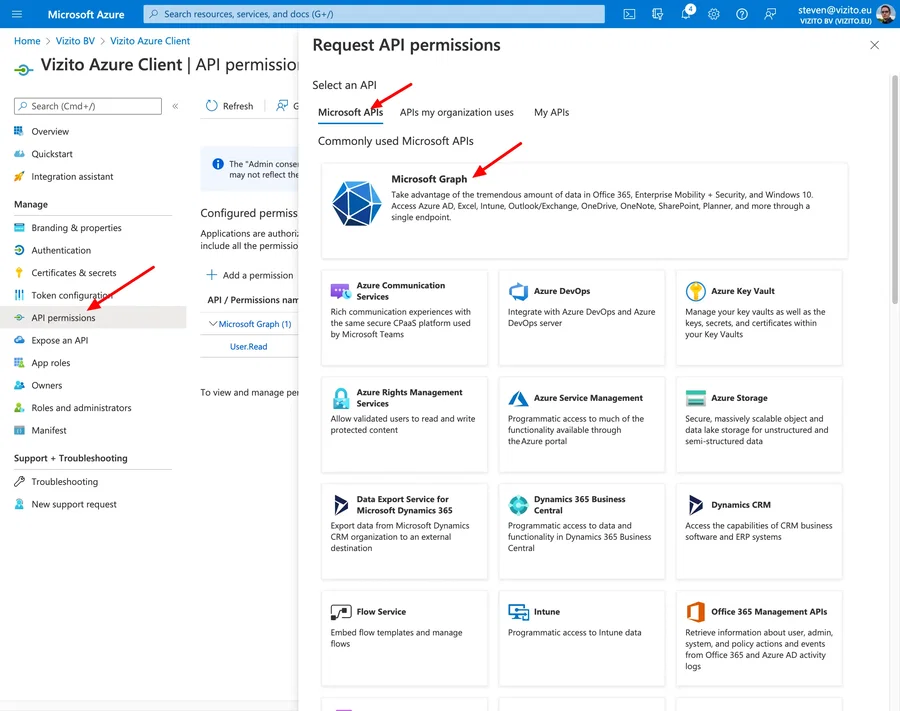
Click on Application permissions
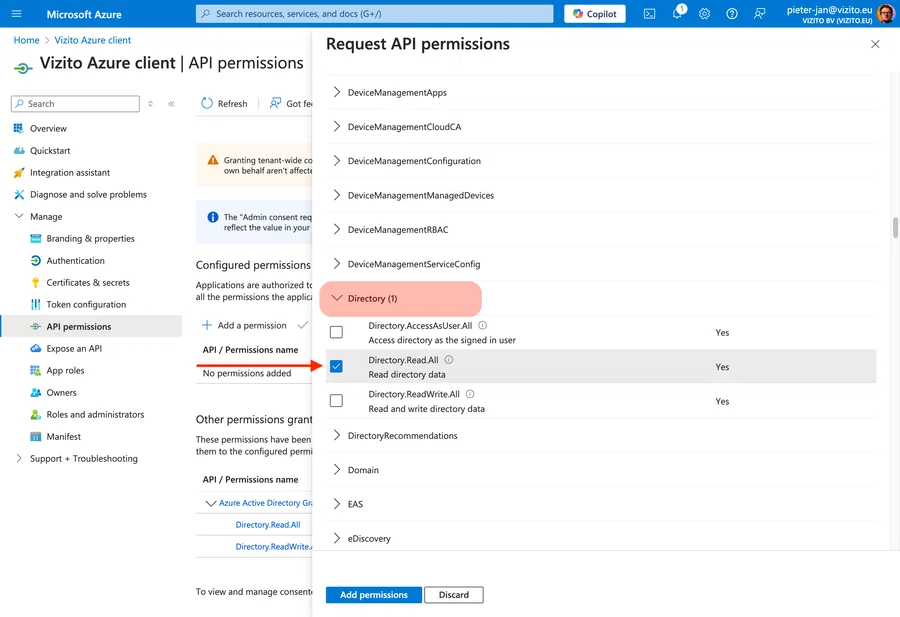
Scroll down to Directory and select Directory.Read.All
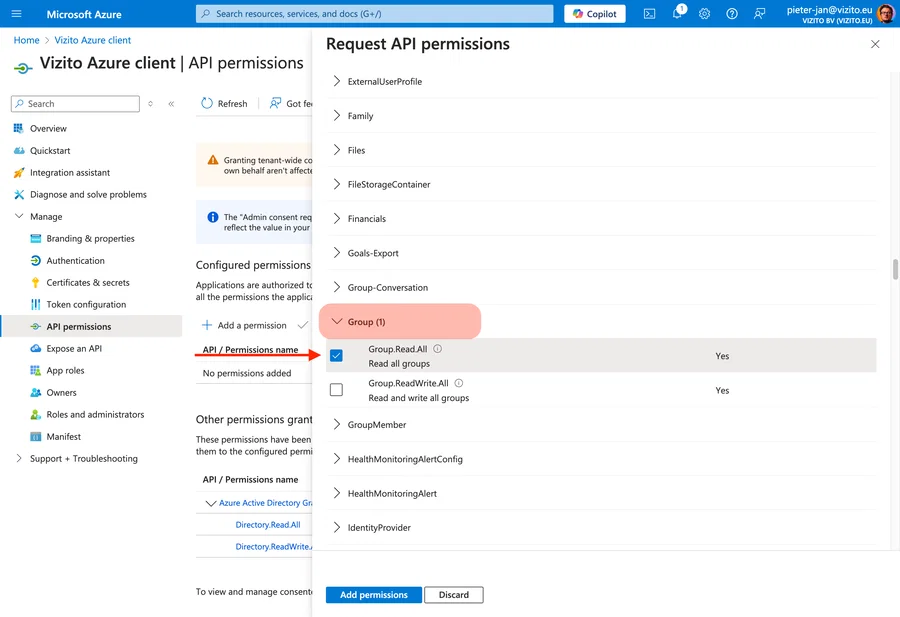
Scroll down to Group and select Group.Read.All
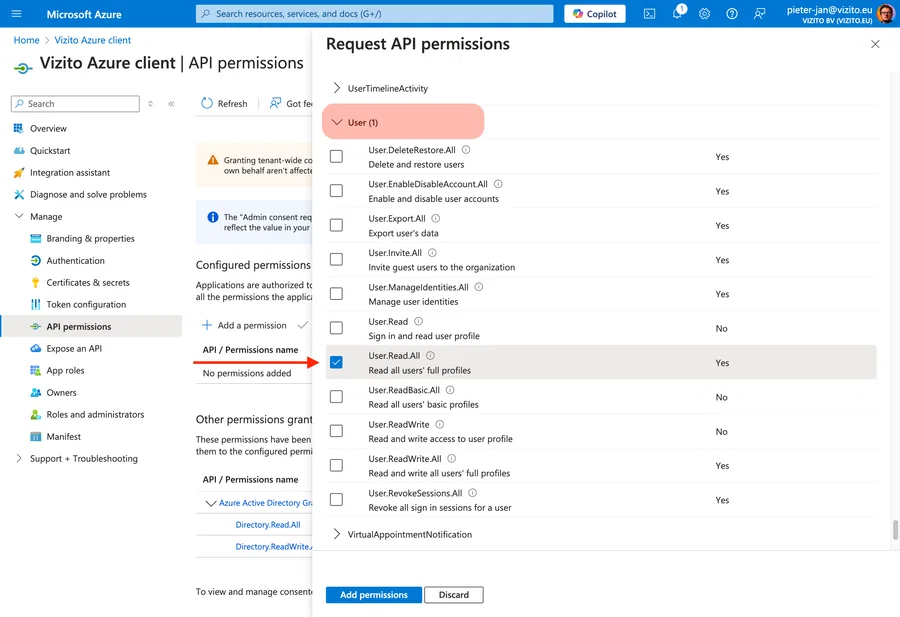
Scroll down to User and select User.Read.All
Click on Add permission
Once completed, click on Grant admin consent for and then Yes:
Step 4: Vizito Azure Entra ID client - Config
Edit config.json to match your environment.
Here you can find the configuration values and a description of what information you need to enter:
| JSON property | Mandatory | Description |
|---|---|---|
| domain | Yes | Domain reference Example: vizito.eu |
| client*id | Yes | The client id used for accessing Azure Entra ID (created in Step 3). |
| client_secret | Yes | The client secret used for accessing Azure Entra ID (created in Step 3). |
| tenant_id | Yes | Your tenant id (selected in Step 3). |
| group | No | Optional filtering for a specific group: provide the Azure Entra ID Group Object ID for which you want to fetch the members for. |
| mobile_prefix | No | If your LDAP dictionary contains local or internal mobile phone numbers (without country code), you can add a prefix containing the country code. The first character of the local or internal mobile phone number will be replaced with this prefix. |
| api_port | Yes | Default value: _48800*. This configures the port at which the node application will listen for HTTP(s) requests. |
| use*ssl_for_api | Yes | Default value: _false*. If set to true, it will use the ssl.ca, ssl.key and ssl.cert configuration items to load a private key / public key pair for enabling TLS communication. |
| Read up on creating your own self-signed certificates using a custom root CA. |
IMPORTANT: You can configure multiple domains in the domains array. Be sure to have a complete domain configuration encapsulated with { } brackets.
Step 5: Run
Open a command prompt, navigate to the folder where your Azure Entra ID client resides, and run
- “npm install” (only required once)
- “node server.js”
If everything works as intended, you should see a line like this in your console: https://graph.microsoft.com/v1.0/users?$top=999.
You can now use a browser to test the Azure Entra ID http server by pointing your browser to http://ip_or_hostname_of_machine_running_azure_entra_id_client:8080.
If you’re running a firewall, make sure it allows access to port 48800.
If your browser shows a JSON object representing the users you want to expose, than everything works!
Step 6: Configure the backoffice to make the tablet connect to the client
Navigate to Vizito backoffice and under Settings, configure the Host datasource as ‘Managed externally’ and fill in the Integration URL. Now the tablet will look up the information from the installed client.
Step 7 (optional): Use NSSM to daemonize the node process as a Windows Service.
Download the latest release of NSSM extract the appropriate architecture executable to a folder of your choice. now run the following command: nssm install vizito_azure_entra_id_client This will show a window where your service parameters can be configured.
- Select “node.exe” as Path. It can usually be found in c:Program Files (x86)nodejsnode.exe
- Type the full path to server.js in the Arguments field
- Optionally, you can set a Display name for your service in the Details tab.
Now go to your Windows Services, start your newly created service, and test! Remember to stop any manually started instances of the Azure Entra ID client before starting the service.
Troubleshooting
Demo services are available for testing purposes. They include names such as “Tesla”, “Newton”, etc..
- HTTP version:
http://178.162.136.223:48800 - HTTPS version:
https://source.vizito.eu:48801
If you’re using a HTTPS configuration you can configure multiple CA references. Add each CA between " (quotes) in the CA array, which you can find in the config.JSON file.