Vizito allows you to automatically print badges for visitors upon sign-in. This saves time for the receptionist and helps boost your workplace security. Vizito supports badge printing for iPadOS, Android, and Browser-based kiosks. This guide will teach you how to set up badge printing for a browser-based kiosk or touchscreen pc.
In this guide, we are using the Brother QL-820NWB label printer and a device running Windows 11. For a full list of the compatible label printers for Vizito, please see our compatible label printers list.
Prerequisites: Connect your printer to the WiFi network. Install the correct printer driver on your device (Brother printer drivers).
Enable Badge Printing in the Backoffice
-
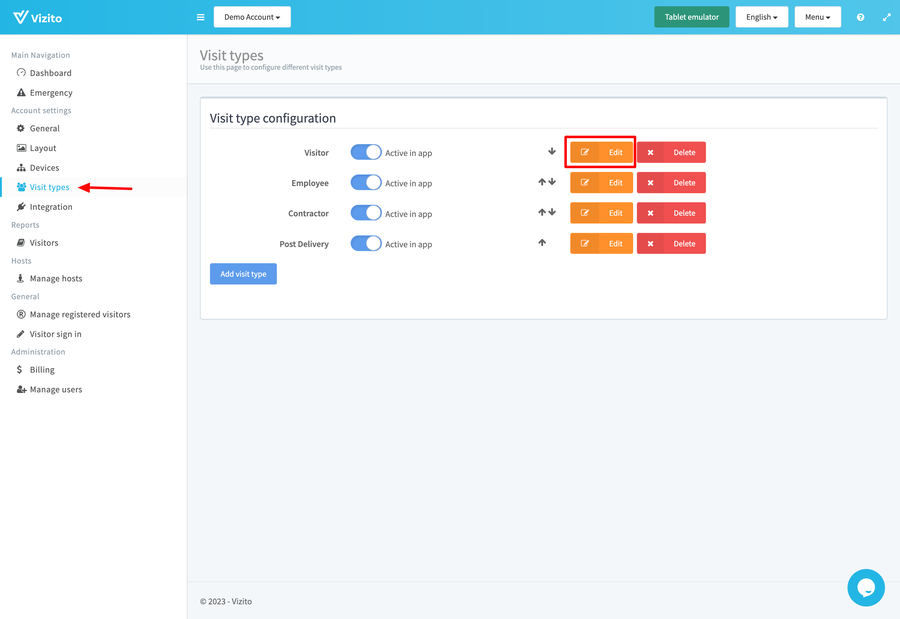
Go to the backoffice > Visit Types.
-
Edit the visit type that you wish to enable badge printing for.
-
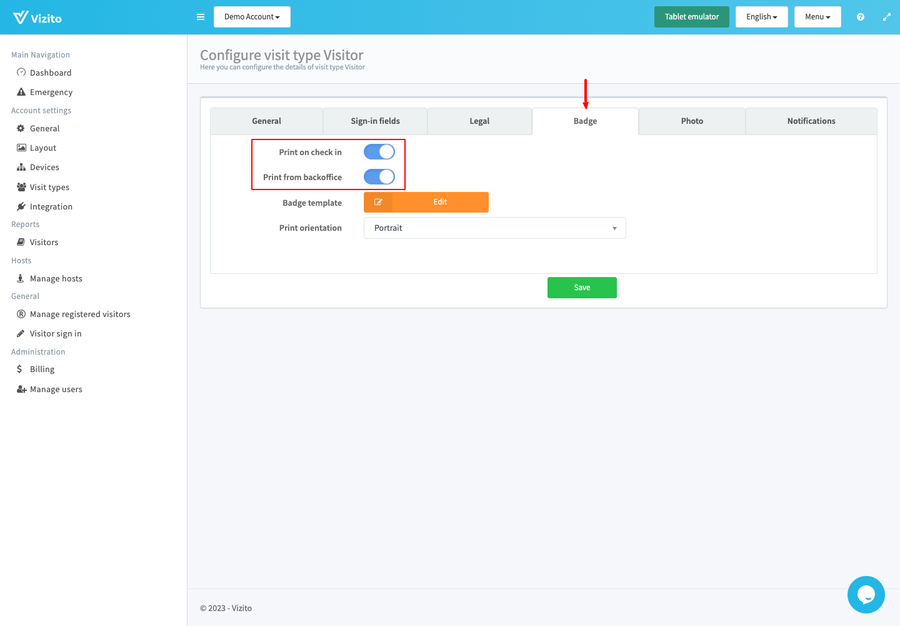
Under the “Badge” tab, toggle on “Print on check in” and/or “Print from backoffice”.
-
Print on check in - A badge will be printed automatically after a visitor completes their sign in.
-
Print from backoffice - This setting allows you to also print badges from the backoffice. This is useful if you would like to be able to reprint badges or print a badge when you sign in visitors from the backoffice via the backoffice visitor sign in option.
-
-
Click on “Edit” to configure your badge template.
-
The default badge template is available for you to use, you can simply delete the Vizito logo and replace it with your own logo by clicking on Insert > Insert/embed image > Select your logo from your folder.
-
Set your print orientation. With the default badge template, it is best to set it as “Portrait”.
-
Lastly, click on “Save” to apply your changes.
Print Setup
-
Install Google Chrome. If you don’t have Google Chrome installed on your computer, visit Google Chrome website to download and install it.
-
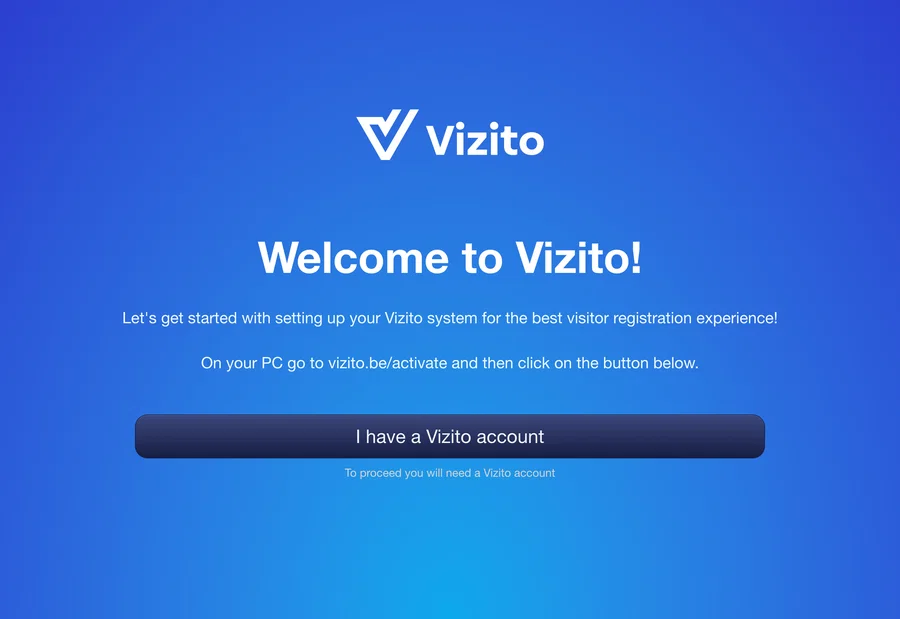
Go to the Vizito frontoffice and click on “I have a Vizito account”.
-
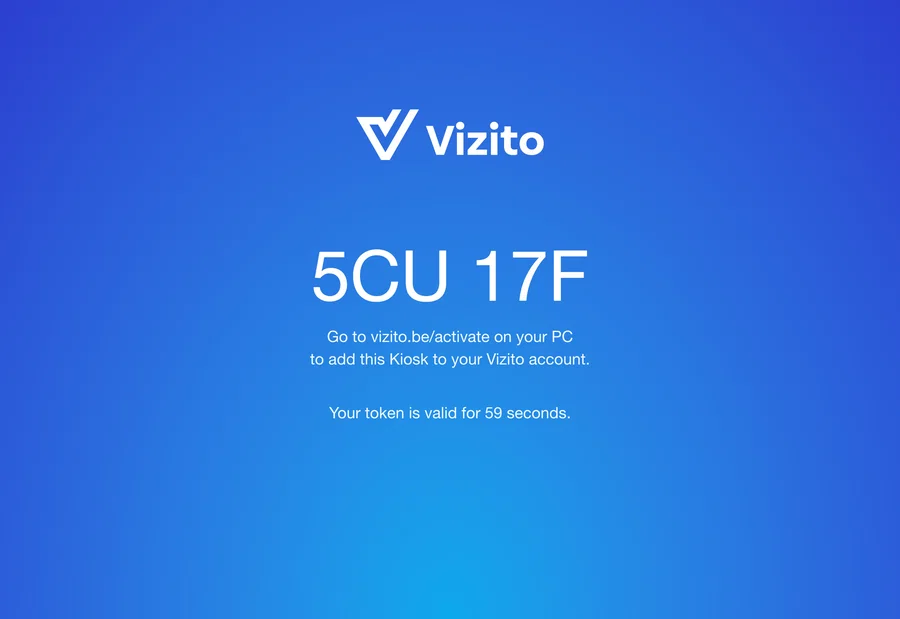
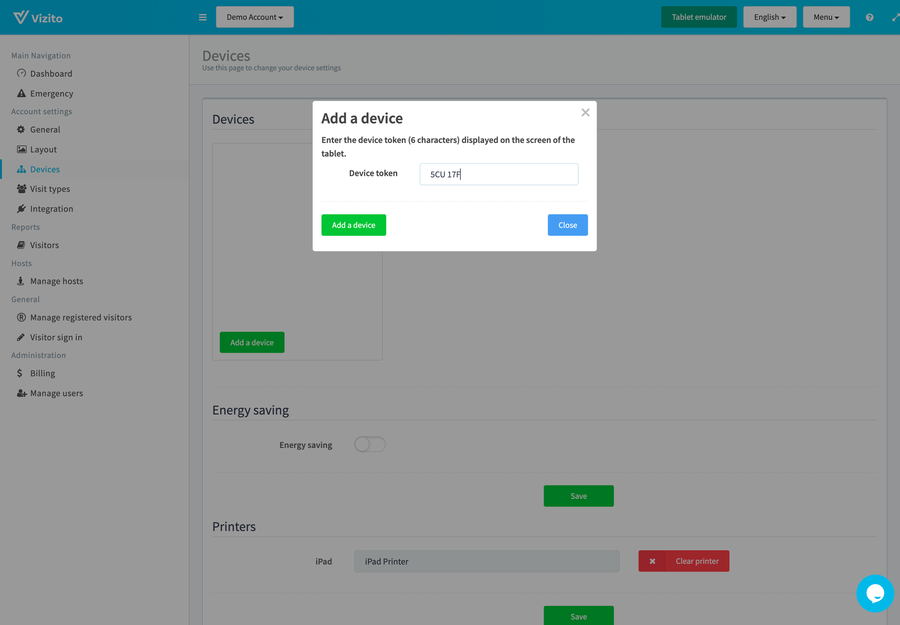
Copy the device token (XXX XXX).
-
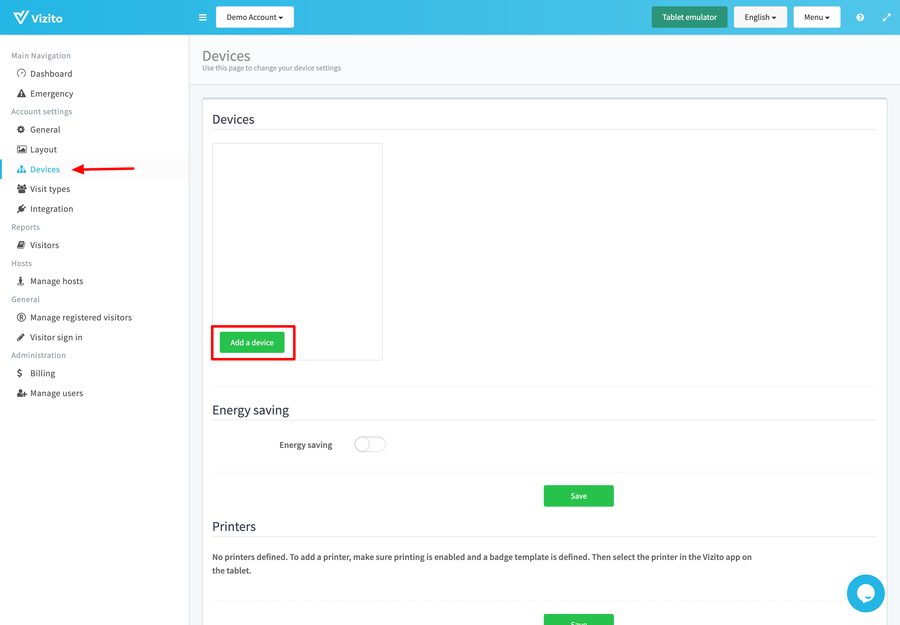
Go to Devices and click on “Add a device”.
-
Paste the device token and your Vizito account should now be linked.
-
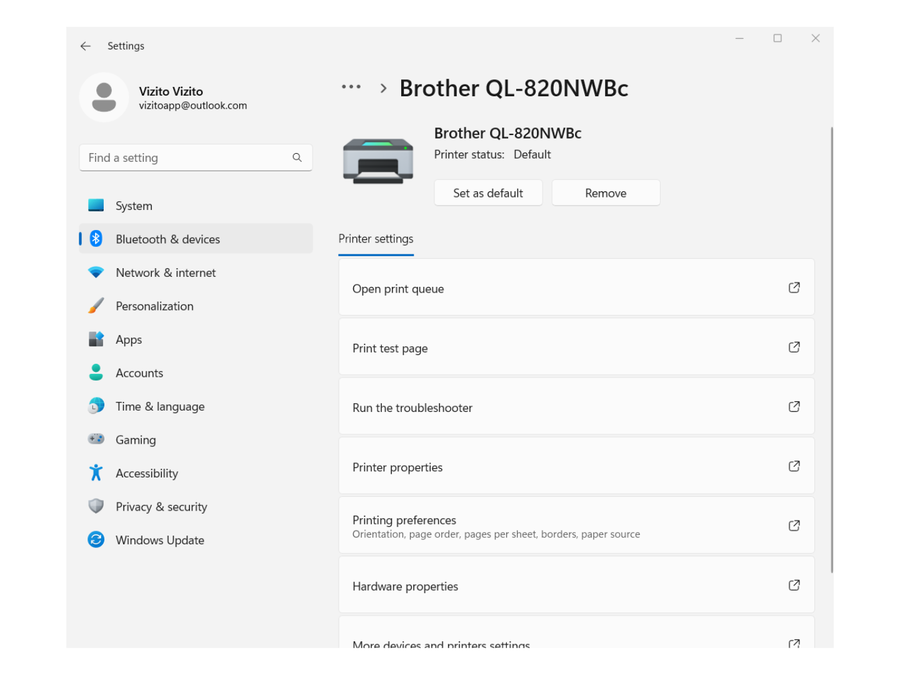
Go to Settings and set your label printer as default. In Windows 11, this is under Bluetooth & devices > select the printer > Click “Set as default”.
-
Test if the printer works by signing in as a test visitor.
-
The print setup dialog will pop up and you should alter the print settings to print as desired. Depending on your printer and label size, it could require some trial and error on the settings within the print setup or the badge template itself. For more information refer to Badge Template Configuration.
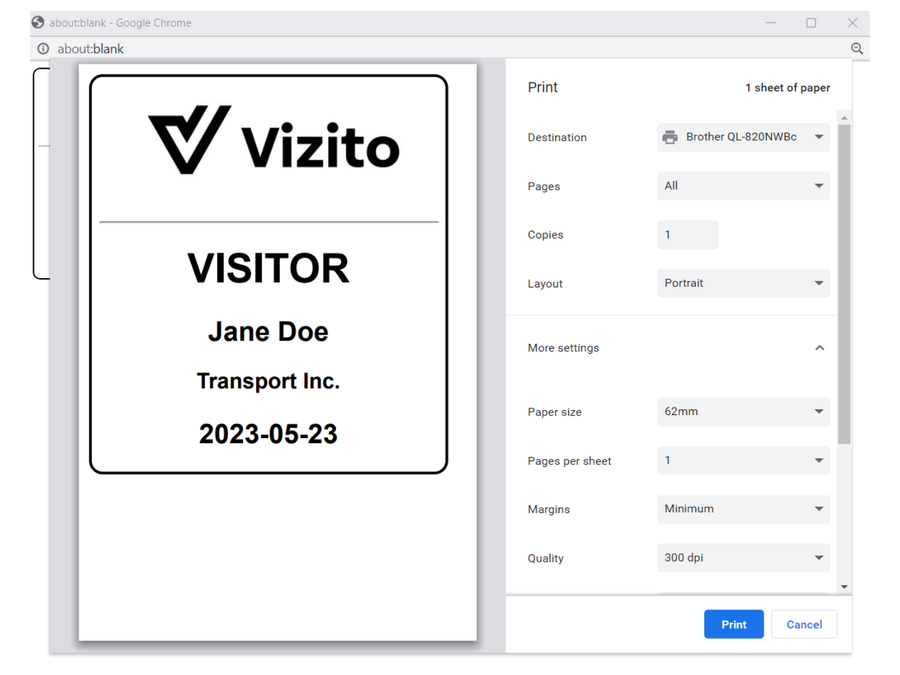
*If the printer is giving an error “Label roll is incorrect”, you can change the label roll setting by opening the Printer properties.
Enabling Kiosk Mode
-
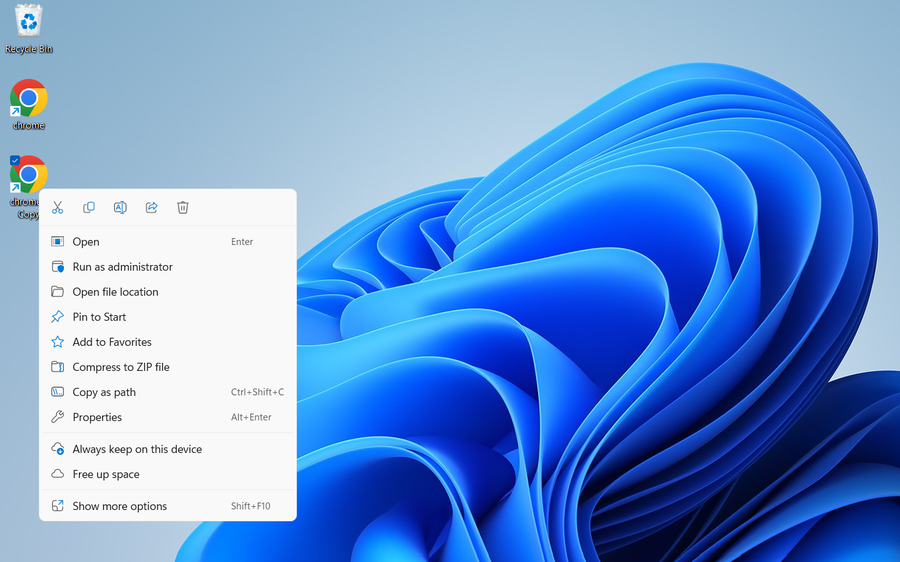
Create a copy of the Chrome Shortcut on your desktop.
-
Right-click the copied shortcut and click on “Properties”
-
In the target field, add the following text to the end, after a space:
--kiosk-printing --kiosk "https://frontoffice.vizito.be/".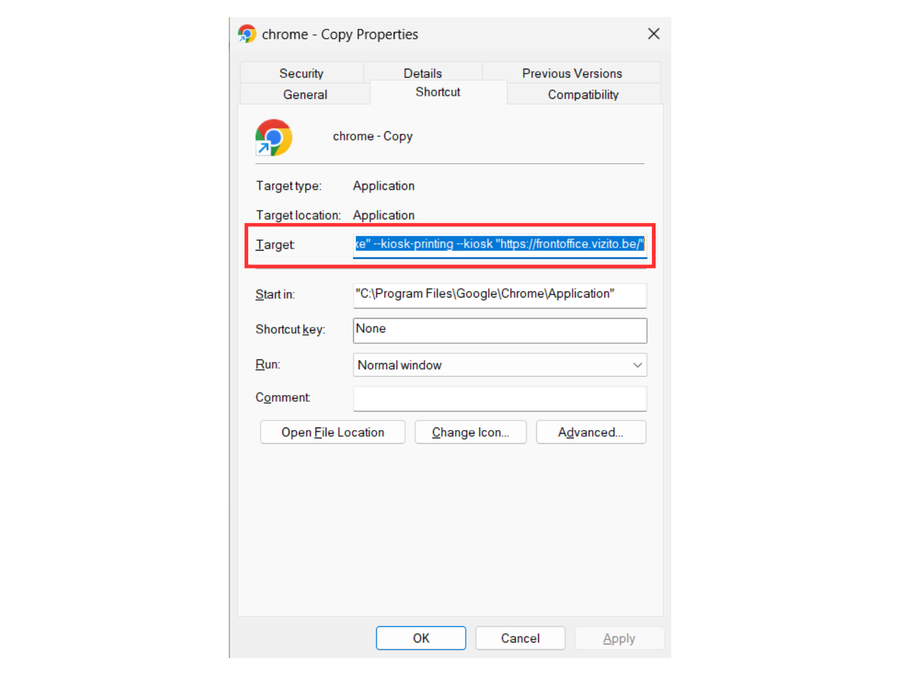
-
Optionally, you can rename your shortcut in the ‘General’ tab and select a different icon in the ‘Shortcut’ tab using the ‘Change Icon’ button.
Background Printing without Full Kiosk Mode
If you prefer to not be locked into Kiosk Mode and want to toggle full-screen on and off using the F11 key, follow the same steps as above, but in step 6, do not include the flag --kiosk. Instead, use only --kiosk-printing. This will enable silent/background printing without forcing full-screen mode.