Entry points
In this article
An entry point records which entrance a visitor signed in at, so a building with several doors can tell a reception sign-in apart from one at the back gate. You create one entry point per entrance and assign it to the tablet or the static QR code that stands there.
How it works
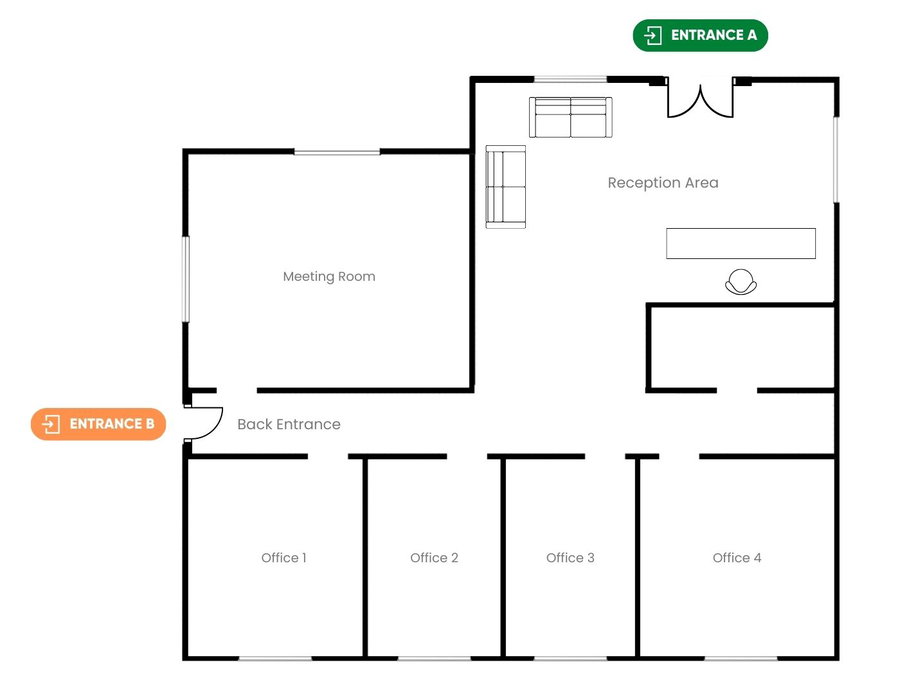
Say your building has two entrances, Entrance A and Entrance B.
- Entrance A is the reception area, where the Vizito app runs on a tablet.
- Entrance B is the back entrance, where a printed static QR code hangs on the wall. Learn more about static QR codes.
You create both entry points, assign “Entrance A” to the tablet and “Entrance B” to the static QR code. When a visitor completes sign-in on the tablet at the reception desk, their visit is recorded against “Entrance A”.
Add an entry point
-
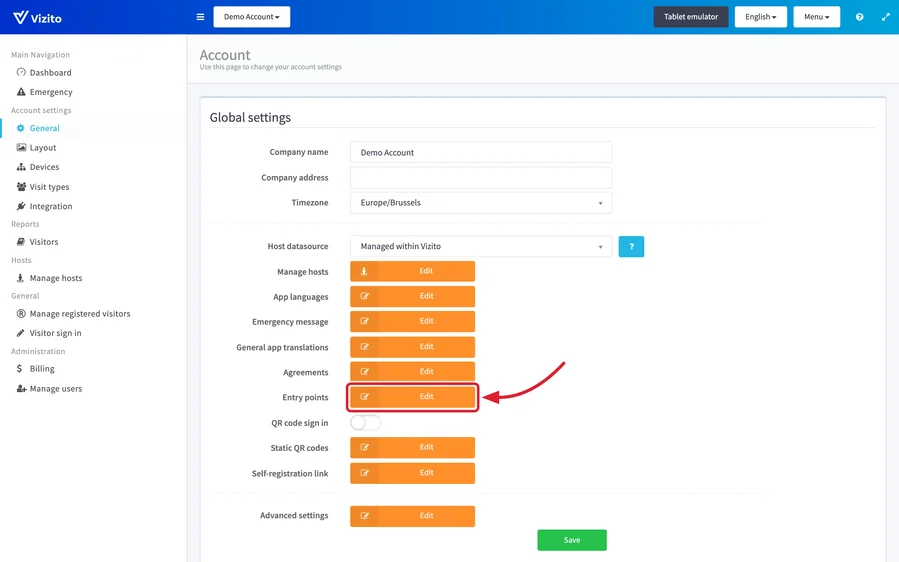
Open the Vizito backoffice and select “Account settings” > “General” in the left menu.
-
Under “Location settings”, find the “Entry points” row and click “Edit”.
-
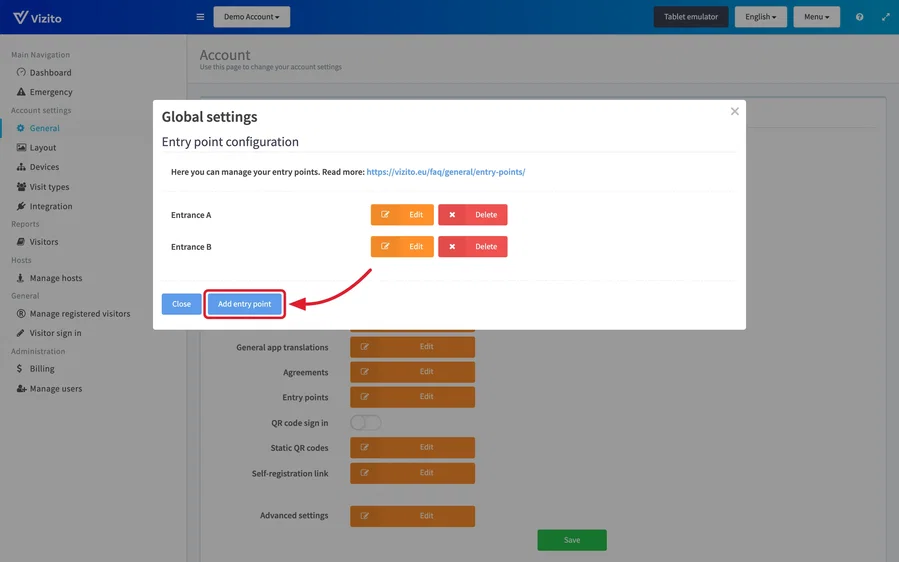
Click “Add entry point” at the bottom of the “Entry point configuration” window.
-
Enter a name in the “Name” field and click “Save”. Use the name people already use for that door, so your reports stay easy to read.
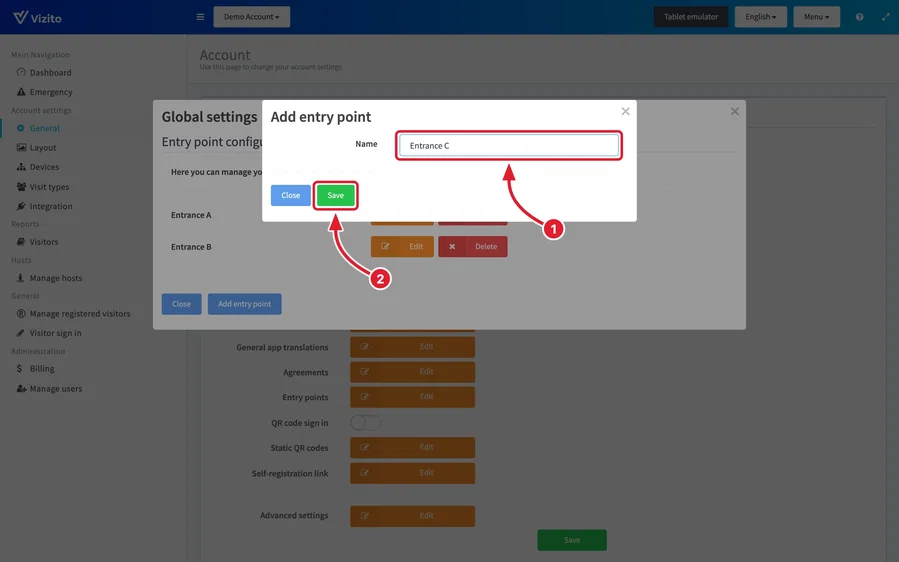
The “Entry point configuration” window lists every entry point in your account. Click “Edit” next to a name to rename it, or “Delete” to remove it.
Assign an entry point to a tablet
-
Select “Account settings” > “Devices” in the left menu.
-
Click “Edit” on the device that stands at the entrance.
-
Open the “Entry point” dropdown in the “Device configuration” window and select the entrance where the device is placed.
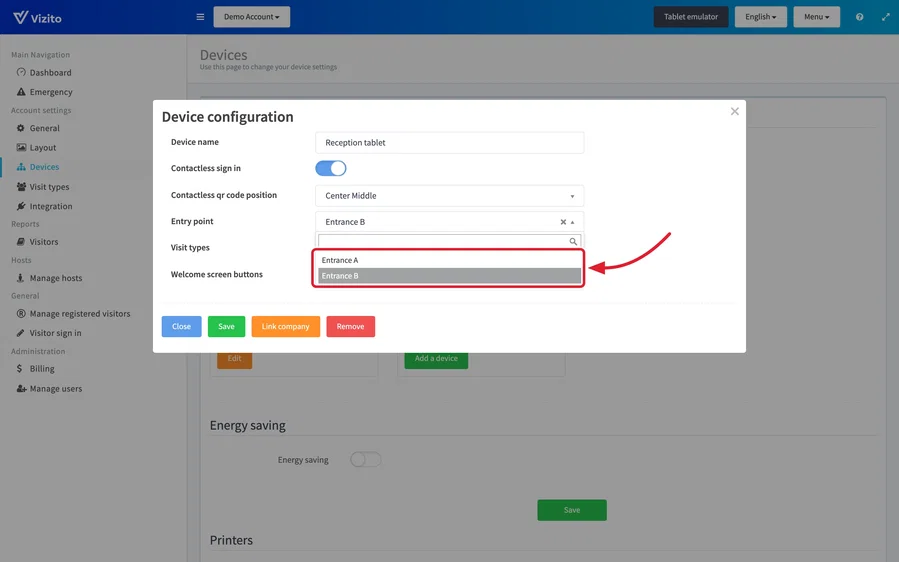
-
Click “Save”.
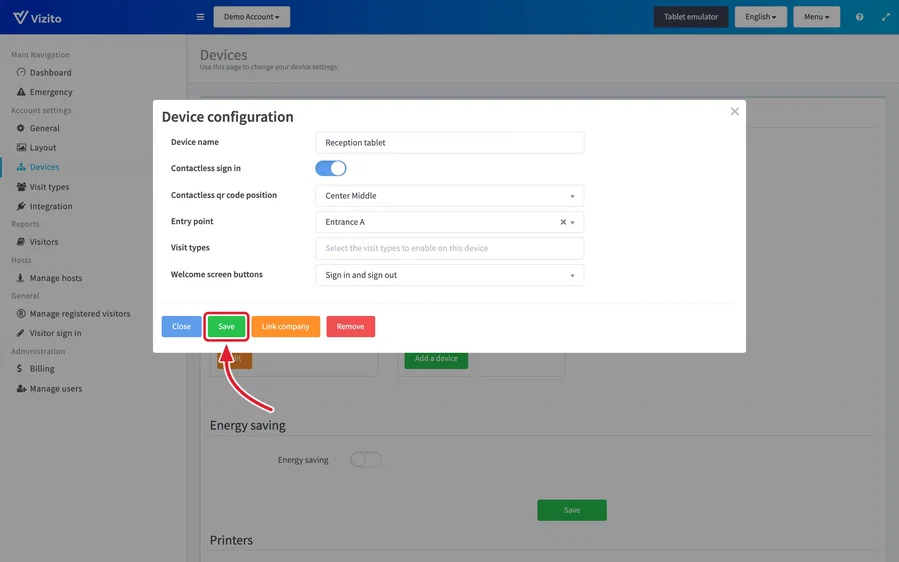
The “Entry point” row only appears once your account has at least two entry points. If the device window does not show it, add the second entry point first.
Assign an entry point to a static QR code
-
Select “Account settings” > “General” in the left menu, find the “Static QR codes” row under “Location settings” and click “Edit”.
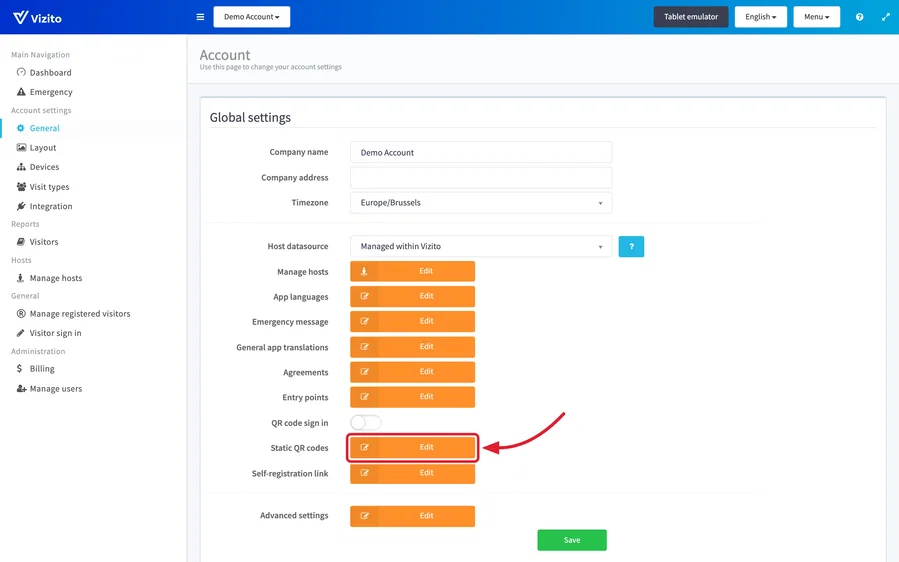
-
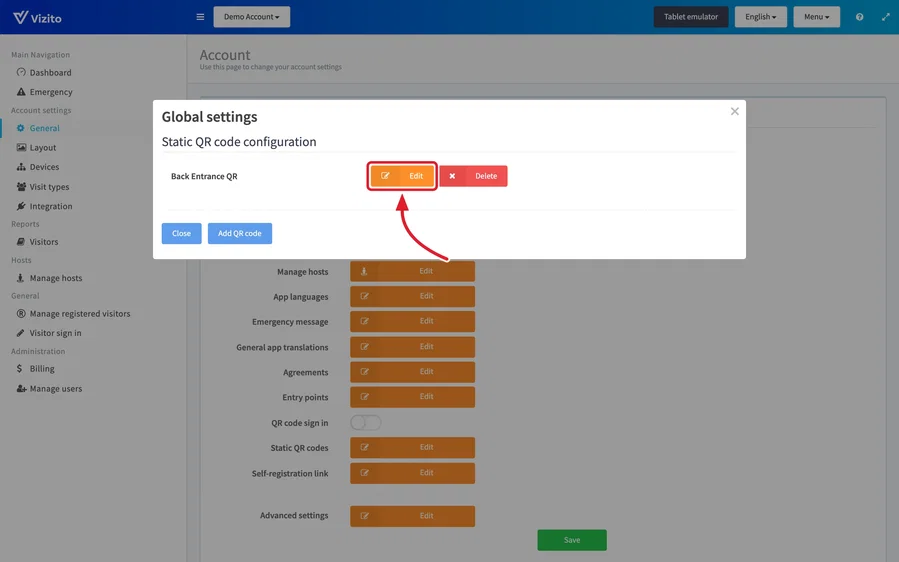
In the “Static QR code configuration” window, click “Edit” next to the QR code you want to assign.
-
Open the “Entry point” dropdown and select the entrance where the code is printed.
-
Click “Save”.
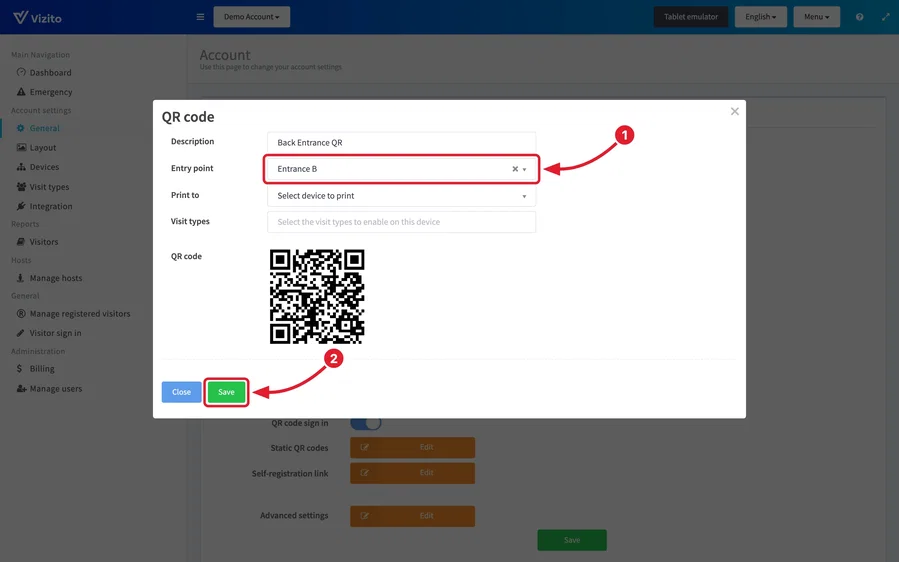
The “QR code” window holds two more settings you can leave empty: “Visit types” limits the code to the visit types you select, and “Print to” selects the device that prints the visitor badge. See visit types and badges.
Limit a tablet to some visit types
An entry point tags where a visitor signed in; it does not decide which visit types a tablet offers. To make a tablet at the goods entrance show only “Delivery”, limit the visit types on that device under “Account settings” > “Devices” > “Edit” > “Visit types”. See Device activation.
Filter the emergency list by entry point
Select “Emergency” in the left menu to open the emergency list. The “Select the entry point” box above the table narrows the list to the visitors who signed in at the entrances you pick, so a site with several doors can be evacuated one door at a time. You can pick more than one entrance at once.
The emergency table has no entry point column, but clicking a visitor opens the “Visitor details” window, which does show the entrance that visitor came in through. See emergencies for the rest of that screen.
See entry points in the visitor log
-
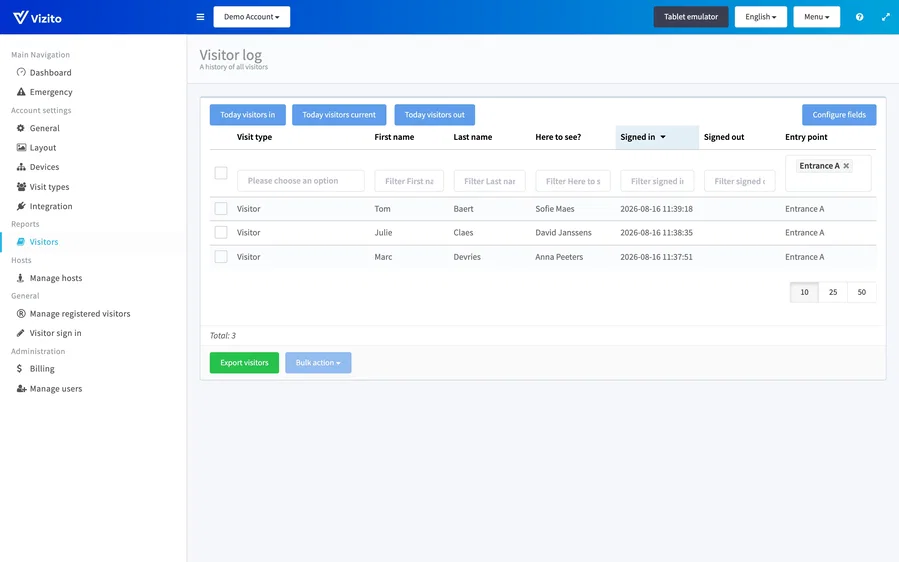
Select “Reports” > “Visitors” in the left menu to open the visitor log.
-
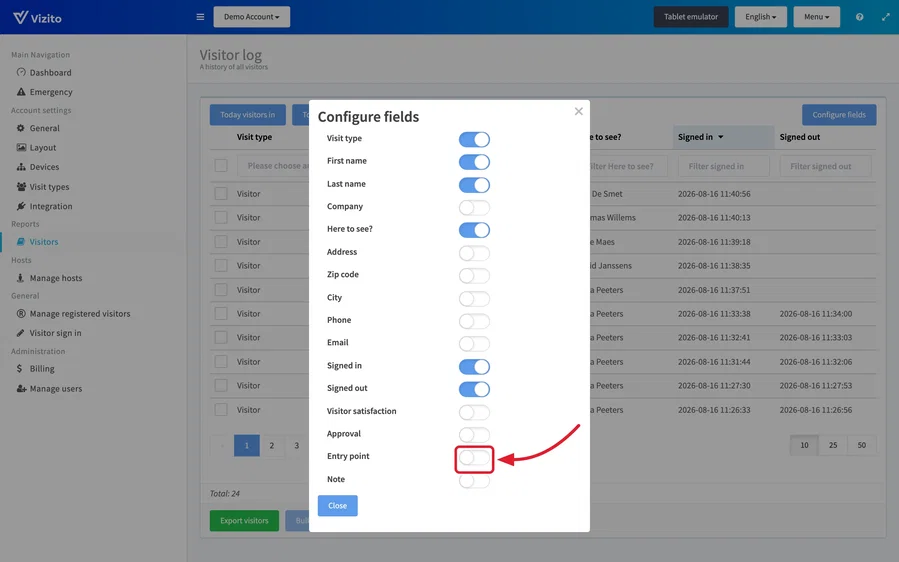
Click “Configure fields” and switch on “Entry point”. The column is off until you do.
-
Pick one or more entry points in the filter under the column heading to show only the visitors who signed in there.