Emergencies
The emergency list holds everyone who is signed in and has not signed out yet, and lets you text and email all of them at once. Use it during an evacuation or a fire drill: alert your visitors, mark them safe as they report in, and hand the list to the emergency services. You can do all of it from any device that opens the backoffice, whether that is a PC, a tablet or a phone.
Set the default emergency message
Write this message in advance. You can still change it during an evacuation, but you should not have to.
-
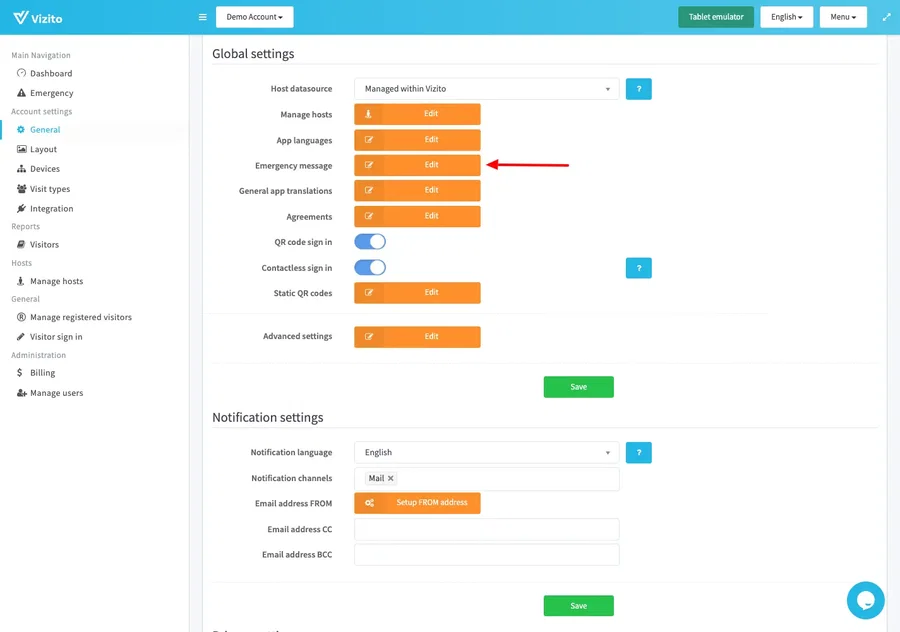
Open the Vizito backoffice and select “Account settings” > “General” in the left menu.
-
Under “Location settings”, find the “Emergency message” row and click “Edit”.
-
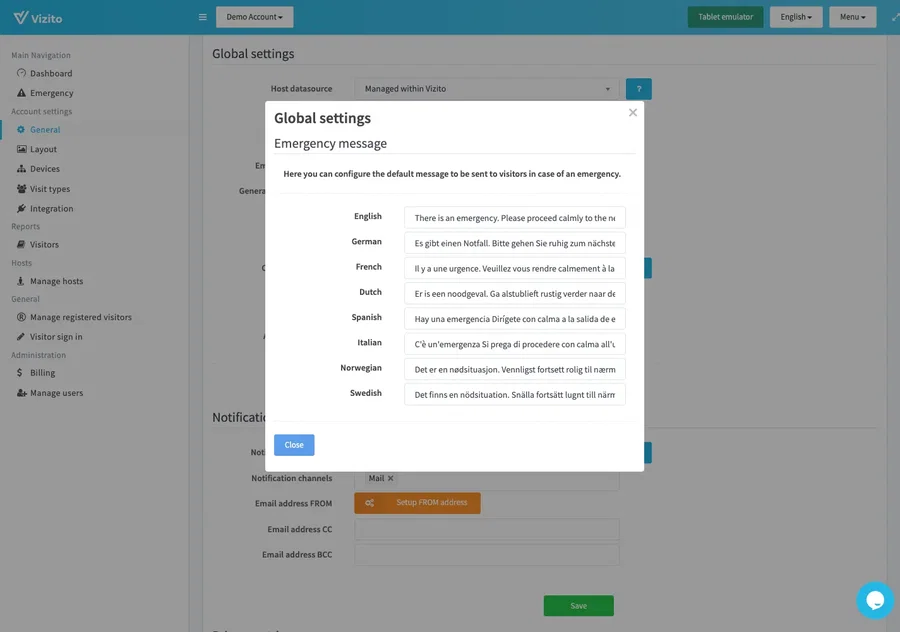
Type the message in each language. The window shows one field per language you enabled under “App languages”, and each visitor is written to in the language they signed in with.
-
Click “Close”, then click “Save” at the bottom of “Location settings” to store the messages.
Note: each message is limited to 160 characters, the length of a single text message. The field stops accepting text at that point, so check the length now rather than mid-evacuation.
Alert everyone in the building
A visitor can only be reached if their record holds an email address or a mobile phone number. Set the “Email” and “Phone” sign-in fields to “Mandatory” or “Optional” on the visit types you use, so visitors are asked for them when they sign in.
-
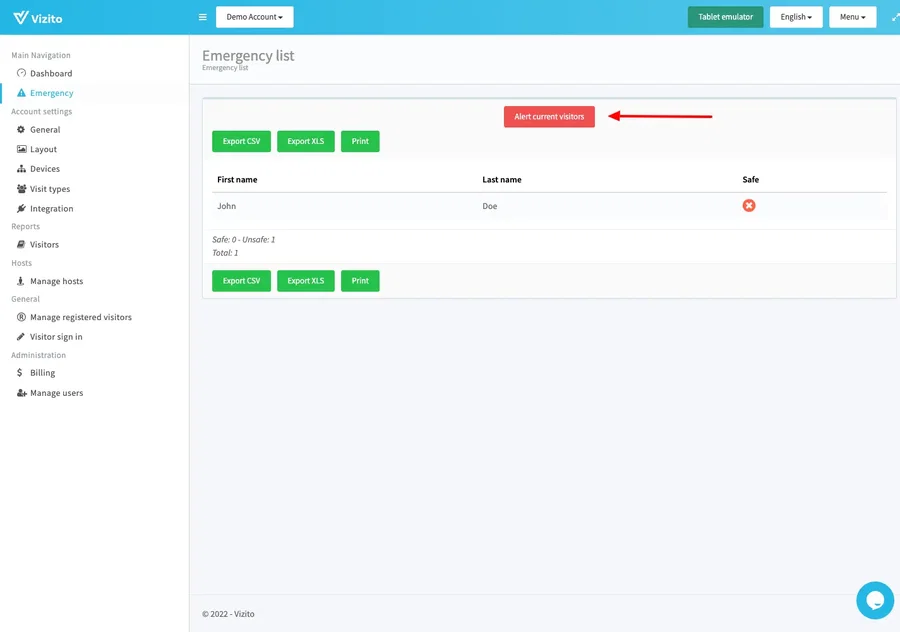
Select “Emergency” in the left menu to open the emergency list.
-
Click “Alert current visitors”.
-
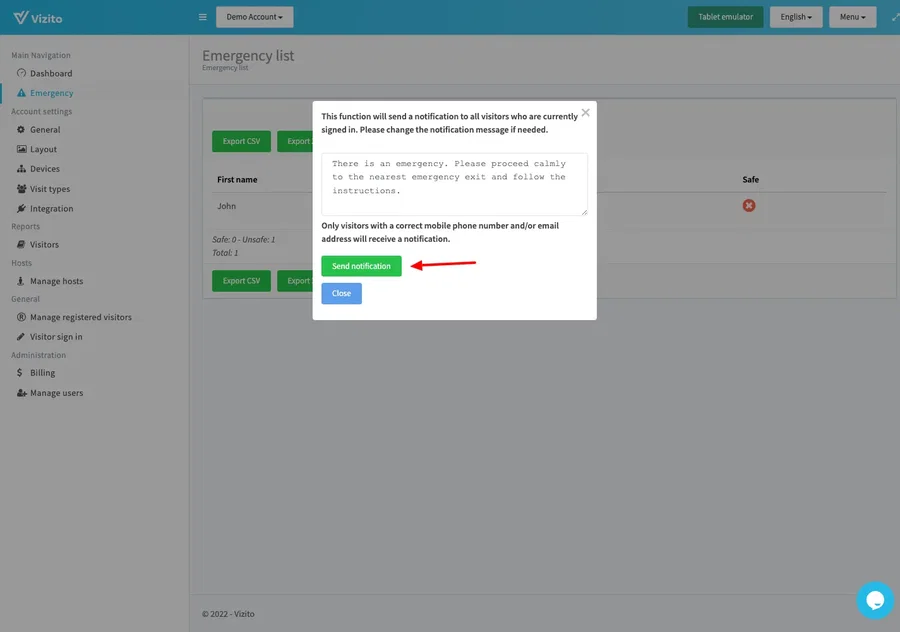
Read the message in the pop-up and overtype it if this emergency needs more detail. It starts from your default message and is limited to the same 160 characters. What you type here is used for this alert only, so your default message stays as it is.
-
Click “Send notification”. Only visitors with a correct mobile phone number or email address receive it, and Vizito confirms once the messages have gone out. Visitors you have already marked safe are skipped. If the email arrives but the text message does not, see Text messages did not go out below.
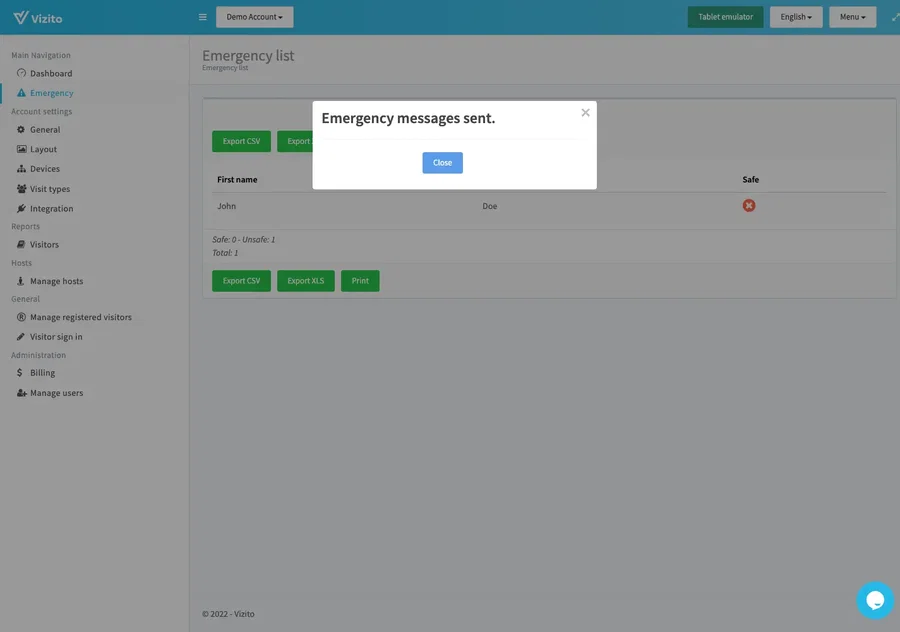
Note: the email goes out from the same address as the rest of your notifications, which is vizito@vizito.be unless you have set up a sender address of your own: see Email delivery and sender address. The text message is sent under a sender name we configure and is not affected by that setting.
Note: the list only holds visitors who are signed in at this moment. When your building is empty the table reads “No data” and “Alert current visitors”, “Export CSV”, “Export XLS” and “Print” are greyed out. That is the normal quiet state, not a broken screen.
Text messages did not go out
“Alert current visitors” sends an email to every visitor with an email address and a text message to every visitor with a phone number, independently of each other. So when only the email arrived, the email side worked and something stopped the text message. This is about the text messages to your visitors; the text messages to hosts are covered in Email and SMS. Check, in this order:
- Did the visitor give a phone number? Open the visitor in the emergency list and look at “Phone”. An empty field means there is nothing to text. The “Phone” sign-in field of their visit type has to be “Mandatory” or “Optional”, and a visitor who signed in before you switched it on has no number.
- Is the number in international format? A text message is only sent to a number with its country code, such as +32 471 12 34 56 or 0032 471 12 34 56. A number written the national way, 0471 12 34 56, loses its leading zero and is read as an international number that does not exist, so nothing is sent and nothing reports an error. The phone field on the tablet asks for the country code, so numbers typed there are fine; numbers you typed or imported yourself for registered visitors are the usual culprit. Correct them under “General” > “Manage registered visitors”.
- Is the account still on its trial? A trial includes 25 text messages in total, and the visitor alert uses the same 25 as the host notifications. Once they are used up, the alert still goes out by email but not by text message. When a trial has expired, “Alert current visitors” sends nothing at all. Subscribing lifts both.
- Is SMS switched on for the account? A trial account created with a public email address, such as a gmail.com address, can start with text messages switched off as a protection against abuse, and the same then applies to every location that account creates. Subscribing switches them on. If your account is subscribed and visitors still receive no text message, contact us.
- Was the message cut short rather than missing? A text message holds 160 characters of the standard SMS alphabet. One character outside it, such as “ê”, “ç”, a curly apostrophe or an emoji, shortens the whole text message to 70 characters. The email always carries the full message. Keep the default emergency message short and use straight apostrophes.
“Notification channels” under “Account settings” > “General” > “Notification settings” does not matter here: it controls the notifications to hosts, not the emergency alert.
How the alert counts against your plan
Every text message the alert sends counts as one text message, exactly like a host notification: an evacuation with 40 visitors who left a phone number uses 40. See how many were sent this month under “Administration” > “Billing”, on the “Text messages” row of “Usage this month”, or on the dashboard under “MONTHLY SMS COUNTS”. There is no separate credit balance to top up on a paid plan: the meter compares what was sent with what your plan includes, and nothing is blocked when you go over. See Email and SMS and Billing.
A number that looks right and still receives nothing, on a subscribed account, needs our SMS log: contact us through the chat in the backoffice or at info@vizito.eu with the visitor’s name and the time of the alert, and we can see whether the message left and what the carrier answered.
Mark visitors safe
-
Click a visitor in the emergency list to open the “Visitor details” window. It shows their host, their company, when they signed in and, if you use them, the entry point they came in through.
-
Click “Mark safe”.
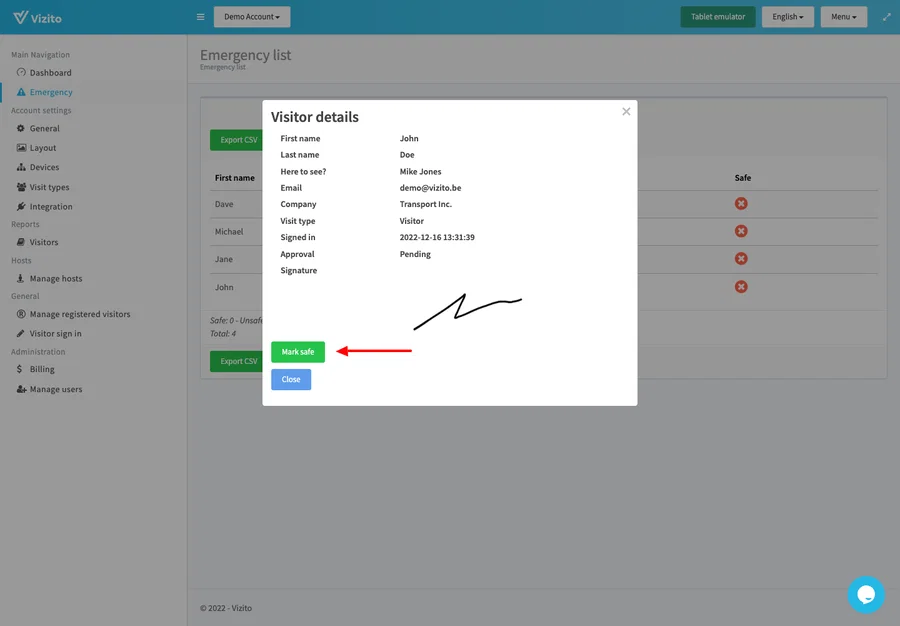
The “Safe” column turns from a red cross into a green check, and the line under the table keeps the count: “Safe” and “Unsafe” beside each other, with “Total” underneath.
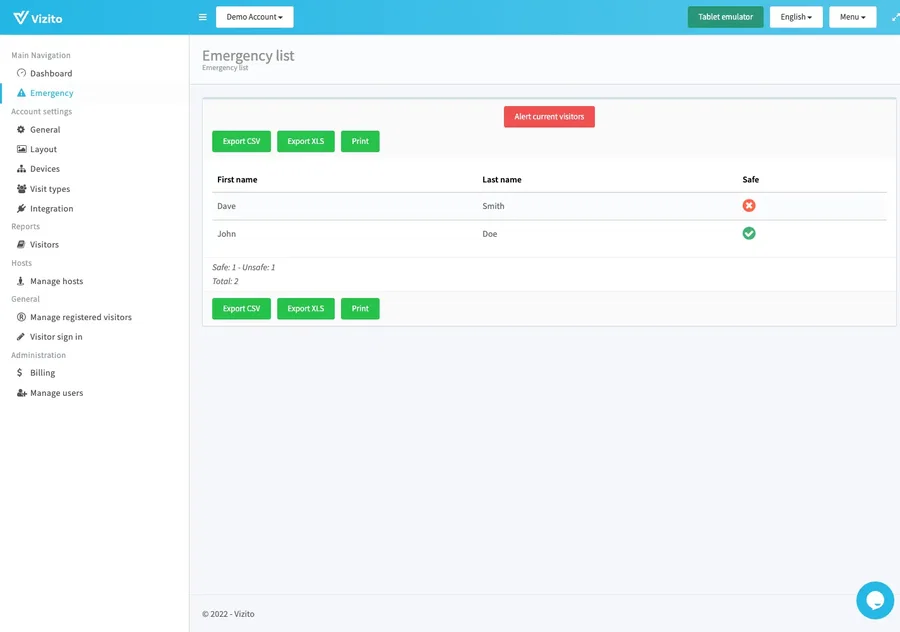
Marked somebody off too early? Open the same window again and click “Mark not safe”.
Choose your columns and filter the list
Click “Configure fields” on the right of the emergency list to switch columns on and off. The list opens with “Visit type”, “First name”, “Last name” and “Safe”, and you can add “Company”, “Here to see?”, “Address”, “Zip code”, “City”, “Phone”, “Email”, “Visitor satisfaction” and “Approval”, along with any custom sign-in fields you added yourself.
Every column heading has its own filter underneath it. Setting “Safe” to “No” leaves you with the people who are still unaccounted for.
The box above the table, “Select the entry point”, narrows the list to one or more entry points. That is what you want when a site with several entrances is evacuated one door at a time.
Export or print the list
“Export CSV”, “Export XLS” and “Print” sit above and below the table. Use them to give the emergency services a copy of who is still in the building.