Video tutorial
Prefer a text version? Please scroll down.
Configuring your sign-in fields
You can configure sign-in fields for each visit type. You can find them via the left side menu item “Visit types” > “Edit” the visit type of your preference. Then click on “Sign-in fields” tab.
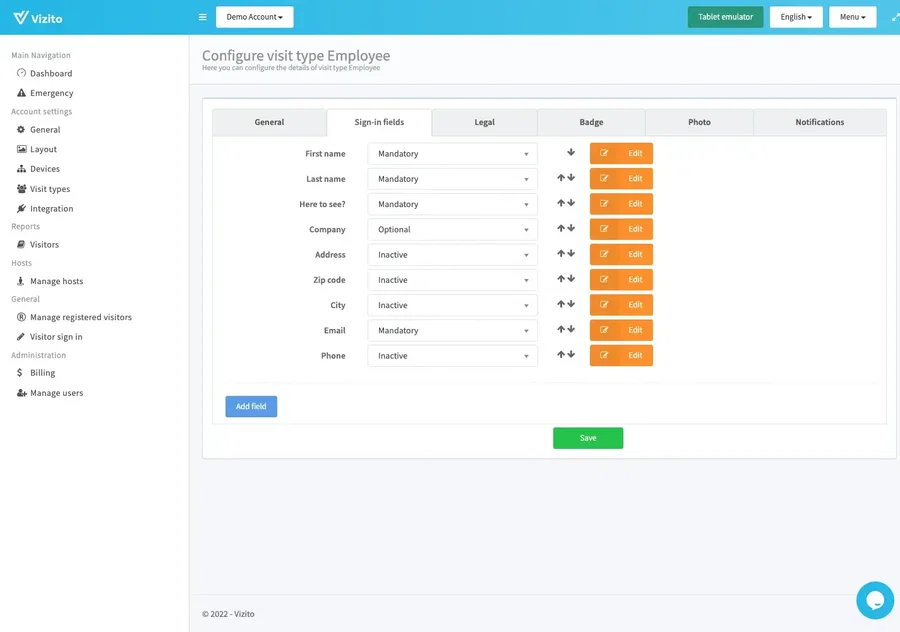
There’s a set of sign-in fields that are available by default:
- First name
- Last name
- Company
- Address
- Zip code
- Phone
- Here to see
- City
You can add additional, custom, fields on top of the above. You are not required to use most of the default fields, though we recommend using at least the name fields.
Field status
Each field can be set to mandatory, optional, inactive and hidden.
- Mandatory: Forces the field to be entered by the visitor.
- Optional: Visitor is not obligated to enter a value for this field.
- Inactive: This field is disabled and will not be shown to the visitor, nor will it be visible from the Vizito backoffice.
- Hidden: This field will not be shown to the visitor, but it can be used via the Vizito backoffice. For instance to leave a remark on a specific visit.

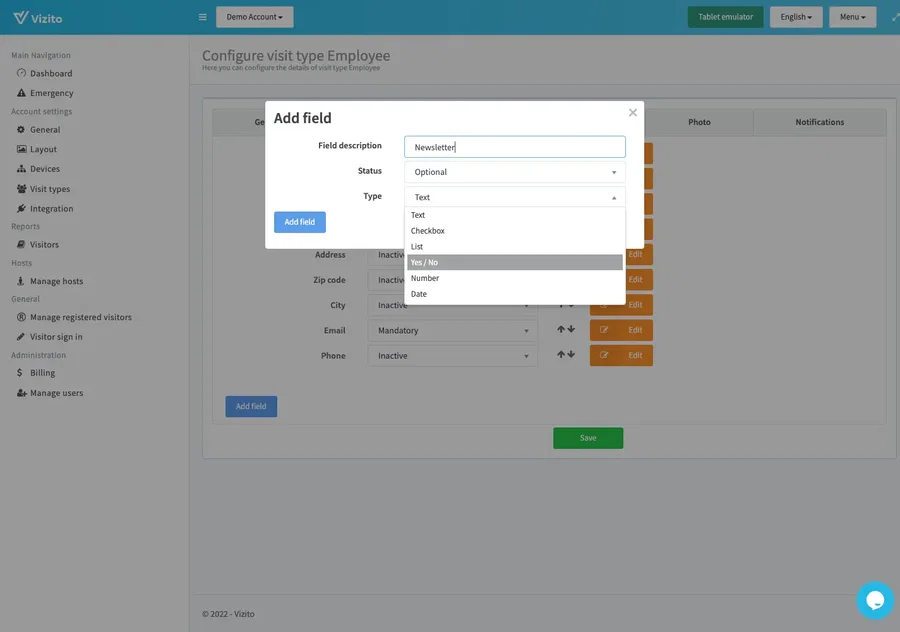
Field type
Each field is configured by type. The following types are available: Text, Checkbox, List, Yes/No, Number, Date.
- Text: This is a normal text-based field.
- There is an optional Regular expression value you can configure if you want the value to match. Only available for custom fields.
- Checkbox: This field can be used to checkmark a sign-in field. Especially handy towards opting in for a newsletter or other communication.
- List: List of values to be shown to the visitor from which they can select an item.
- Yes/No: Question type field for which you can answer Yes or No
- Number: This is a number-based field.
- There is an optional minimum and maximum value to be configured.
- Date: Date field which can be used towards selecting a date.
Default country code for the phone field
The phone field includes a country code selector. By default the selector follows the device or browser region, but you can override it with a fixed default prefix per visit type.
To set a default country code:
- Go to the Vizito backoffice.
- Open Visit Types from the left side menu and click Edit on the visit type you want to change.
- Open the Sign-in fields tab.
- Find the Phone field and set the Default prefix to the country you want, for example Germany (+49).
Visitors can still pick a different country code at sign-in if they need to. The default prefix only changes which country is preselected.