You can automatically create new employees in Vizito as users of the system. You can also automatically add them as hosts, from which the visitor can select the person they have a meeting with.
Advantages of using this integration are:
- All user and host data is always up to date.
- Users that no longer work in your organization are automatically removed.
- No need to provide passwords for each user, as they can log in using their Microsoft account using Single Sign On.
The synchronization will run every day at 00:00 CET. You can also execute a manual synchronization, see step three.
In order for the integration to work, you will need to set up a new App Registration in Azure. This should be done by your IT support who is responsible for managing Azure Entry ID.
You will need to get the following information from Azure:
- Tenant ID
- Client ID
- Client Secret
- Group ID
Don’t worry we will guide you through the complete process.
Step 1: Create a new app registration in Azure
Go to https://portal.azure.com/ and log in.
Select the domain / tenant you would like to integrate with Vizito.
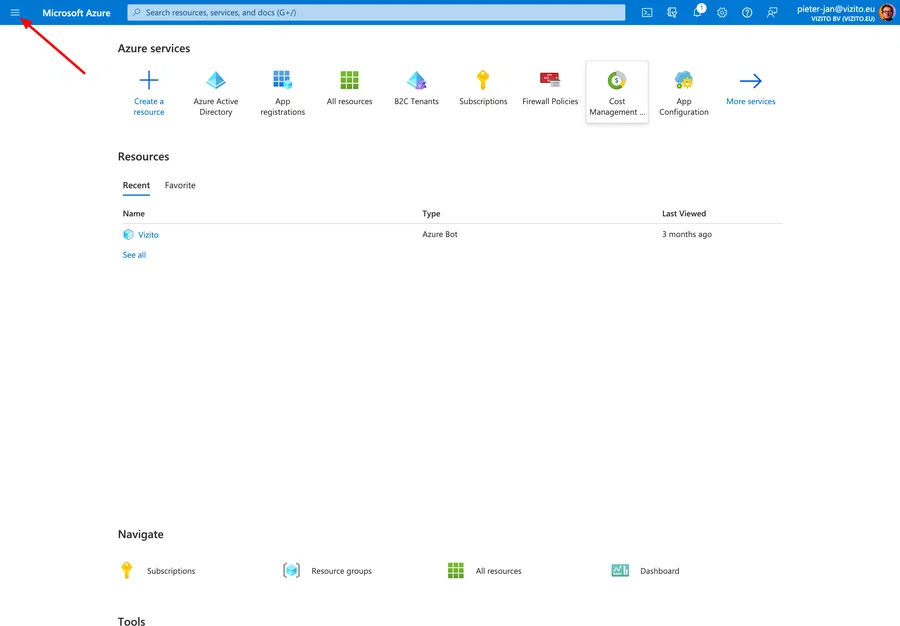
Once logged in, click on the hamburger menu icon in the top left corner:
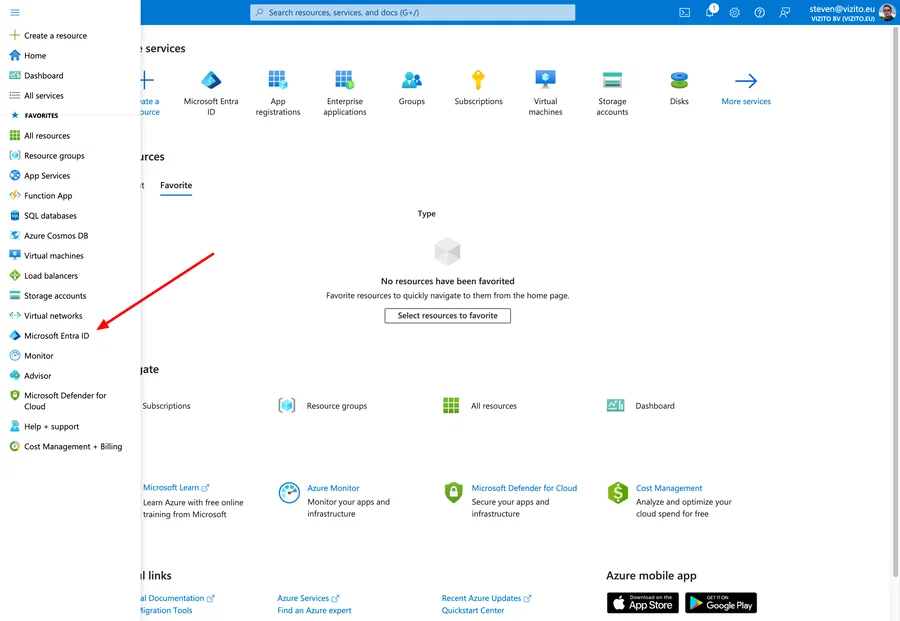
Click on Azure Entry ID:
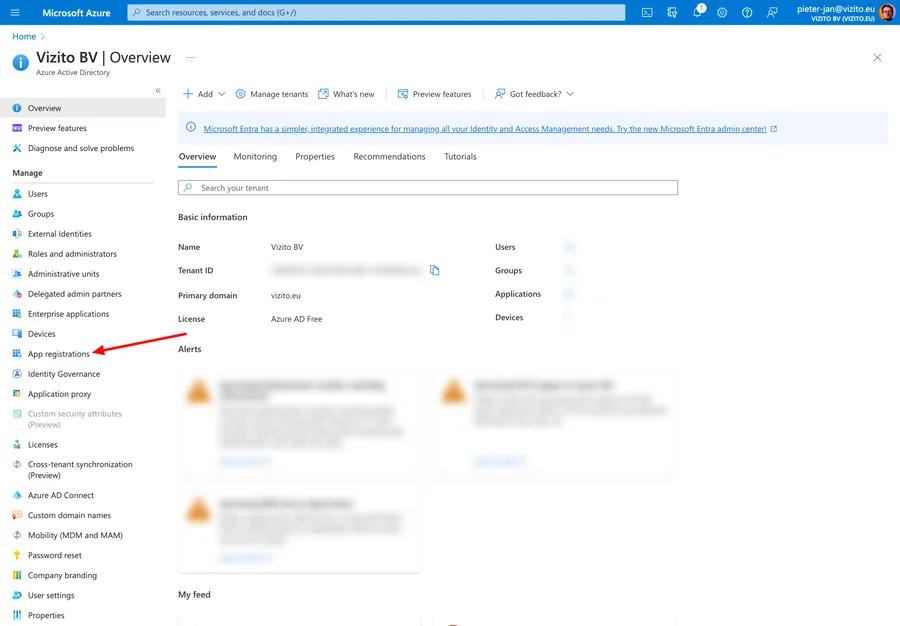
Now that you are in Azure Entra ID, click on the option App registrations in the left hand menu:
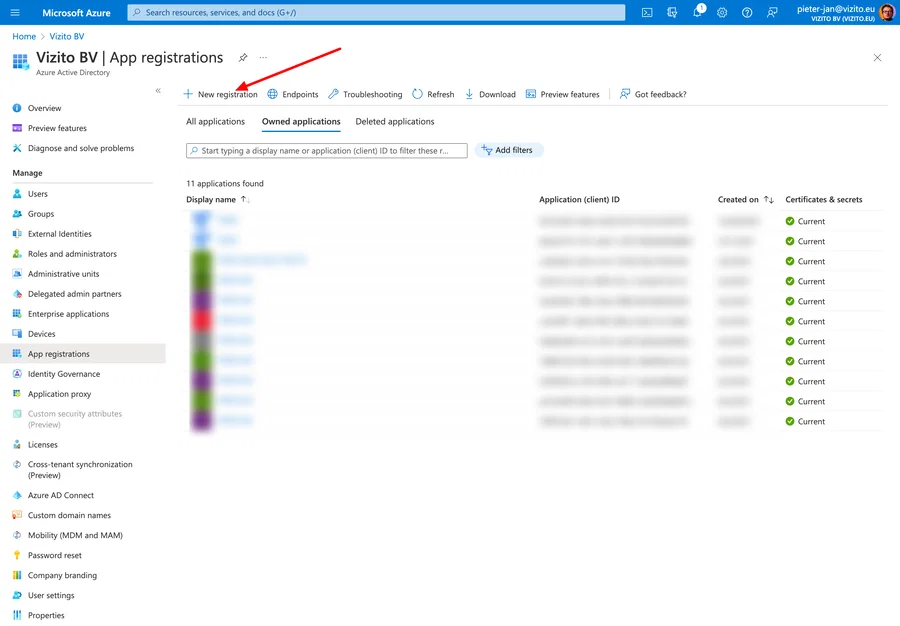
Click on + New registration to create the new app registration:
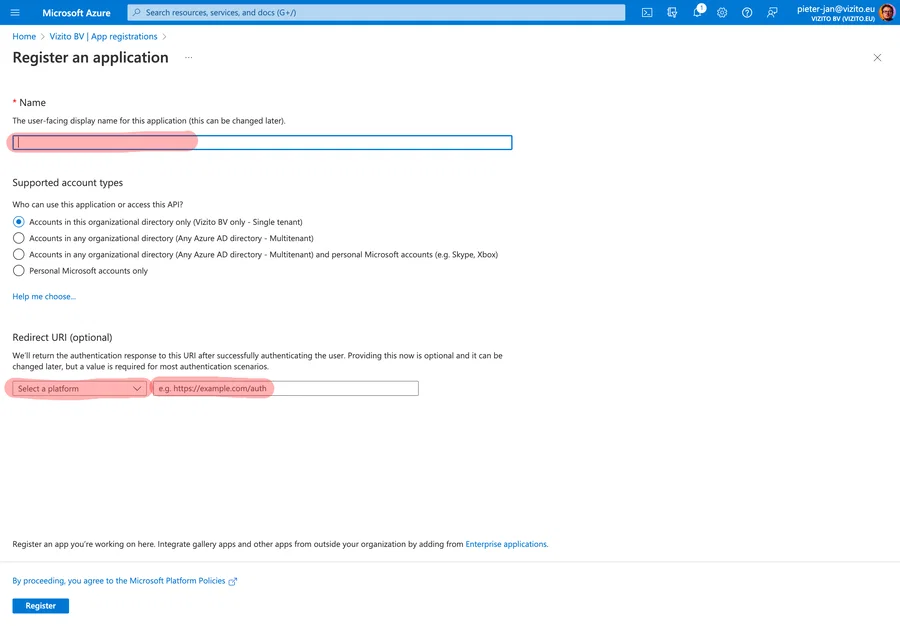
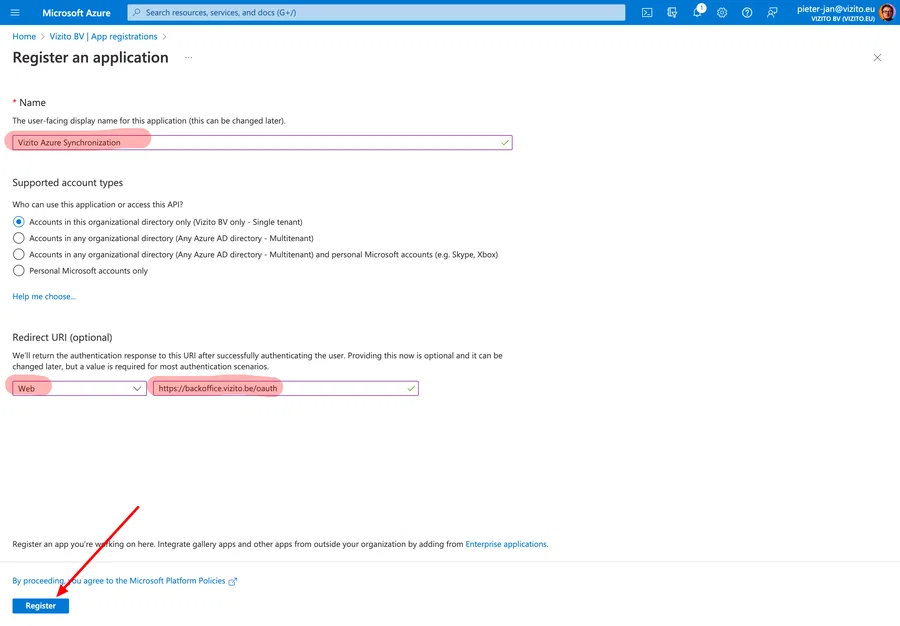
Fill in the name of the new app registration and set the redirect URI.
For the name, you can use a sentence that explains what the app registration does, such as: Vizito Azure Synchronization .
As for the Regirect URI, choose Web as the platform and as the URI, set https://backoffice.vizito.be/oauth .
Click on Register once everything is correct.
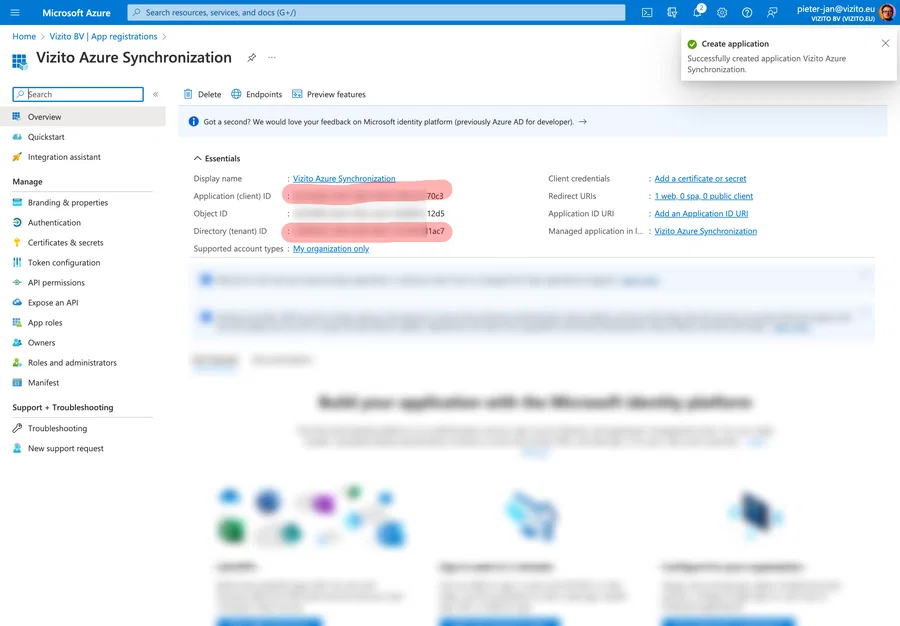
Now you can copy/paste or write down the Application (client) ID (what we refer to as Client ID) and the Directory (tenant) ID (what we refer to as Tenant ID).
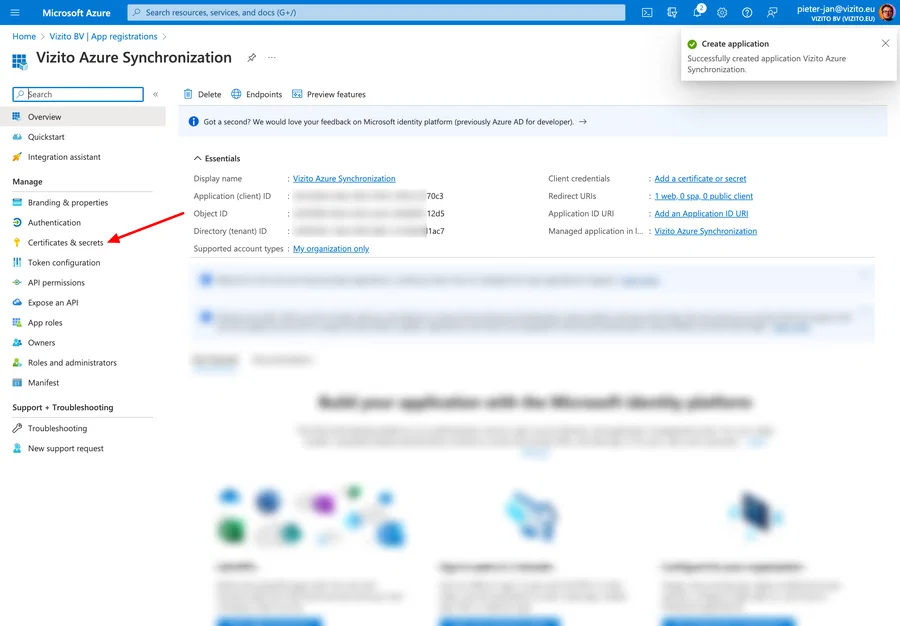
Next up, we need to add a client secret so that we can authorize as the app registration.
Click on Certificates & secrets:
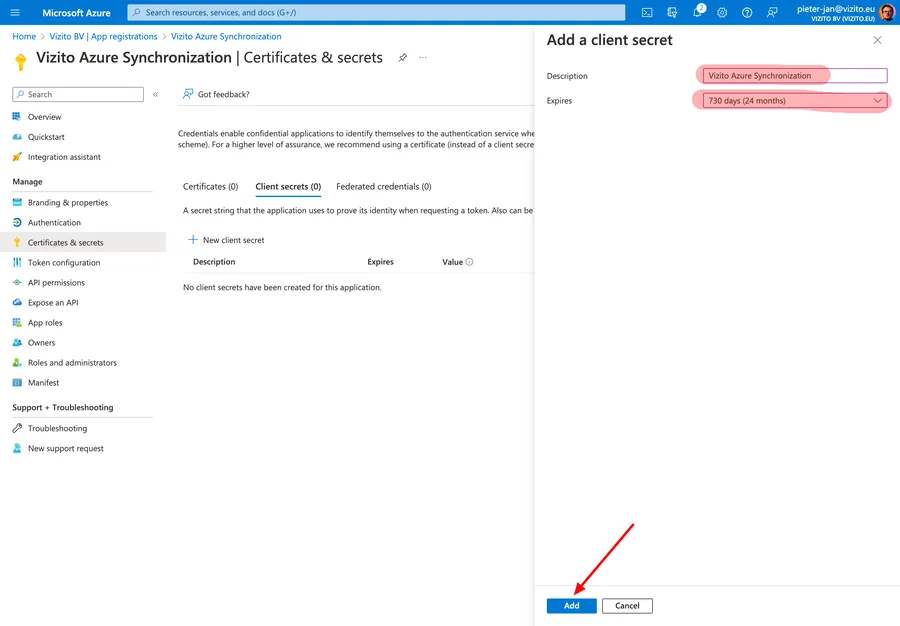
Click on New client secret:

Set a description for the secret, such as Vizito Azure Synchronization Secret and set the Expires to 730 days (24 months).
It is important to set this to a long period as you will have to renew the secret after that period.
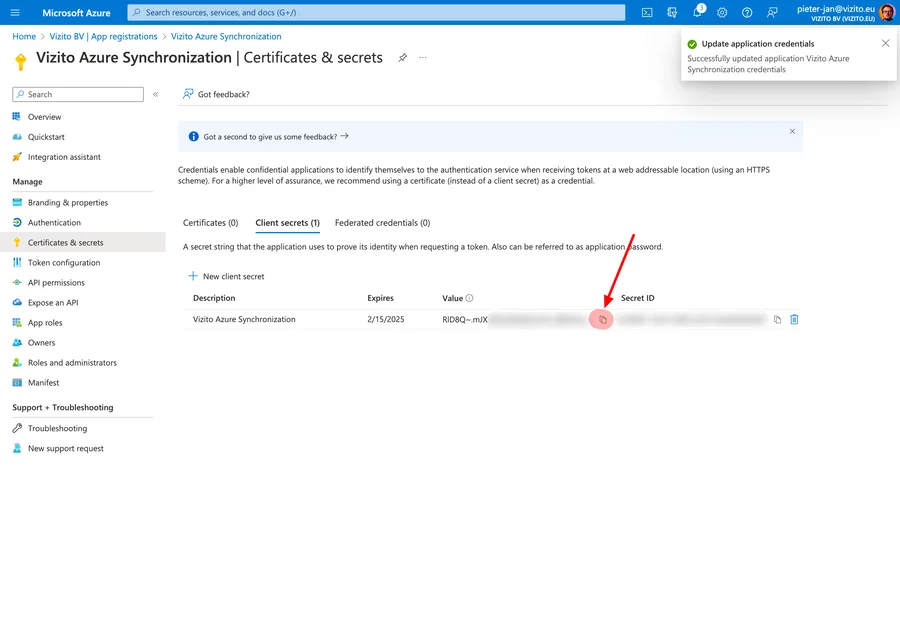
Now the client secret has been created.
Copy paste or write down the Value of the client secret, as this will only be displayed once. After closing this window, you will no longer be able to access this secret value.
If you did not write it down, not a problem, just delete this Client secret and create a new one. Remember to write it down though.
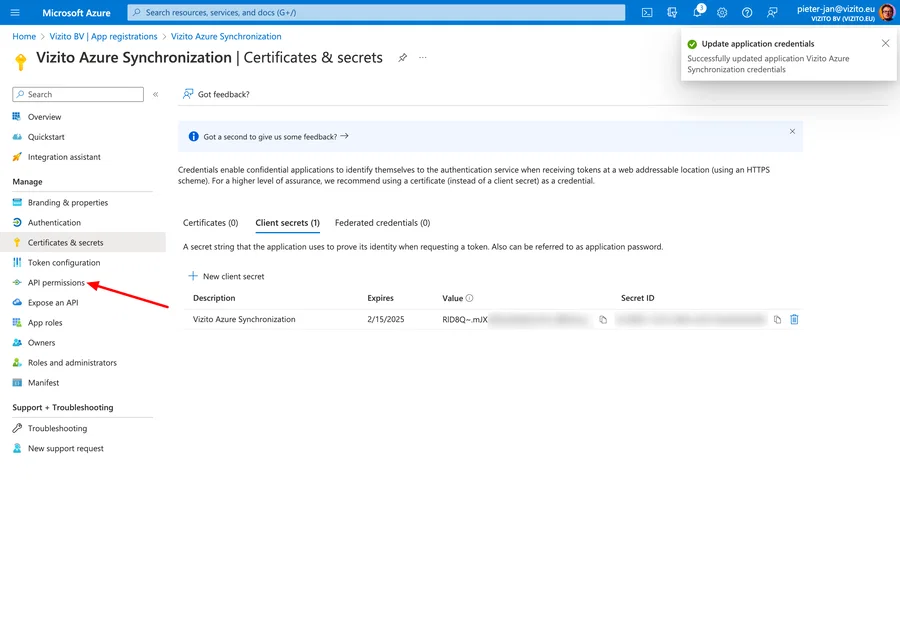
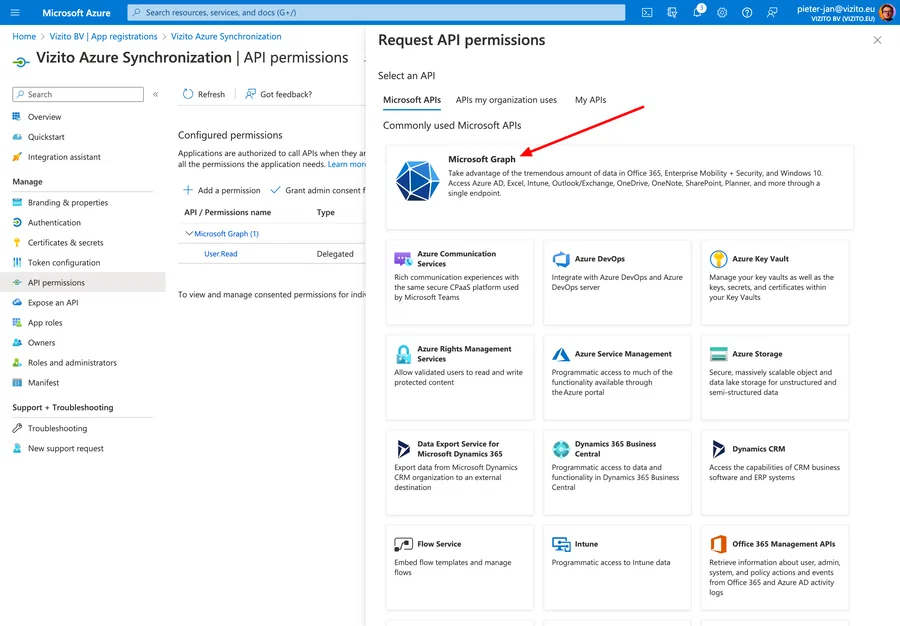
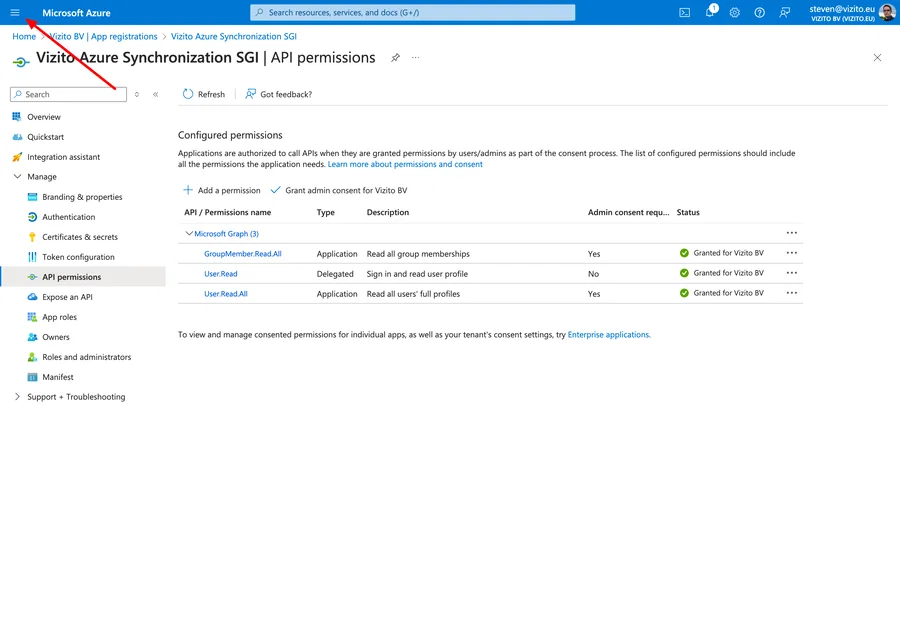
Now go to API permissions in the left hand menu:
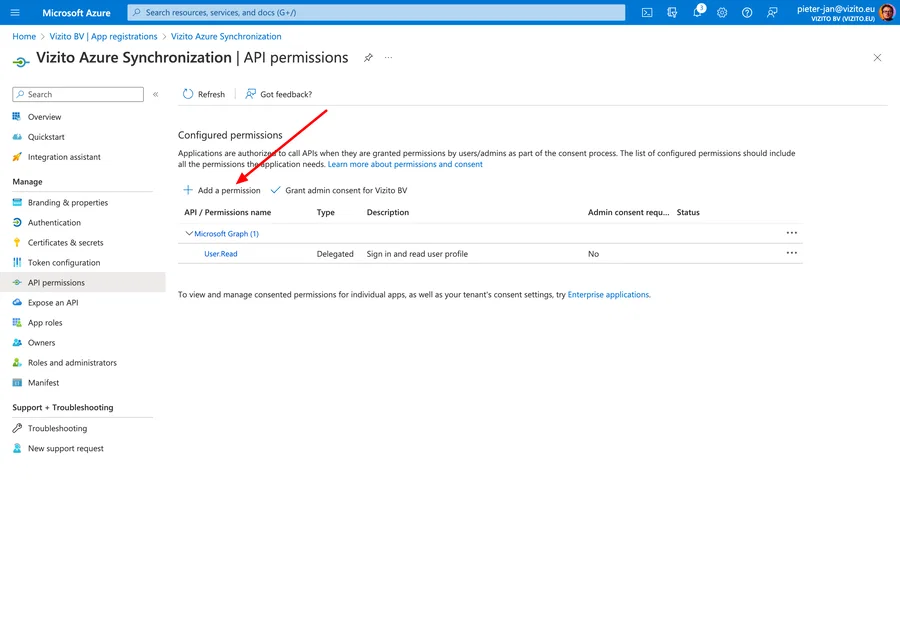
Click on Add a permission:
Click on the Microsoft Graph rectangle:
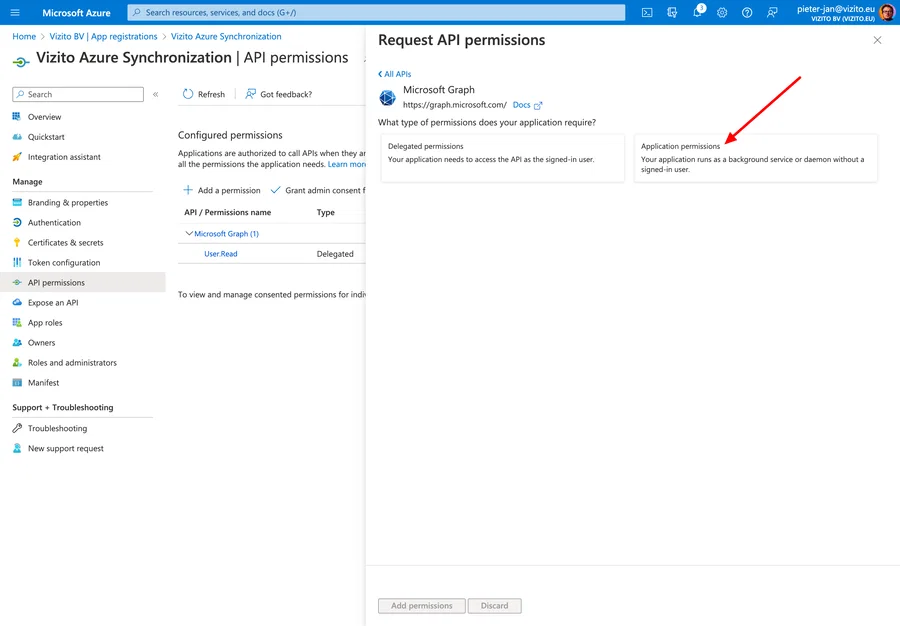
In the following window, click on the Application permissions rectangle:
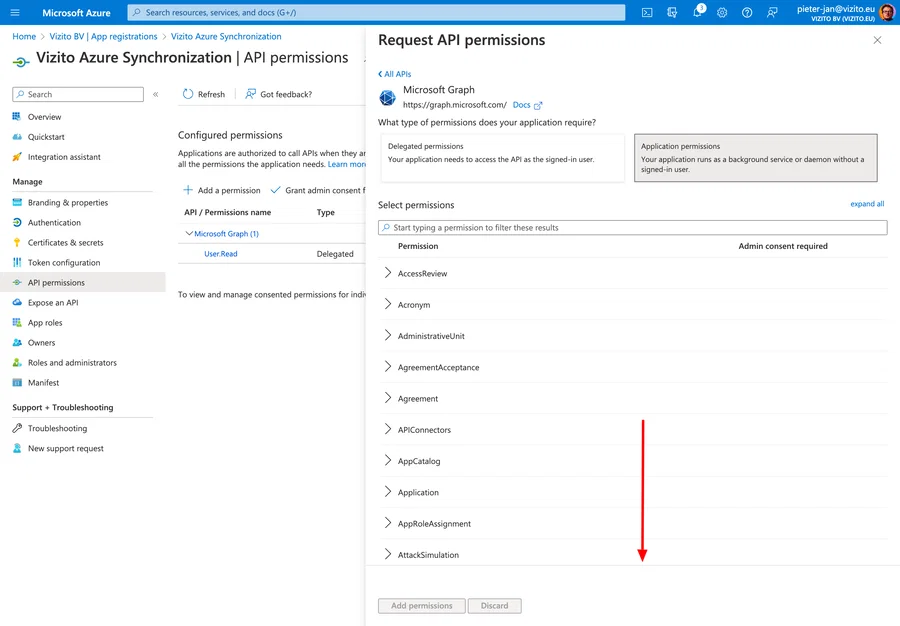
Scroll down until you come across the Group list and click on it:
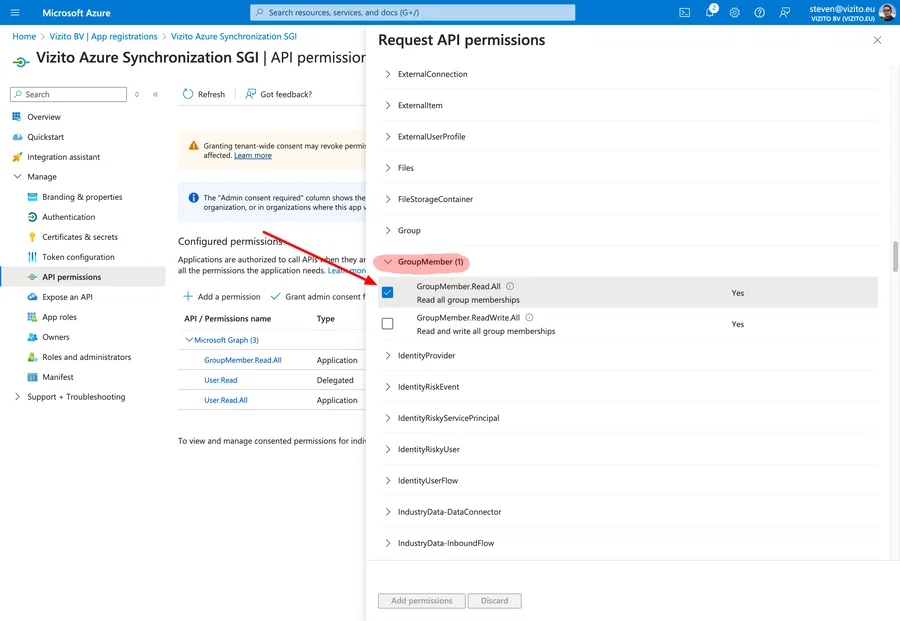
Click the checkbox for GroupMember.Read.All:
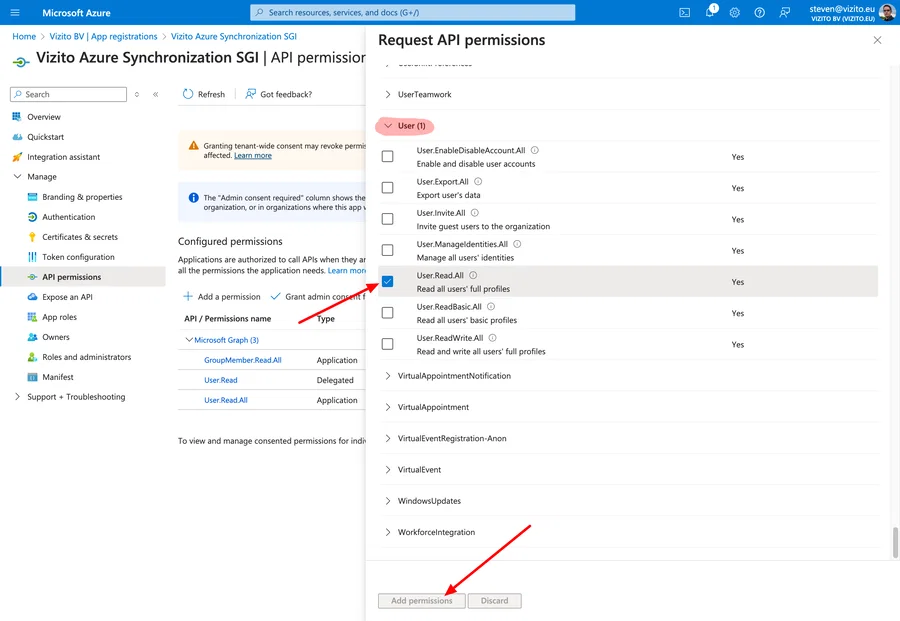
Scroll down until you come across the User list and click on it.
Click the checkbox for User.Read.All and then click on Add permissions:
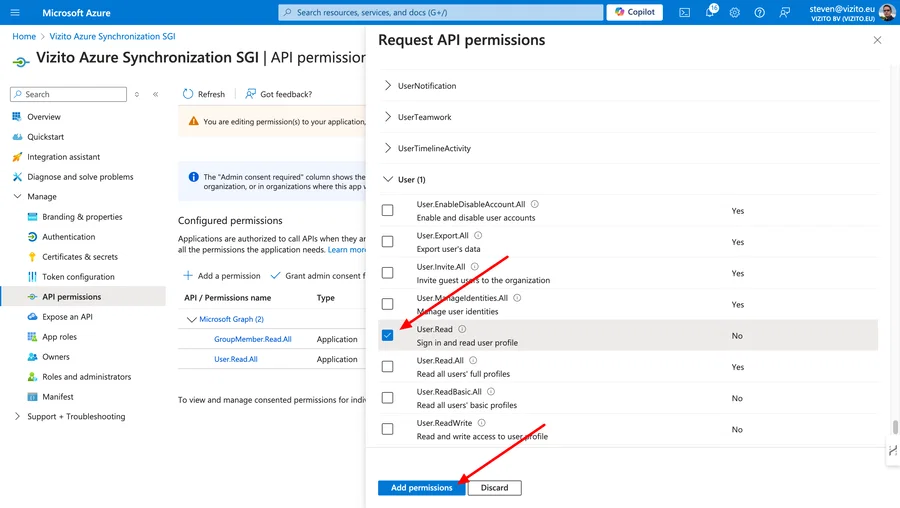
Also add a delegated permission
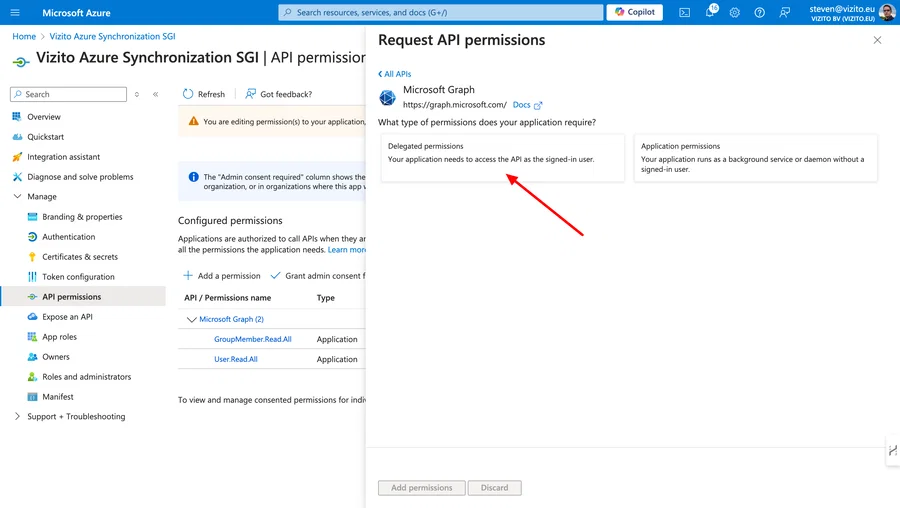
for User.Read
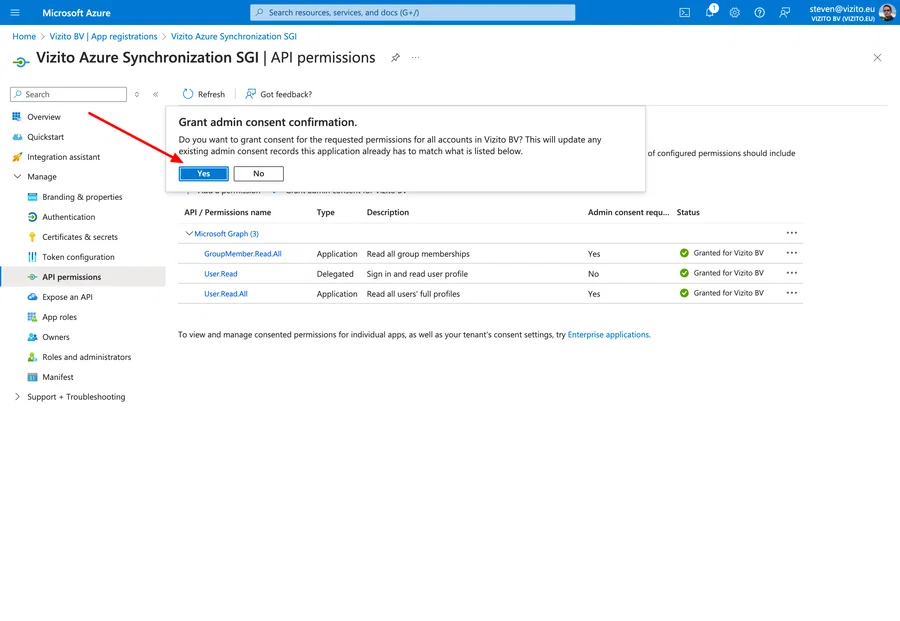
Once the permissions are added, you also need to grant admin consent for those permissions.
You can do that by clicking on the Grant admin consent for [ORGANIZATION] button:
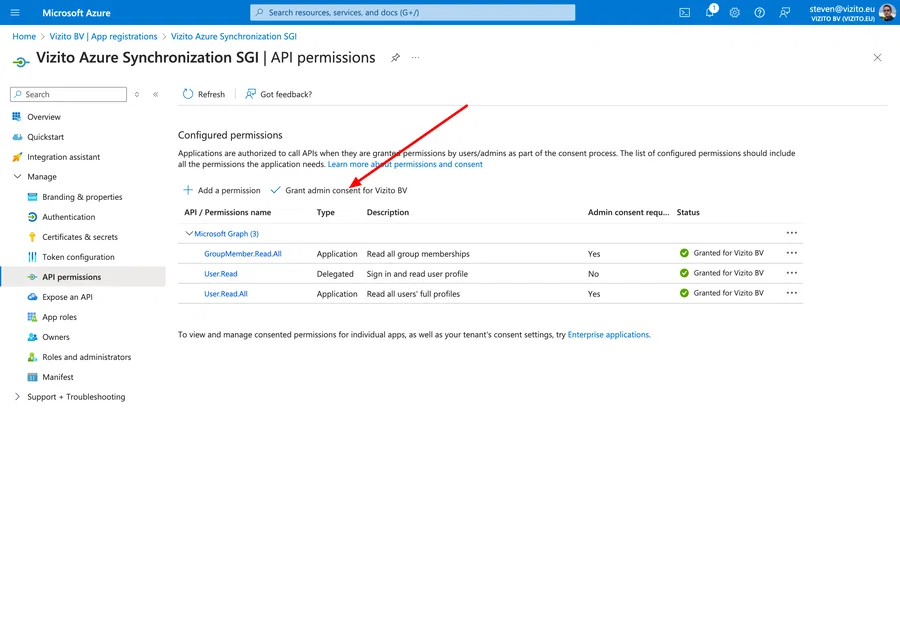
And confirm this action:
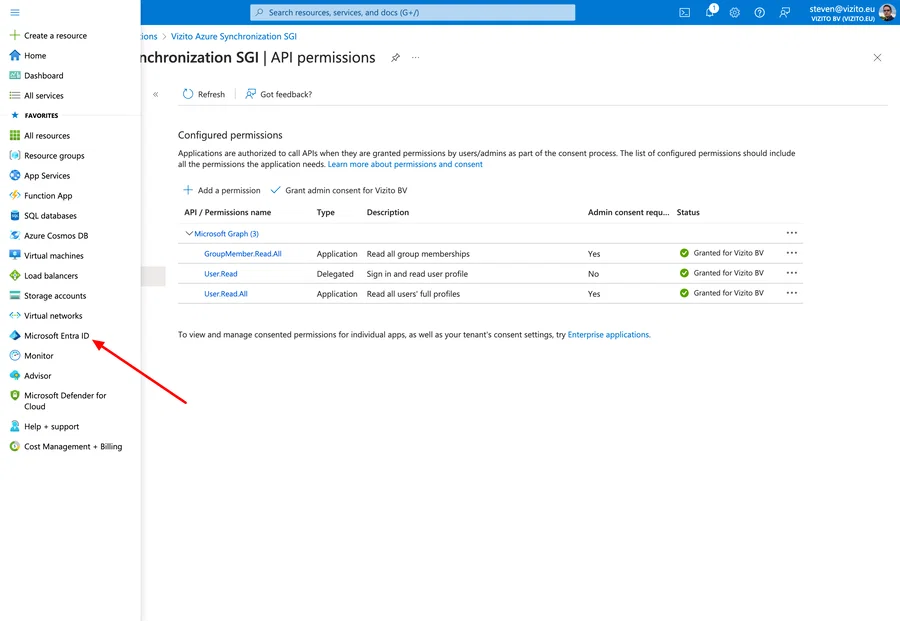
Now, go back to Azure Entry ID by clicking on the hamburger icon in the top left corner:
Now click on Groups in the left hand menu:
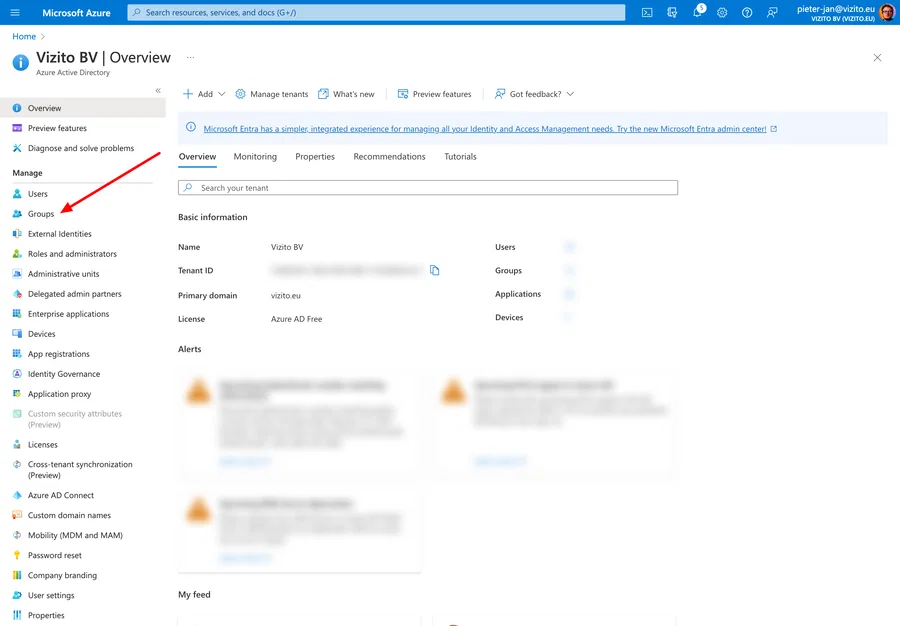
Find the group of users that you want to synchronize with Vizito. If you do not yet have a group, create one and assign some users to it. Learn how to do this on the Azure documentation page.
And copy or write down the Object ID:

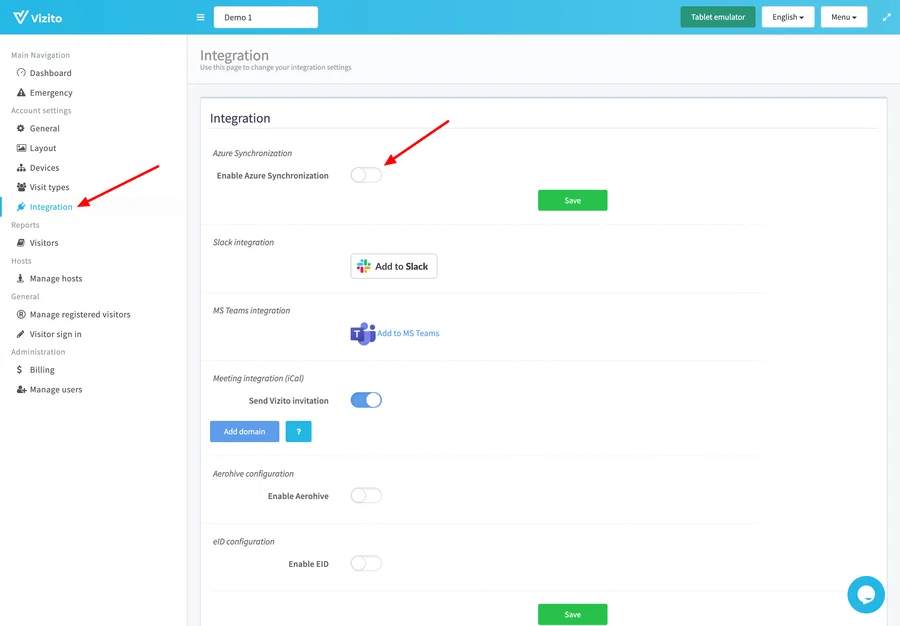
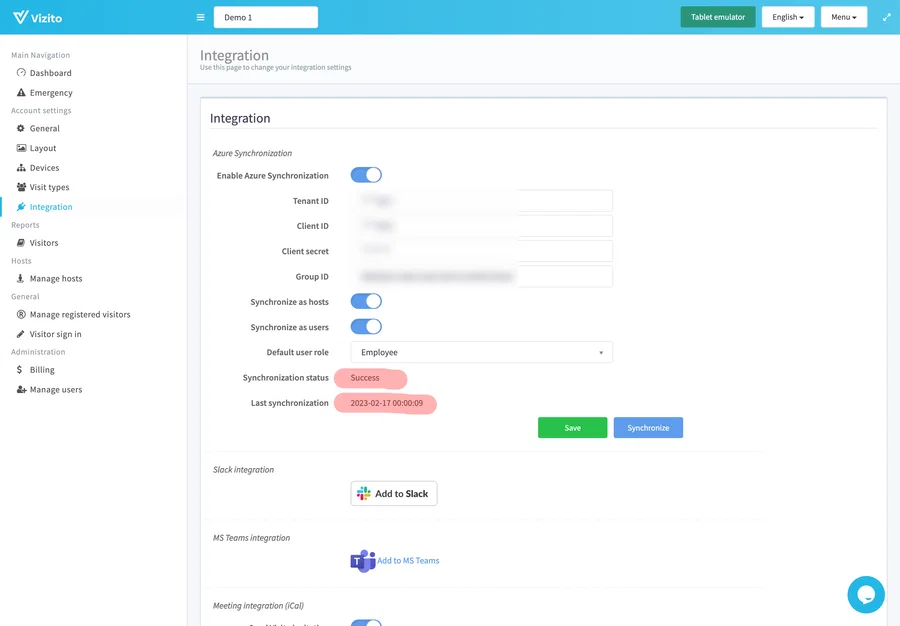
Step 2: Configure the collected Azure information in the Vizito backoffice
Now, open the Vizito Backoffice Integrations page, enable Azure Synchronization:
Fill in the following information:
- Tenant ID
- Client ID
- Client Secret
- Group ID
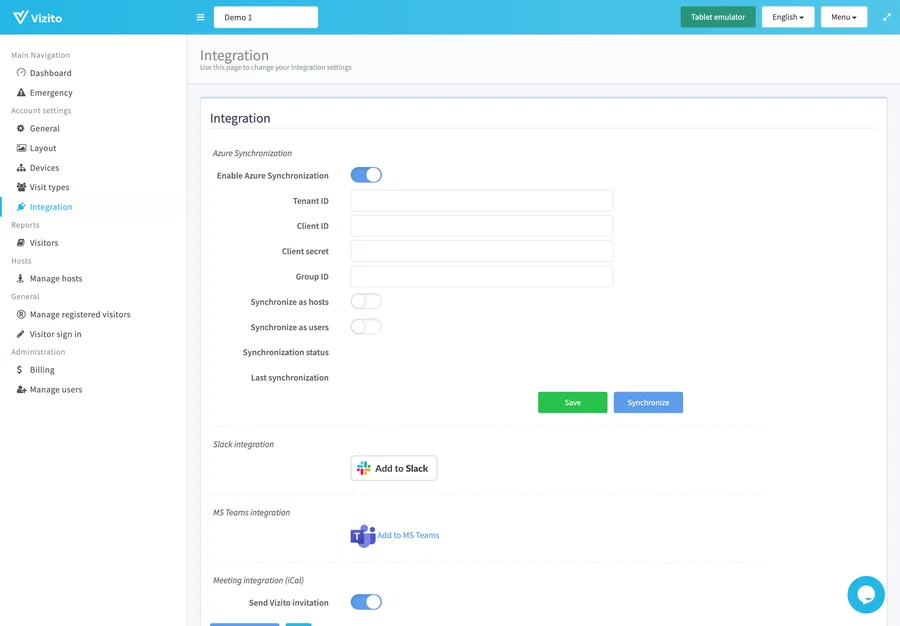
And now choose if you want to synchronize the Azure users as:
- Synchronize as hosts: this way all employees in that user Group will be available as a host from which the visitor can make a selection. The email address and, if available, the phone number will also be synchronized for sending notifications to the user when the visitor signs in or out.
- Synchronize as users: this way your users can log in to the Vizito backoffice using their Microsoft account via Single Sign On.
- Default user role: choose the default role that is applied to the users. Check out which roles Vizito offers.
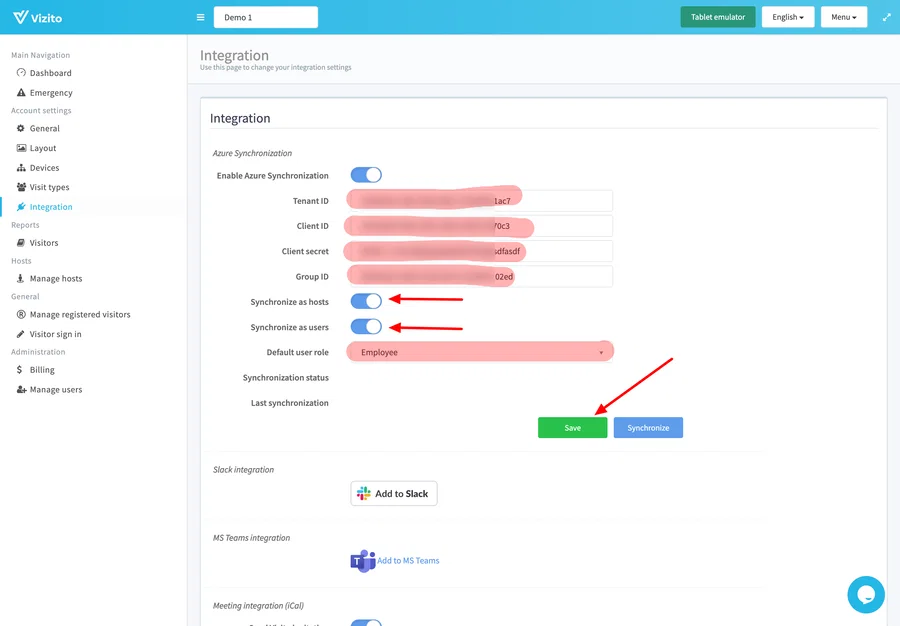
Now that everything is saved, you can already initiate a manual synchronization to see if everything is working.
Step 3: Manual synchronization.
You can do a manual synchronization from the integrations page by clicking on the blue Synchronize button:
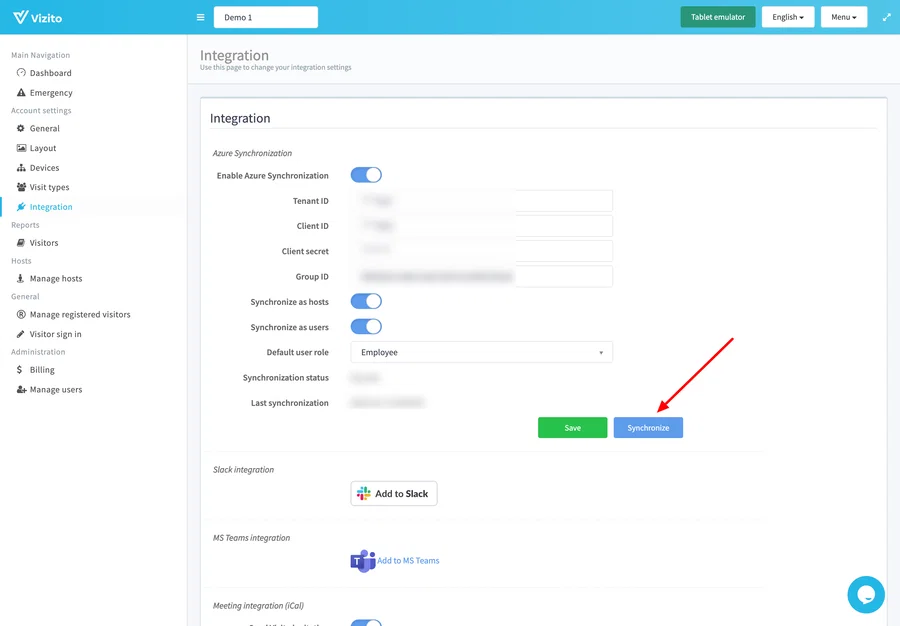
If all the details are correct then you should see that the synchronization status states: Success. If not, check if everything is in order and re-enter the details that you got from Azure.
Note: Under General, scroll down to Global Settings, and make sure that the Host datasource is set to “Managed within Vizito”.