Multi-tenant
In this article
A multi-tenant setup lets several companies in the same building share one reception device. Use it when visitors arrive at a shared entrance and have to pick the company they are visiting before they sign in.
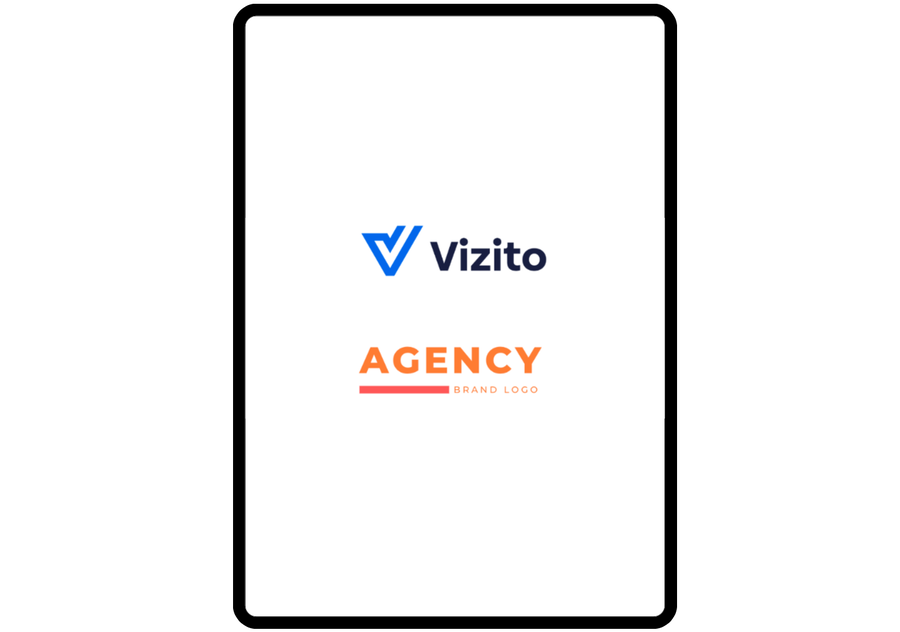
Every tenant keeps its own Vizito subscription and its own account, so each company only sees the data of its own visitors and keeps its own branding, privacy policy and agreements. What the tenants share is the device: all of their accounts are linked to the same tablet, and the tablet opens on a welcome screen showing the logos of every company linked to it.
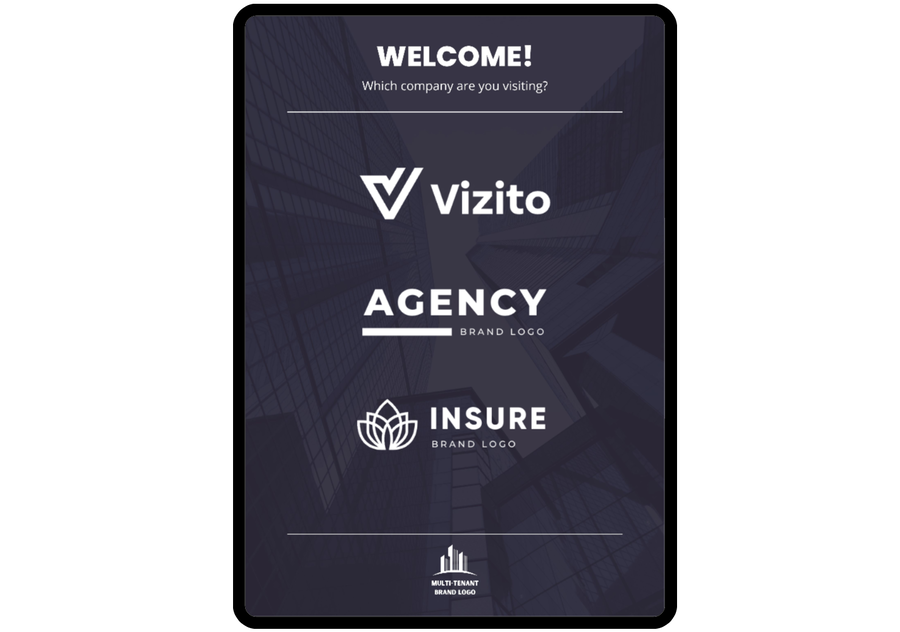
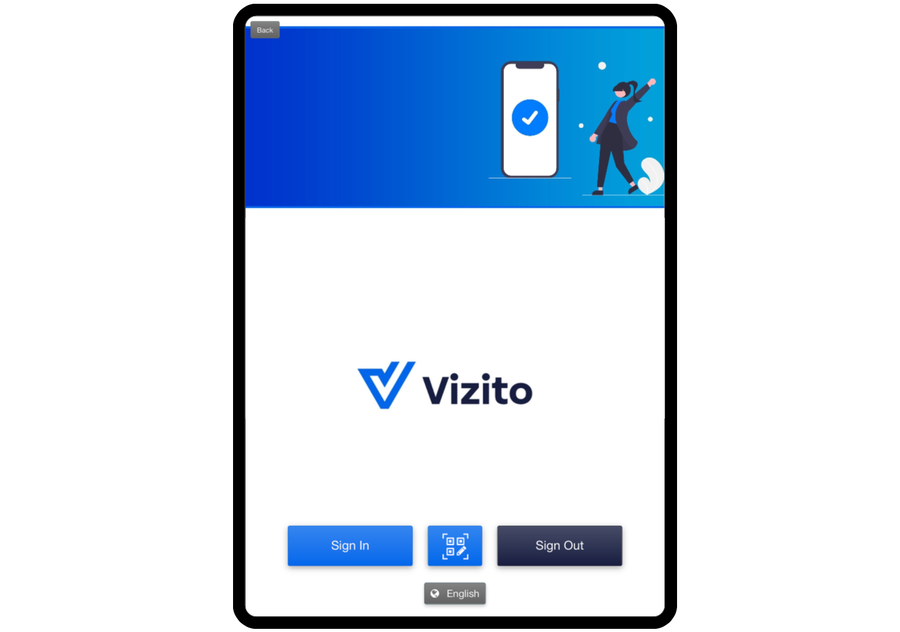
The visitor taps the logo of the company they are visiting and continues on that company’s own sign-in screen.
Setting up multi-tenant
The first company pairs the device, then hands a link code to each of the other tenants.
-
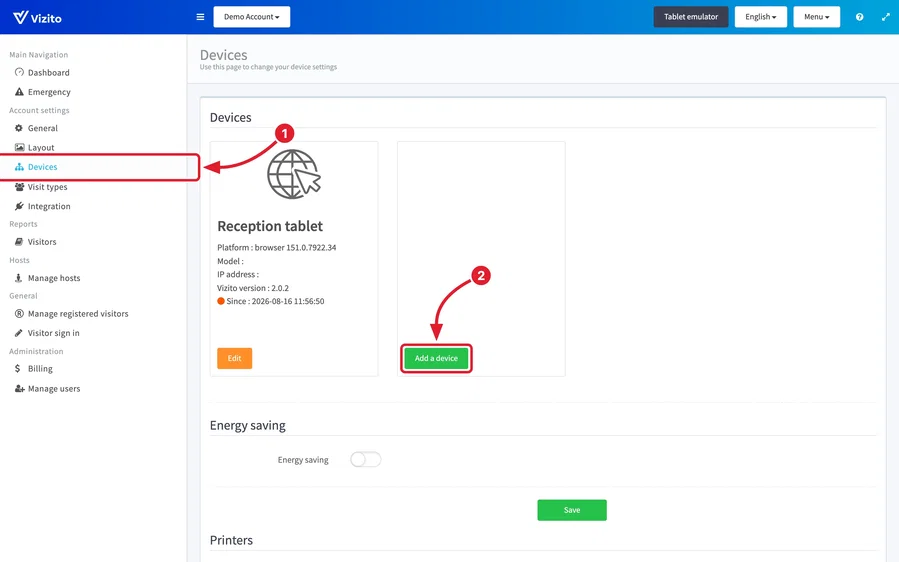
Go to Account settings > Devices in the Vizito backoffice and click “Add a device”.
-
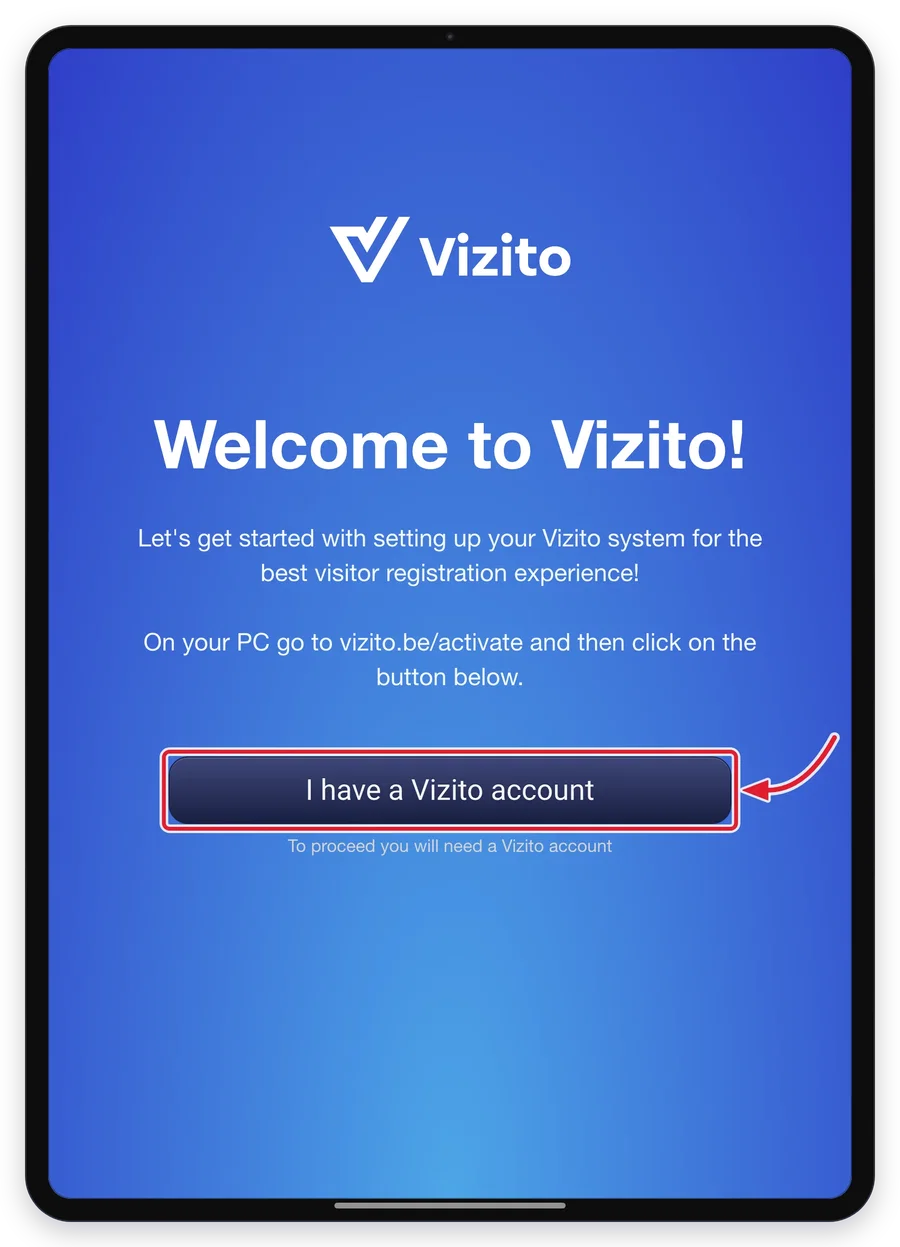
On the tablet, tap “I have a Vizito account”.
-
Read the device token the tablet now shows.
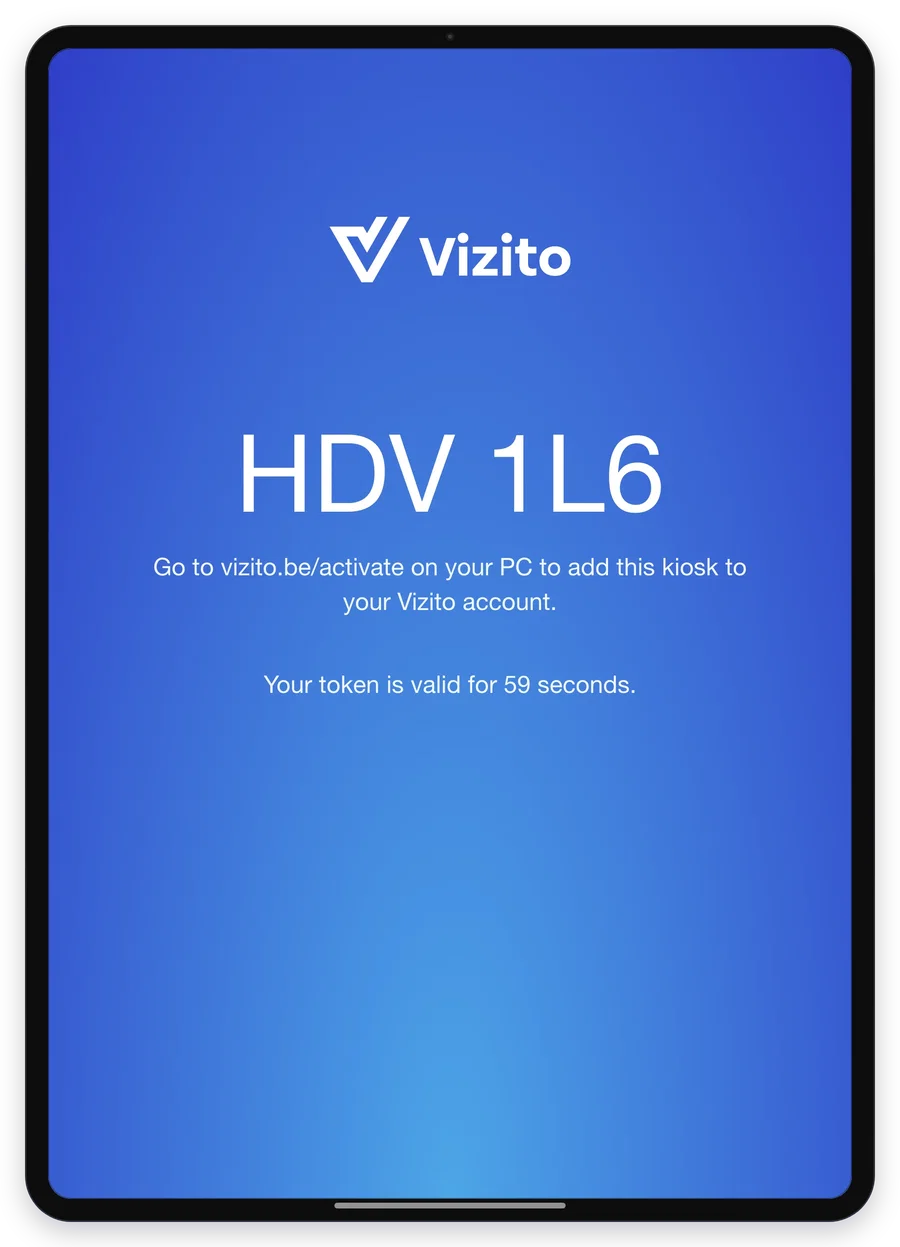
The token is valid for about a minute. If it expires before you have entered it, the tablet shows a new one.
-
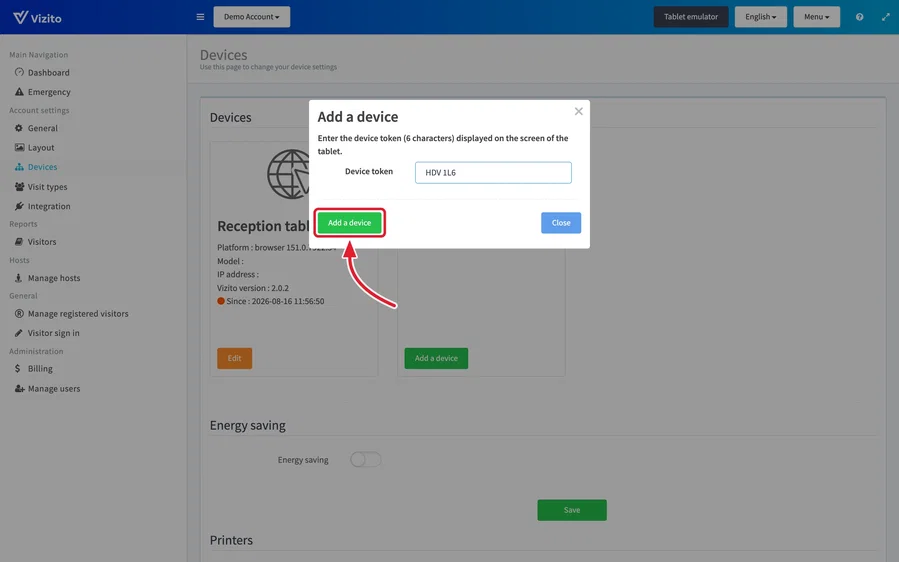
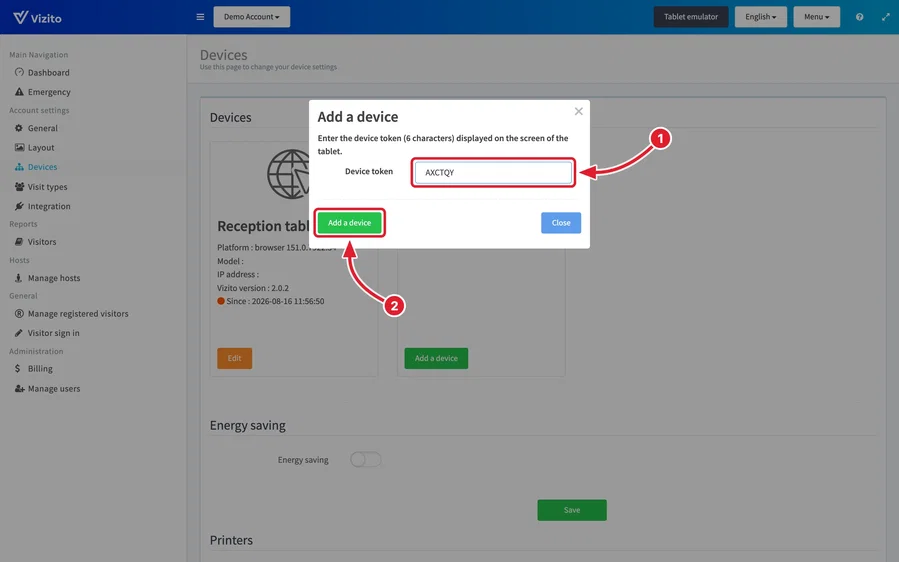
Enter that token in the “Device token” field of the “Add a device” dialog and click “Add a device”. The tablet appears as a card on the Devices page.
-
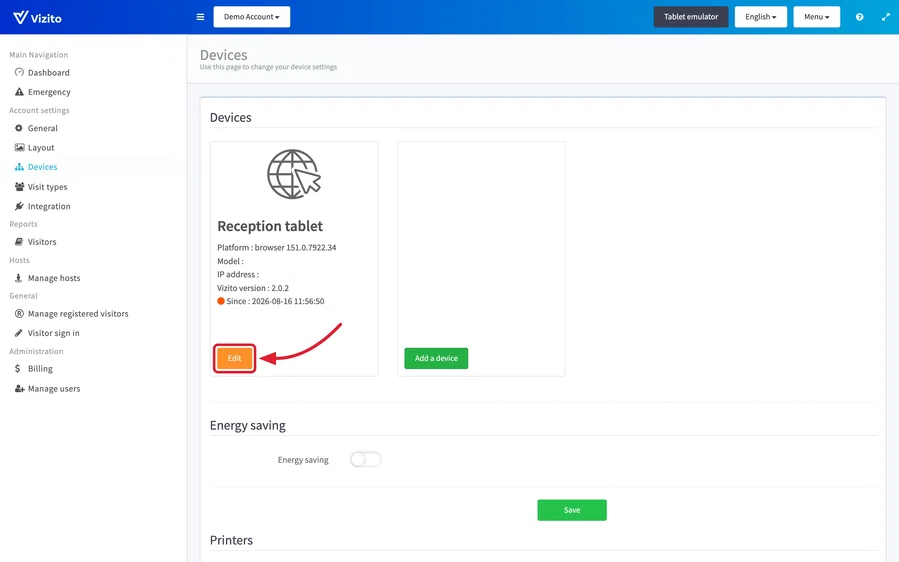
Click “Edit” on the device card to open Device configuration.
-
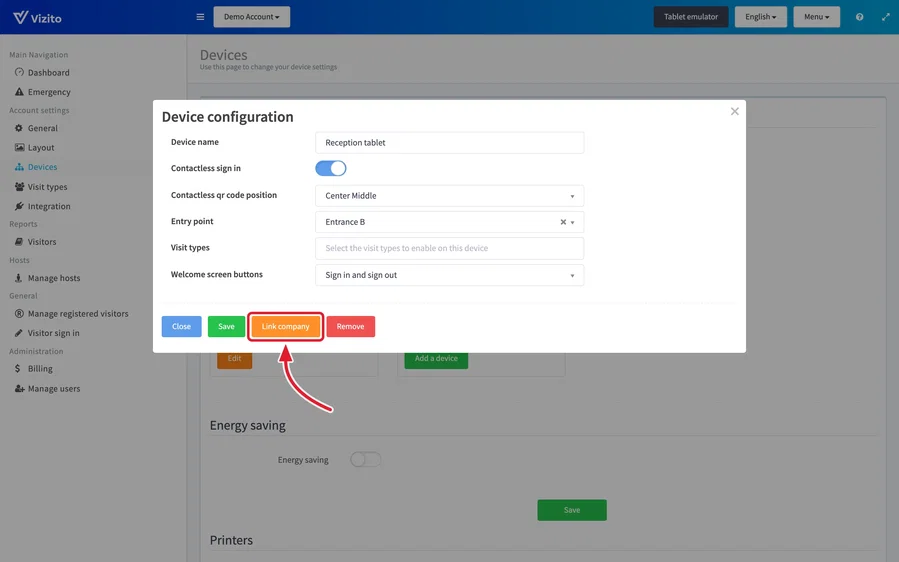
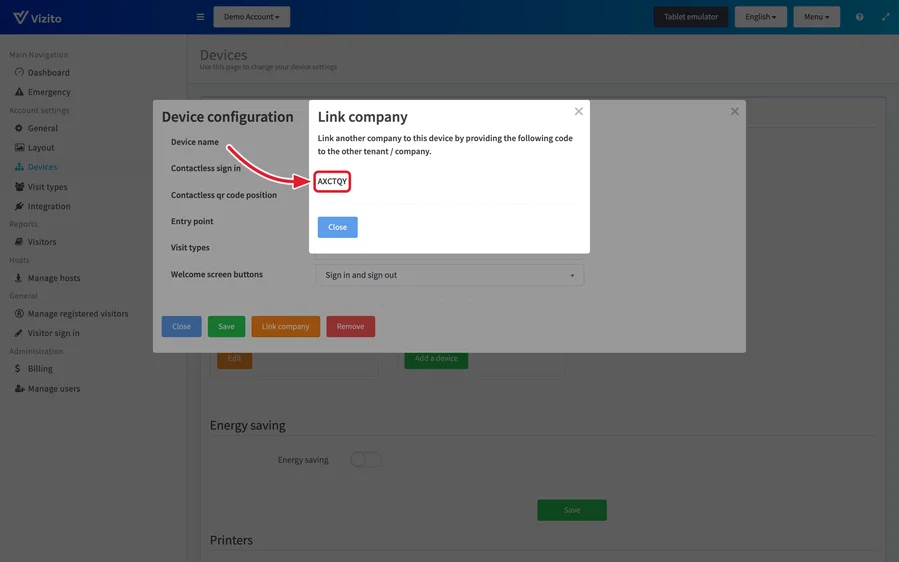
Click “Link company”.
-
Copy the six-character code and send it to the next company in the building.
-
Have the other company add the same device from their own Vizito account: Account settings > Devices > “Add a device”, enter the code you sent them, and click “Add a device”. The screenshot below is taken in a demo account, but the second tenant does this in their own backoffice.
The device now shows the logos of both companies.
To add another tenant, repeat steps 5 to 8: click “Edit” on the device, click “Link company”, and send the new code to the next company.
Customizing the multi-tenant welcome screen
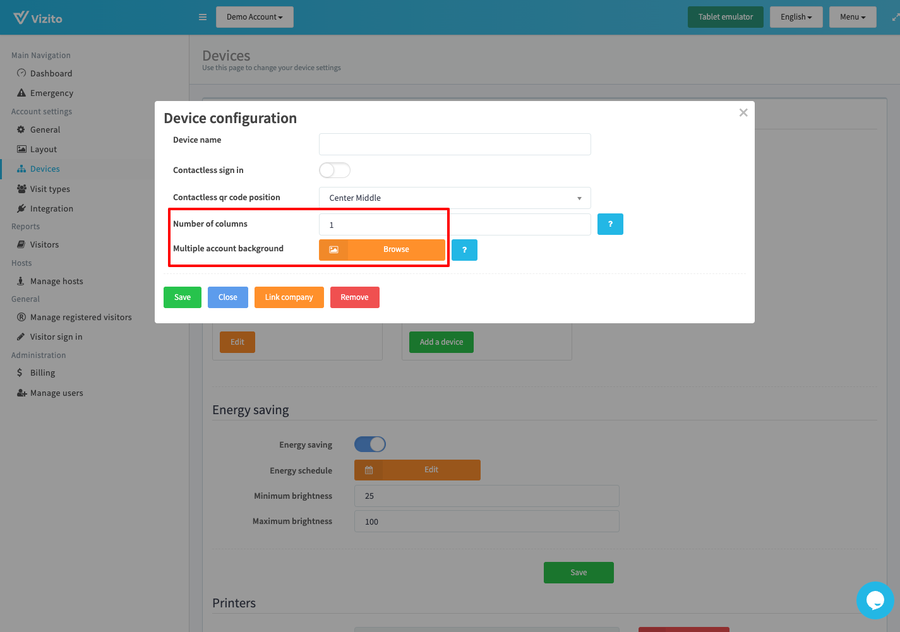
As soon as a device is linked to more than one company, two extra settings appear in Device configuration: “Number of columns” and “Multiple account background”. With a single company they are not shown.
Device configuration also holds settings that apply to this device only: “Device name”, “Contactless sign in”, “Contactless qr code position”, “Entry point”, “Visit types” and “Welcome screen buttons”.
-
Go to Account settings > Devices and click “Edit” on the device.
-
Set “Number of columns” to the number of columns the logos should be spread over.
-
Click “Browse” next to “Multiple account background” and upload your background image. For best results, use dimensions of 2048 x 2950px.
-
Click “Save”.
For a consistent look, ask each company to upload a white version of their logo on their own Layout page. If the tenants prefer their coloured logos, pick a plainer, more neutral background so the logos stay readable.