Manage locations & location groups
In this article
A location is a site with its own Vizito configuration. A location group combines several locations into one logical entity, so you can report across all of them from a single dashboard.
You manage both on the Locations page.
Open the Locations page
-
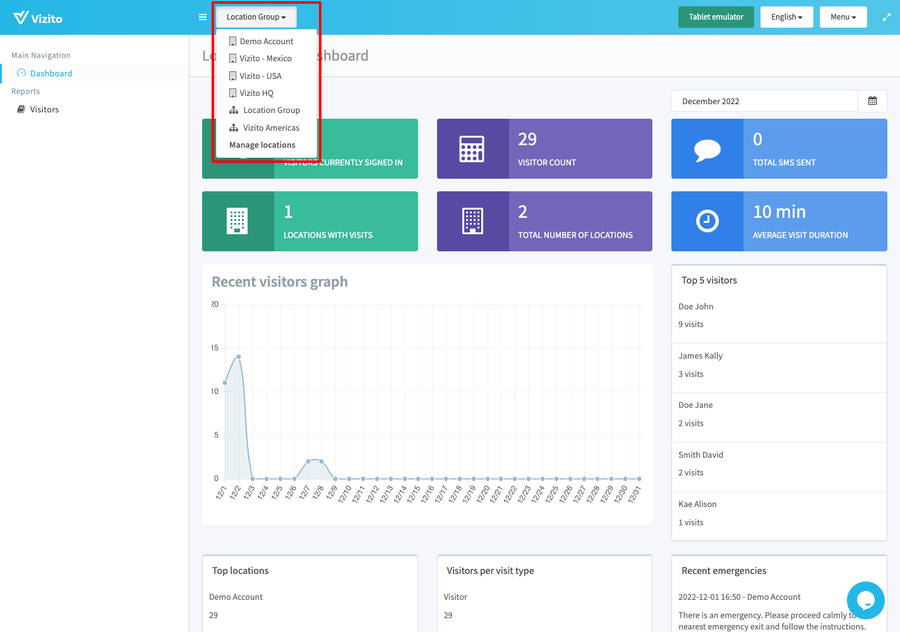
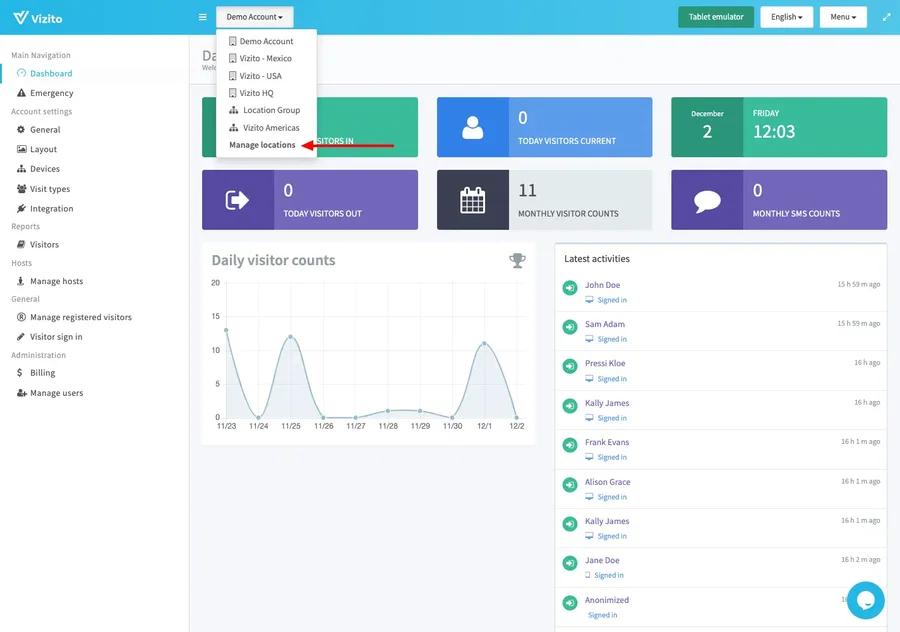
Open the Vizito backoffice and click the button in the top bar, next to the menu button. It is labelled with the location you are working in, so in the example below it reads “Demo Account”.
-
Select “Manage locations”, the last entry in the list.
Add a location
-
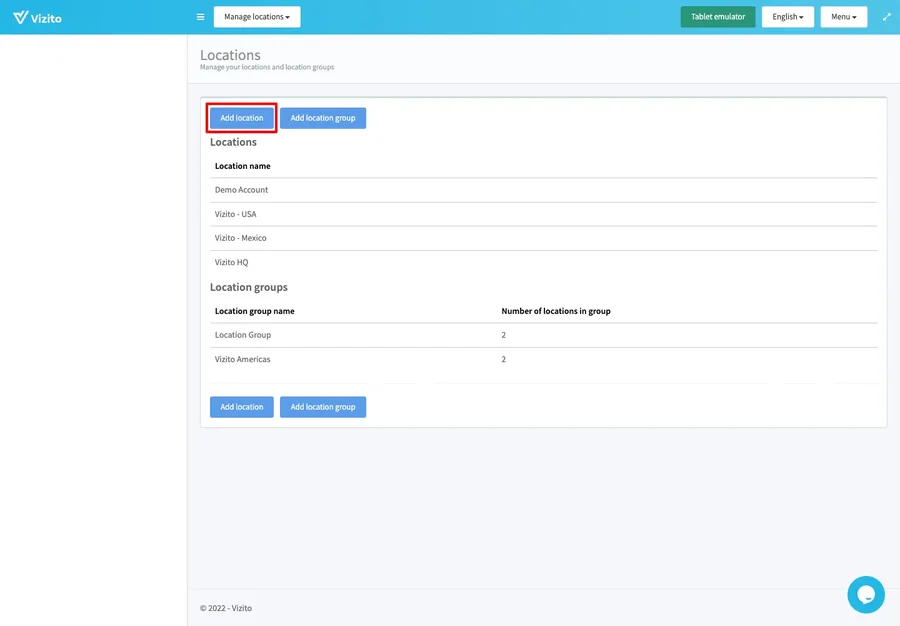
On the Locations page, click “Add location”.
-
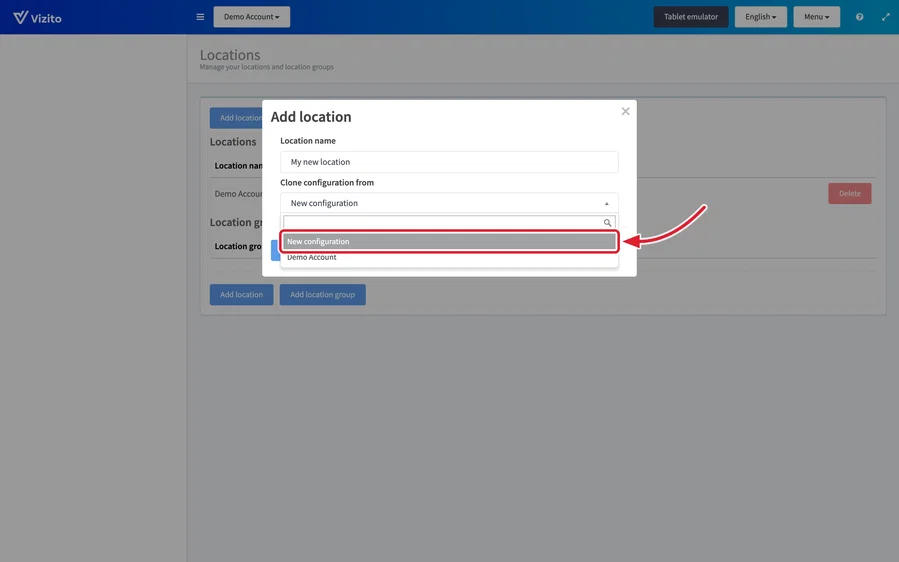
Fill in “Location name”.
-
Choose what the new location starts from under “Clone configuration from”. Select “New configuration” for a brand new location, or select an existing location to copy its configuration. The list has a search box, which helps once you run more than a handful of locations.
-
Click “Add location”.
Note that Registered visitors and Hosts are not copied when you clone an existing location. Give the new location its own name and address under “Account settings” > “General” once it exists: see Settings.
What a new location costs
A location is licensed on its own. Adding one does not extend your current plan to the new site: the new location starts as a separate trial of 14 days, counted from the day you add it, and at the end of that trial it needs a subscription of its own on its own “Administration” > “Billing” page. That holds when you clone a location that is already subscribed, and it holds during your own trial: a second location added on day 10 of your trial gets a full 14 days of its own.
A location cloned from another inherits the billing details of that location, so the name on the invoice, the VAT number and the invoice address are filled in once. The subscription, the plan, the invoices and the monthly visitor and text message limits of the plan are per location: see Billing. Contact us through the chat in the backoffice or at info@vizito.eu if you would rather have several locations on one invoice or on the same renewal date.
Delete a location
- On the Locations page, click “Delete” on the row of the location you want to remove. The button stays greyed out while the account has only one location.
- Type the word DELETE in the confirmation box.
- Click “Yes”.
Add a location group
-
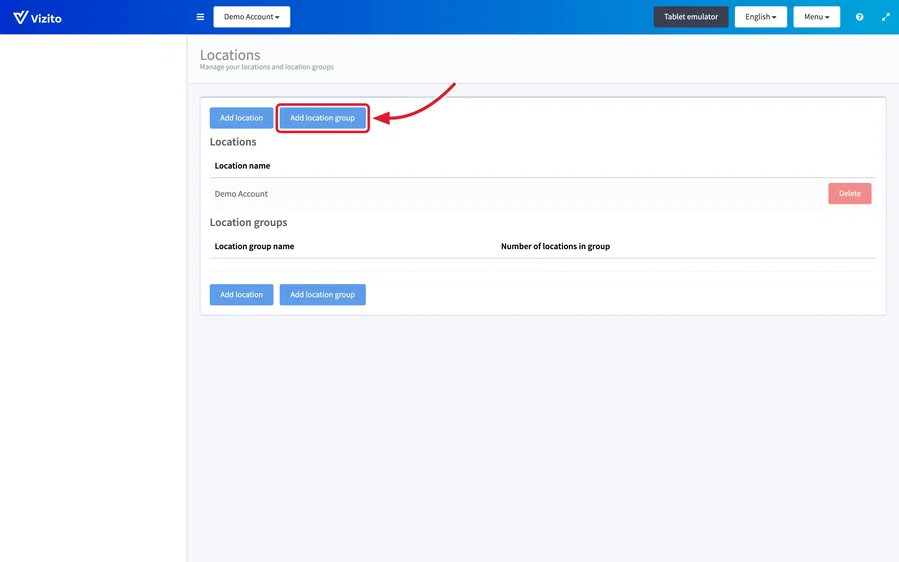
On the Locations page, click “Add location group”.
-
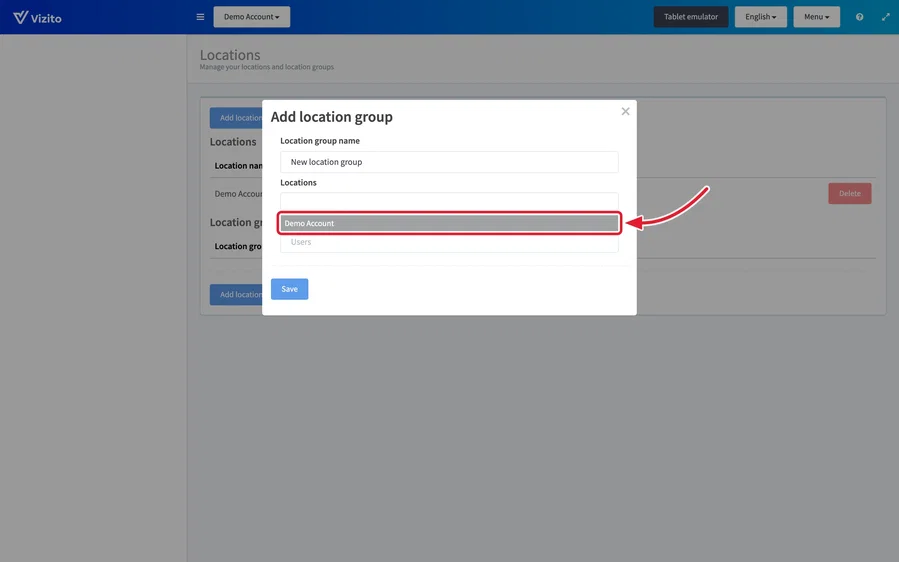
Fill in “Location group name”.
-
Select under “Locations” which locations are part of the group.
-
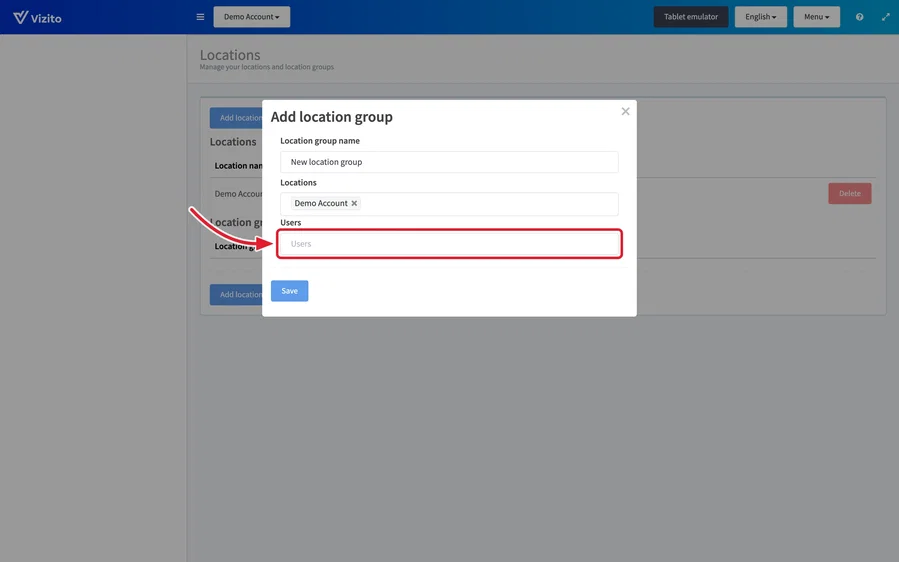
Optionally select under “Users” which users should be able to access this location group.
-
Click “Save”.
Work in a location group
Open the same dropdown in the top bar and select your new location group. The group has its own dashboard and a visitor log that spans every location in it.