Add visitor notes
A visitor note is a free-text field your staff fill in from the backoffice after a visitor has signed in. Use it for the details you only learn during the visit and do not want to ask at the front desk: the building someone was escorted to, a parking spot, a reminder to hand something over, or an incident to flag.
Notes are not a separate feature. A note is a sign-in field you add to a visit type with the status “Hidden”, which keeps it off the sign-in screen but leaves it editable from the backoffice. Add that field first, otherwise there is nothing to type into.
Add a note field to the visit type
- Open the Vizito backoffice and select “Account settings” > “Visit types” in the left menu.
- Click “Edit” next to the visit type you want to change.
- Open the “Sign-in fields” tab and click “Add field” under the list.
- Fill in a “Field description” your team will recognise, for example “Note”.
- Set “Status” to “Hidden”, leave “Type” on “Text” and click “Add field”.
- Click the green “Save” button at the bottom of the visit type. Nothing on this tab is stored before you do.
“Hidden” means the field is not shown to the visitor, but you can still use it from the backoffice. The other statuses, the field types and what else you can change per field are covered in sign-in field configuration.
Each visit type has its own set of sign-in fields, so repeat this for every visit type whose visits you want to annotate.
Add a note to a visit
-
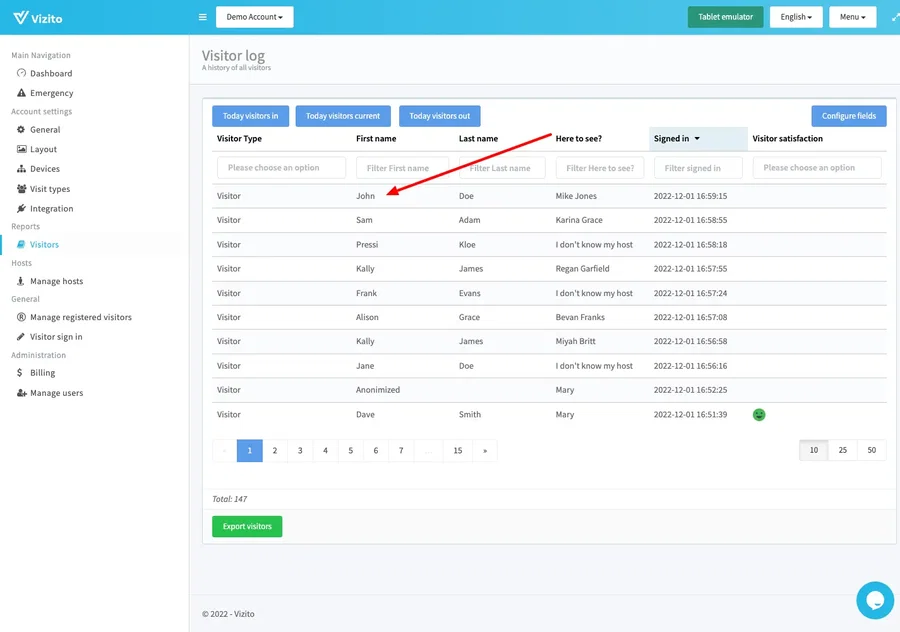
Select “Reports” > “Visitors” in the left menu to open the visitor log.
-
Click the row of the visit you want to annotate, anywhere except the checkbox at the start of the row. The “Visitor details” window opens.
-
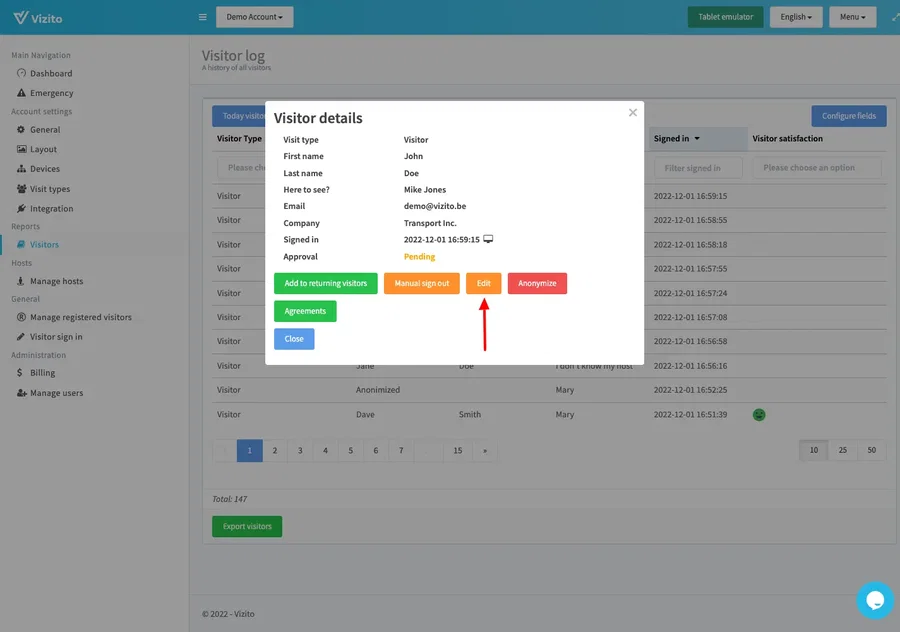
Click “Edit” in the “Visitor details” window.
-
Type your note in the field you added and click “Save”.
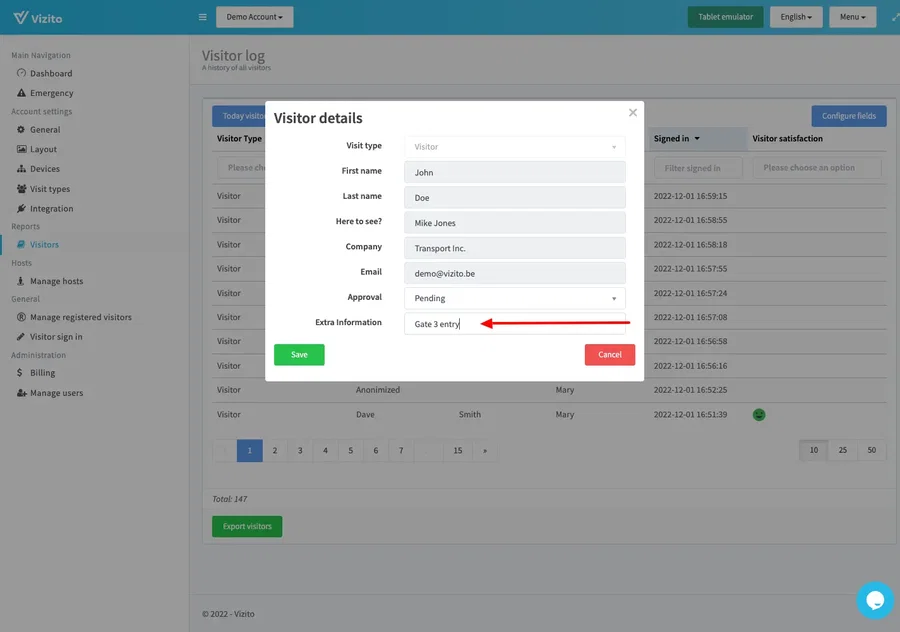
Note: the standard rows in this window are read-only. “Visit type”, “First name”, “Last name”, “Company”, “Here to see?” and “Entry point” are all greyed out and cannot be changed after a sign-in. Only the fields you added to the visit type yourself can be typed into.
See your notes in the visitor log
- Select “Reports” > “Visitors” in the left menu to open the visitor log.
- Click “Configure fields” at the top right of the list.
- Switch on your note field and click “Close”.
The column is off by default, so until you switch it on the log shows no notes at all. To read or change the note of a single visit, open its row and click “Edit” again.
Keep in mind
A hidden field is never shown on the sign-in screen, so a visitor cannot fill in their own note. If you do want visitors to answer it themselves, give the field the status “Mandatory” or “Optional” instead of “Hidden”.
The note is only printed on the badge if you add its placeholder to the badge template of the visit type, under “Account settings” > “Visit types” > “Edit” > “Badge”.