Visitor log
In this article
The visitor log is the history of every sign in at your location: who came, for whom, when they arrived and when they left. Use it to look up a visit, to sign out somebody who forgot to, to add a note to a visit, and to download the list for an audit, a safety report or an invoice.
Open the Vizito backoffice and select “Reports” > “Visitors” in the left menu. The page is titled “Visitor log”.
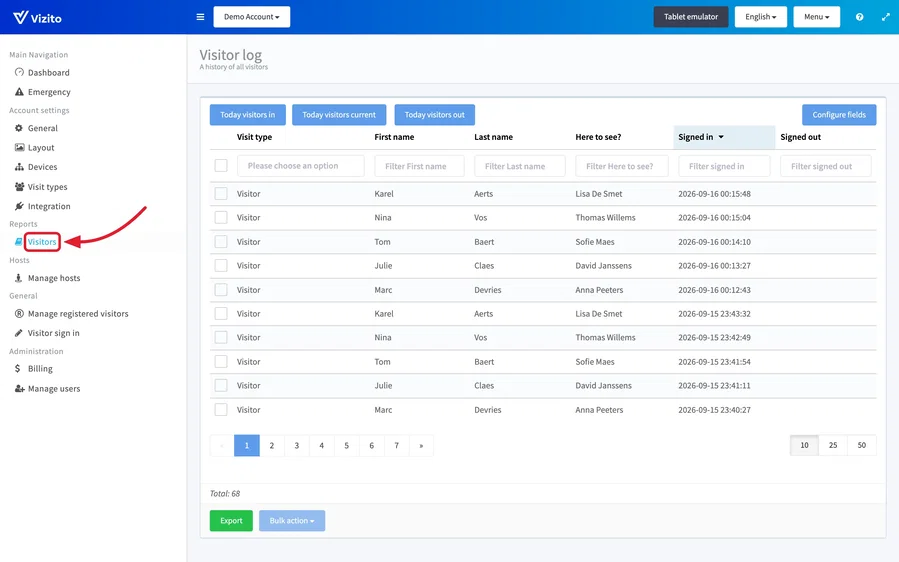
The list is sorted on “Signed in”, newest first. Click a column heading to sort on it. The buttons under the list switch between 10, 25 and 50 rows per page, and “Total:” counts the visits that match your filters.
Is there a visitor log on the tablet?
No. The tablet only signs visitors in and out; it keeps no history and shows no list of past visits. The one list it has is the sign-out list, which shows the visitors who are still signed in, and only for today unless “Number of days you’ll be able to sign out after signing in” in the advanced settings says otherwise. That list is for signing out, not for looking anything up.
The visitor log lives in the backoffice, and the backoffice opens in any browser, on a phone as well as on a PC. A receptionist who wants to see the day’s visitors next to the tablet opens backoffice.vizito.be on a second device, or on the tablet itself outside kiosk mode, and uses the “Today visitors in” button described below. Give them the Receptionist role: see User management and user roles.
Filter the list
Three buttons above the list are shortcuts for today: “Today visitors in” shows everyone who signed in today, “Today visitors current” everyone who is still in the building, and “Today visitors out” everyone who already left.
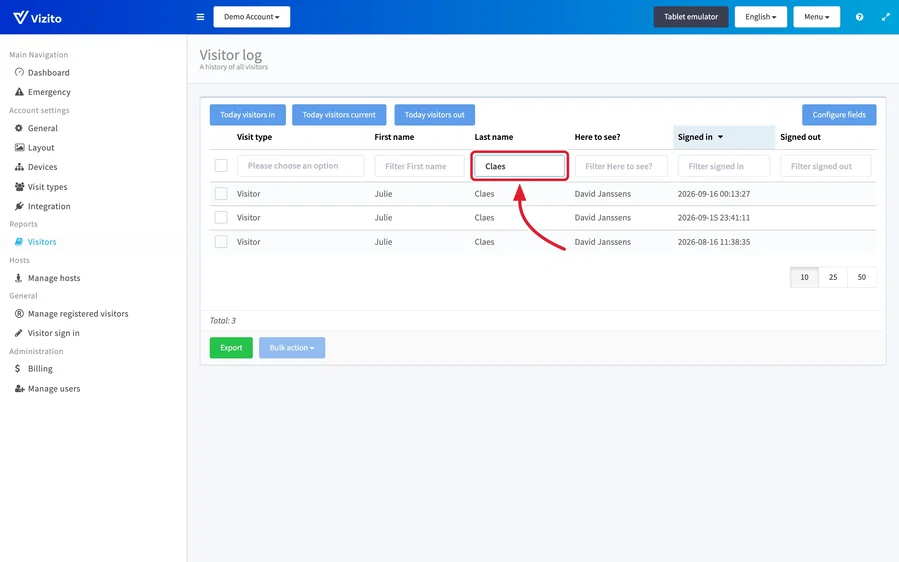
Every column has its own filter in the row under the heading, and the filters combine, so a last name plus a date range is one search.
-
Type in the box under “First name”, “Last name”, “Here to see?” or any other text column. The list narrows as you type, and it matches anywhere in the value, so “peet” finds “Anna Peeters”.
-
Pick a “Visit type” in the dropdown under that heading, which reads “Please choose an option” while nothing is selected.
-
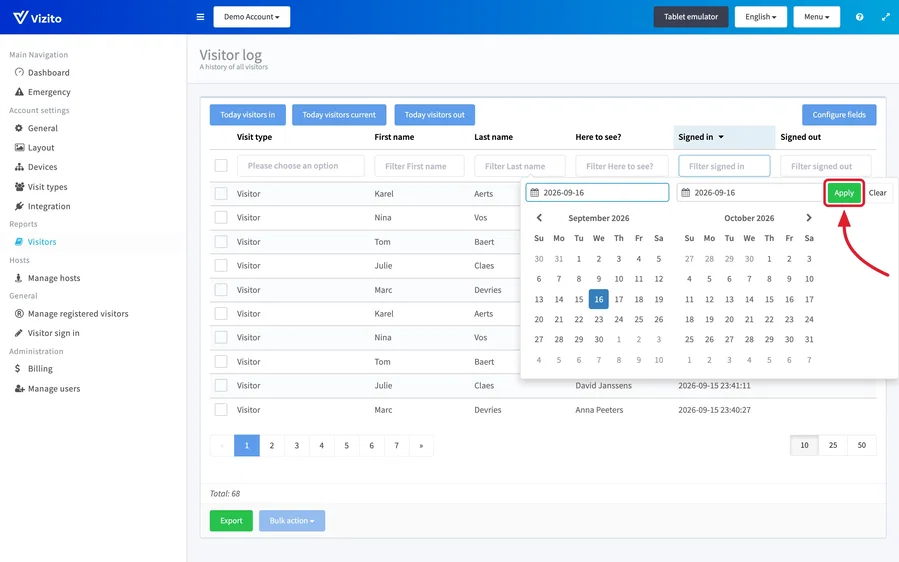
Click the box under “Signed in” or “Signed out” to filter on a date range. A calendar opens with a start and an end date. Choose the two days, or type them in the fields at the top of the calendar, and click “Apply”. “Clear” removes the range again.
The filters are also what “Export” exports, so narrow the list first when you want a file for one month or one host.
Choose the columns
“Configure fields”, top right of the list, decides which columns you see. The log opens with “Visit type”, “First name”, “Last name”, “Here to see?”, “Signed in” and “Signed out”. Switch on “Company”, “Address”, “Zip code”, “City”, “Phone”, “Email”, “Visitor satisfaction”, “Approval”, “Entry point” and any sign-in field you added yourself, such as a note field, and click “Close”. “ID”, at the top of the window and off by default, adds the unique ID of every visit as a column, which is what you need to match an export against another system.
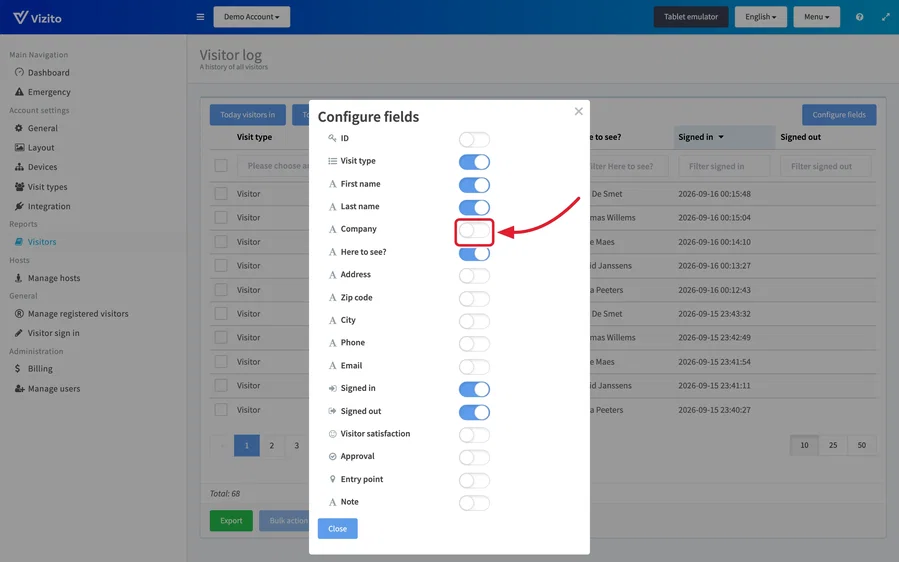
A column you switch on gets a filter box of its own, so this is also how you filter on a value that is not shown by default. If the log looks different from what you are used to, or a filter you relied on is gone, this is the window to check: switching the column back on brings its filter back.
Custom fields only appear here once they exist on a visit type: see Sign-in field configuration and, for a note field your staff fill in after the visit, Add visitor notes.
Open a visit
Click a row, anywhere except the checkbox at its start. The “Visitor details” window shows everything recorded for the visit: the sign-in fields, “Signed in” and “Signed out”, “Visit type”, “Entry point”, and the photo if the visit type takes one.
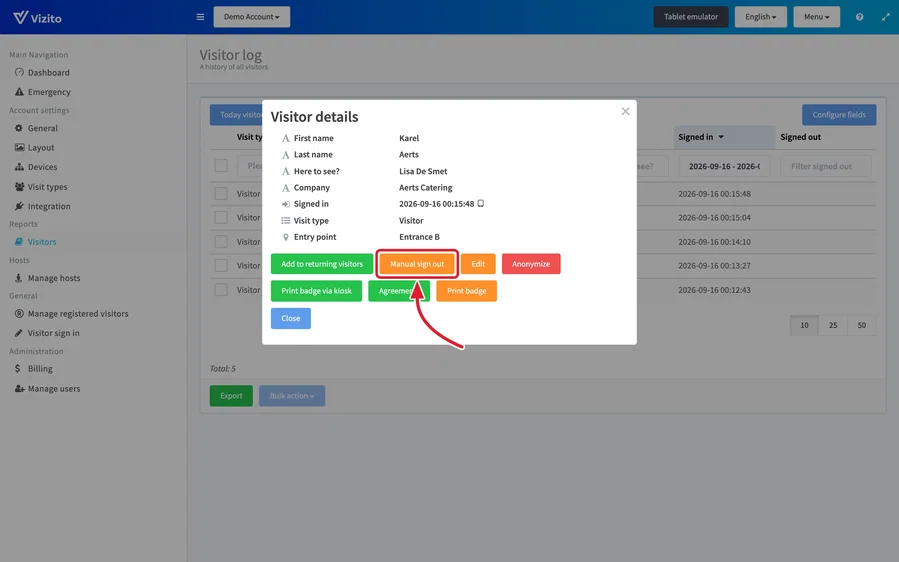
The buttons under the details. Which of them you get depends on your role: see Who can do what.
- “Manual sign out” signs the visitor out now. It is only shown while the visitor is signed in. Use it when somebody left without signing out, so the emergency list and the “Today visitors current” filter stay correct. See Sign out a visitor from the backoffice.
- “Edit” lets you change the fields you added to the visit type yourself, for instance a note. The standard fields are read-only after a sign in.
- “Add to returning visitors” turns this visitor into a registered visitor, so they can look themselves up next time: see Registered visitors.
- “Agreements” opens the agreements the visitor signed during this visit. It is only shown when they signed any.
- “Print badge” and “Print badge via kiosk” print the badge again from your browser or on the printer of the tablet. Both only appear when the visit type prints badges: see Reprint label.
- “Anonymize” removes the personal data of the visit and keeps the statistics: see Privacy settings.
Sign out or print for several visits at once
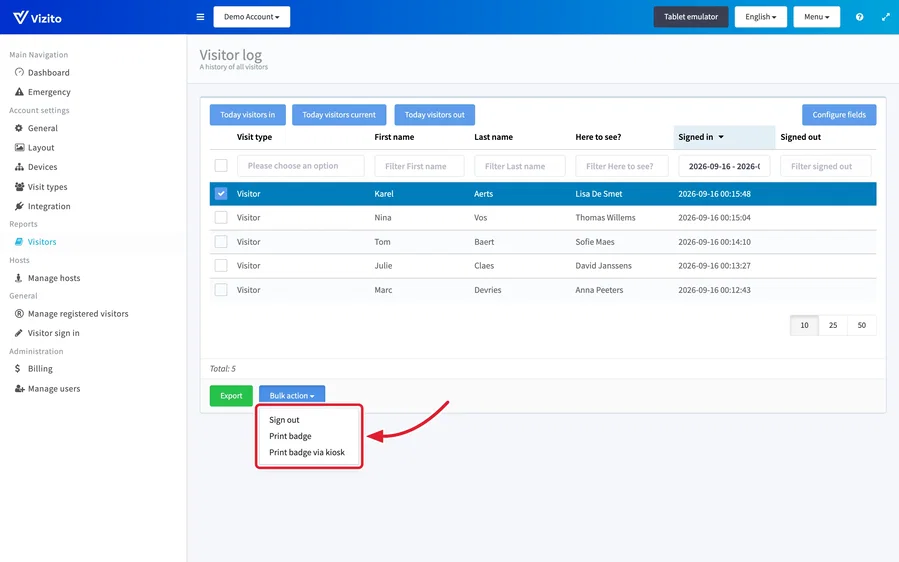
- Tick the checkbox at the start of every row you want. “Bulk action”, under the list, stays greyed out until you tick at least one. The button is missing altogether when your role may not sign out or print from the log.
- Click “Bulk action” and choose “Sign out”, “Print badge” or “Print badge via kiosk”.
Export the visitor list
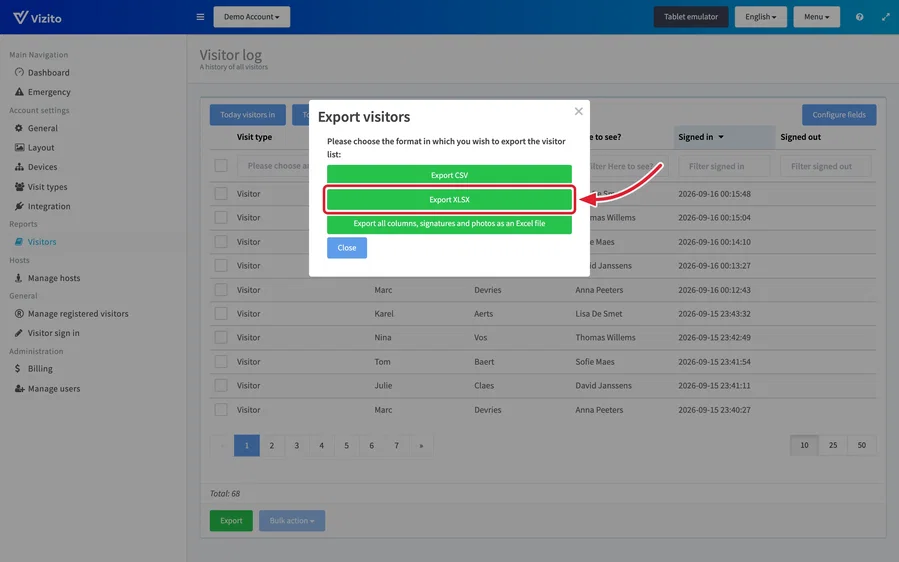
“Export”, under the list, opens the “Export visitors” window, which downloads the visits that match your filters, with the columns you switched on. Every built-in role has the button except Employee, who can read and filter the log on screen but cannot export it. See Who can do what below.
- Set the filters and the columns as described above.
- Click “Export” and choose a format:
- “Export CSV”: a text file every spreadsheet opens.
- “Export XLSX”: an Excel workbook.
- “Export all columns, signatures and photos as an Excel file”: an Excel workbook with every field of the visit type, whether or not it is shown as a column, plus the signature and the photo of each visit.
Print the list of a day
The visitor log has no print button of its own. Two ways work:
- Filter on the day, click “Export” and choose “Export XLSX”, then print the workbook from Excel. This gives you exactly the columns you switched on, in a table that fits the page.
- Set the rows per page to “50” and print the page from your browser. Good enough for a quick list at the desk.
For the people who are in the building right now, use “Emergency” in the left menu instead: that page has a “Print” button and prints the evacuation list. See Emergencies.
Who can do what
Every role that opens “Reports” > “Visitors” can read and filter the log and open a visit. What else you get depends on the role:
- Employee sees only the visits of the host linked to them, and gets “Add to returning visitors”. No “Export” and no “Bulk action”.
- Security guard sees every visit and gets “Export”. They cannot sign out, edit or print from the log, so “Bulk action” is not shown.
- Receptionist gets “Export” as well as “Manual sign out”, “Edit”, “Add to returning visitors”, the two print buttons and “Bulk action”.
- Local admin and Global admin get all of that plus “Anonymize”.
See User management and user roles.
A custom role gets what its privileges say, whichever built-in role it started from. “Open the logbook and visitor details” opens the log, with every visit of the location. “Export the logbook” adds “Export”. “Edit visitors, sign them out, reprint badges” adds “Manual sign out”, “Edit”, the print buttons and “Bulk action”. “Anonymize” needs “Manage data retention and anonymise visitors” on top of that one, and “Add to returning visitors” needs “Add, edit, delete, import and invite registered visitors”.
The list you export in an emergency is a different one: “Emergency” in the left menu holds the visitors who are in the building right now, and its “Export CSV” and “Export XLS” are available to every built-in role that can open it. See Emergencies.
Several locations
The log shows the location you are working in, named in the top bar. A location group has a visitor log of its own that spans all of its locations: see Manage locations & location groups.