Enable badge printing
Vizito prints a visitor badge the moment somebody signs in, but only once two things are true: the visit type the visitor uses has a badge with printing switched on, and the kiosk knows which printer to send the badge to. This article covers both. It works the same way in every setup, whether the printer is on WiFi or Bluetooth and whether the kiosk is an iPad, an Android tablet or a browser.
If you still have to set the printer itself up, do that first: Brother QL-820NWBc setup for the model we recommend most often, or Compatible labelprinters for the full list.
Turn badge printing on in Vizito
The printer will not print anything until the visit type the visitor signs in with has a badge and badge printing is switched on for it.
-
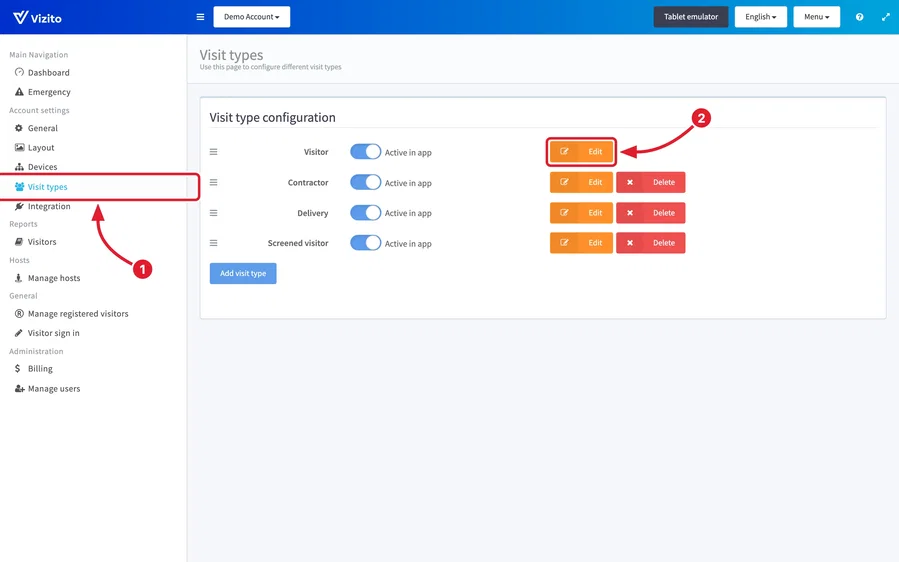
Go to the Vizito backoffice and select “Account settings” > “Visit types” in the left menu.
-
Click “Edit” next to the visit type you want to print badges for.
-
Open the “Badge” tab and look at “Badge template”. If the visit type has a badge, you see a card with a preview of the badge and its name. If it says “No badge for this visit type yet”, click “Choose a template” and add a badge first: see Badge designer. Until the visit type has a badge, both print switches are locked and read “Requires a badge template.”
-
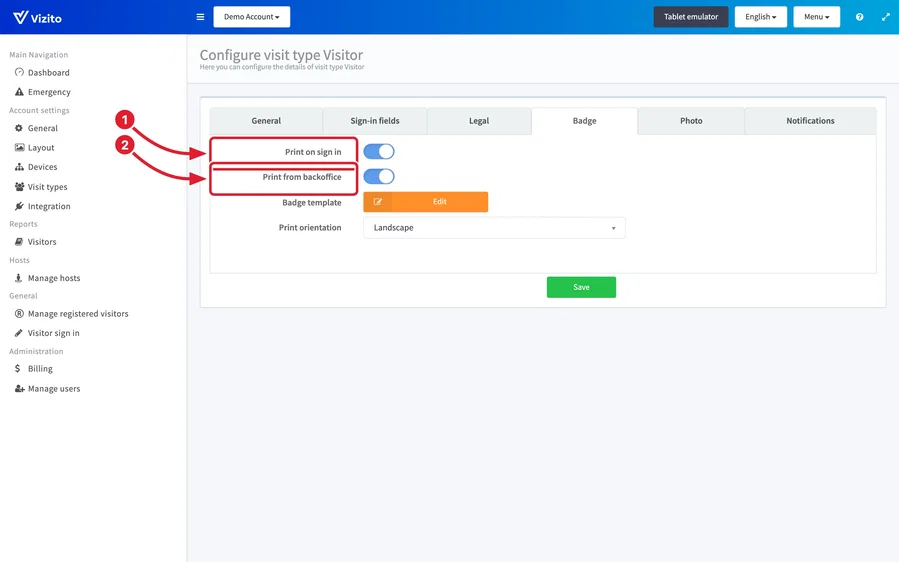
Under “Printing”, turn on “Print on sign in”, “Print from backoffice” or both.
- Print on sign in makes the kiosk print a badge automatically as soon as a visitor finishes signing in. This is the setting this guide is about.
- Print from backoffice adds a “Print badge” button to the “Visitor details” window, which opens when you click a visitor on the “Dashboard” or under “Reports” > “Visitors”. That badge prints through your own browser: see Reprint label.
-
Click “Save” at the bottom of the tab. The switches only take effect once you save.
Repeat this for every visit type that should produce a badge. A visitor signing in with a visit type that has printing switched off gets no badge, even though the printer is connected.
To change what the badge looks like, click “Edit” under the card. A badge whose “Type” is “Designed badge” opens in the Badge designer, and one whose “Type” is “HTML template” opens in the HTML editor.
Note: “Print orientation” under “Printer” only applies to an “HTML template” badge: choose “Landscape” or “Portrait” to match the way your labels come out of the printer. A “Designed badge” carries its own orientation, and the tab shows it with “Set in the badge design.”
Select the printer on the tablet
The tablet picks up the new settings the next time the Vizito app refreshes.
-
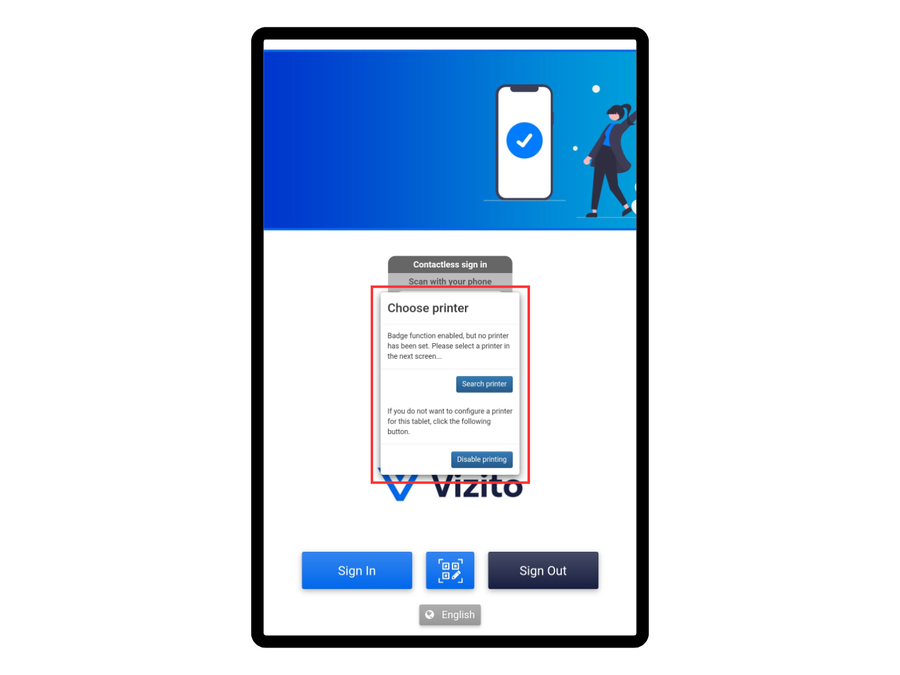
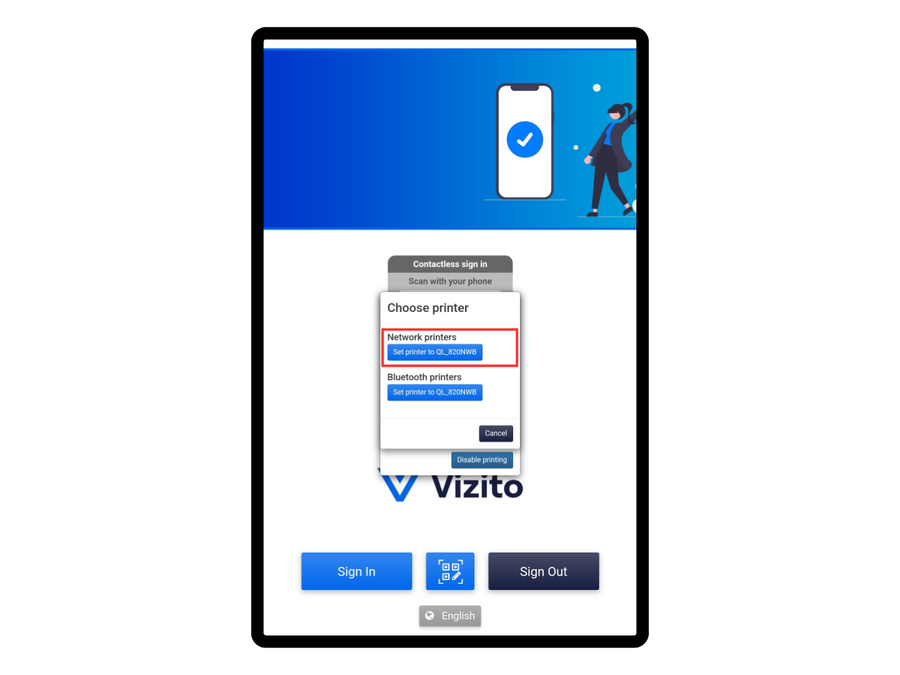
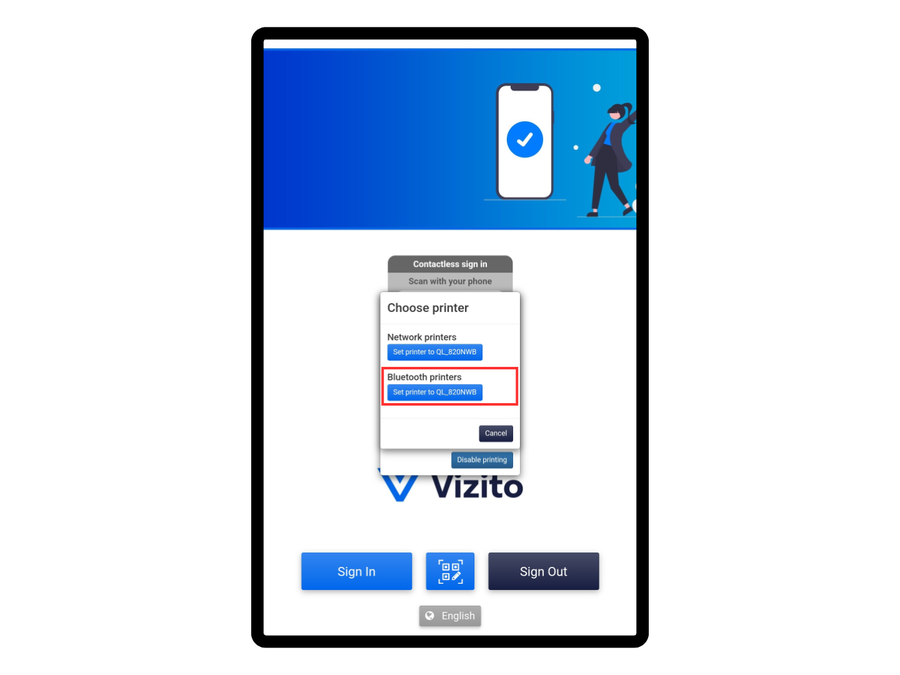
Open the Vizito app on the tablet. A “Choose printer” window appears.
If it does not, the app has not refreshed yet. Tap “Sign In” and then “Back”. The app reloads its settings, sees that badge printing is now on, and shows the prompt.
-
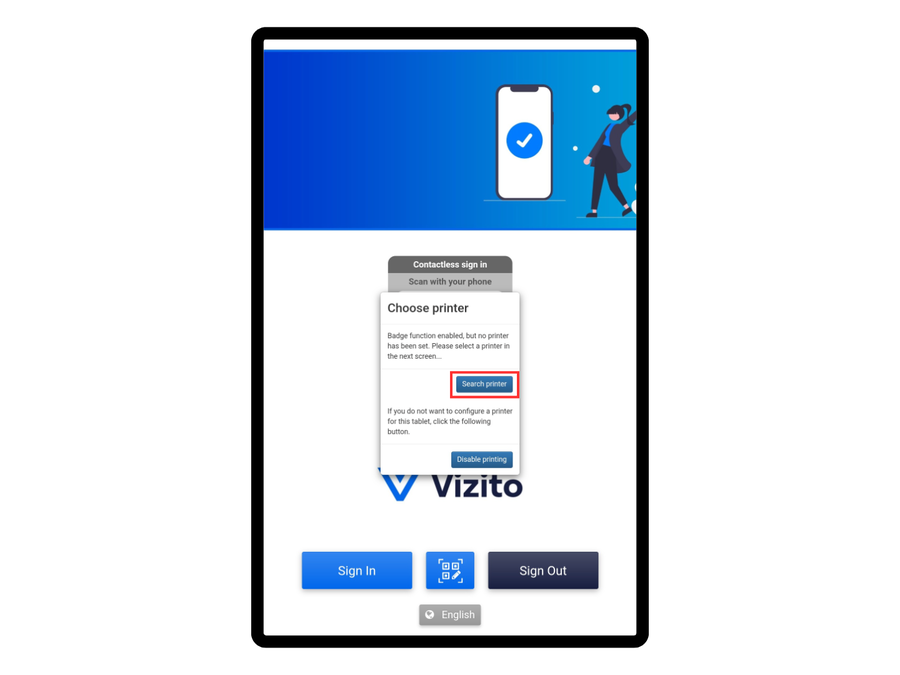
Tap “Search printer”.
-
Pick your printer from the list. Over WiFi it appears under the network printers.
Over Bluetooth it appears under the Bluetooth printers, as “Set printer to …”.
-
Back in the backoffice, open the “Badge” tab of the visit type again and click “Test print via kiosk”. The kiosk prints the badge with sample visitor data, and the tab names the printer it went to. If it says “No kiosk with a printer found. Pair a printer in the Vizito app on the tablet first.”, repeat steps 1 to 3.
-
Do a test sign in on the tablet with that visit type. The badge should print and cut by itself.
Once a kiosk has selected a printer, that printer is also listed under “Printers” at the bottom of the Devices page in the backoffice, where you can clear it, confirm with “Yes” and click “Save”. Before any kiosk has selected a printer that section is empty and only explains how to add one.